
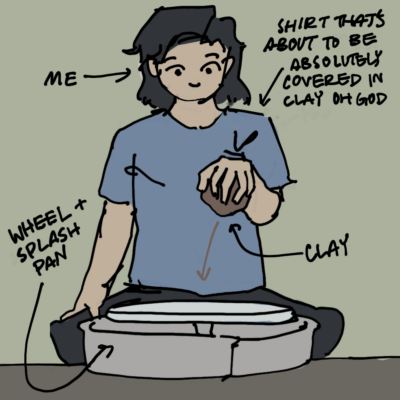
clay crash course by Gloria Z. '26
one month of wheelthrowing later…
This IAP, I took pottery classes! Between class time, open studio, and one-time workshops, I threw on the wheel for an average of eight hours a week. Every weekend, I would walk 35 minutes or so past Fenway, a scarf wrapped tightly around my ears, listening to an audiobook or music or the whistling of the city. My destination, Brookline Arts Center, sat right next to St. Mary’s stop on the green line, across the street from Japonaise Bakery; it was a squat, proud building with a large yard and wrought-iron gates, with a high square window on the facade. Then it was hours of pushing wet mud forward; scraping redness off the wheel; and pulling, with trembling fingers, timid, slippery walls up to the sky. Too thin or too splayed and they crumpled, and I started all over again, spinning.
After class, I’d change out of my clay-crusted clothes, crack flakes of earth off the hems, and take the green line then the 1 bus back to campus. I loved these weekly jaunts into Boston–the walk brought me right down Commonwealth, past Kenmore, through Fenway, and into Brookline. (One of the many luxuries of IAP is to be able to spend hours just walking around, with no psets or deadlines in mind.) In the summer after freshman year, I had actually lived right next to Kenmore, so it was nice seeing the familiar sights and realizing, after a few times, that I no longer needed to consult Google Maps at every turn.
After each session, as I sat on the T, I would note down everything I had worked on that day, what had succeeded and what had failed. This blog is an abridged collection of those notes, logging one month of ceramics progress.
(Disclaimer: I didn’t go in completely new–I’d attended a wheelthrowing workshop last year, and the year before, I had taken half of a four-session wheelthrowing class with MIT Arts Studios. So I knew enough to know that throwing is way harder than it looks, but I hadn’t retained much of the actual muscle memory.)
week 1: the basics
To start, the instructor tasked us with throwing the most fundamental shape: a straight, even cylinder. They broke it down in steps:
1) Pat the clay into a ball and lob it onto the wheel, aiming for the center.
.
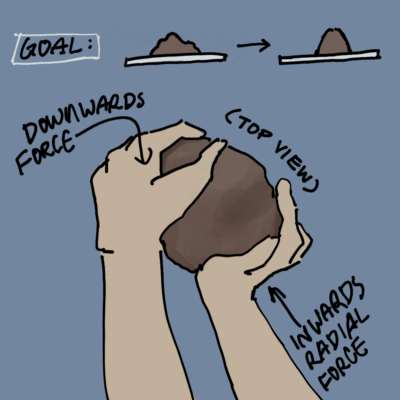
2) Center the clay. From this step onwards, the wheel is kept spinning and the clay is kept wet. In the centering process, you push in firmly to force the clay up and down until it reaches a radially symmetric conelike shape. It’s important that the clay is properly centered, as otherwise the resulting pot will be asymmetric and it’ll be a lot harder to control.
.
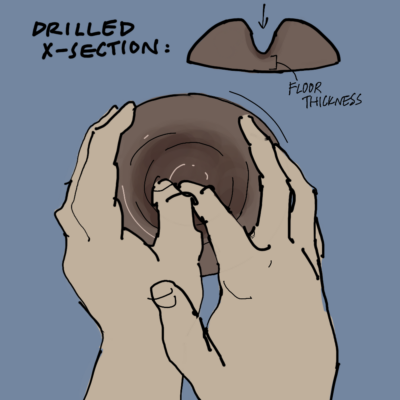
3) Drill a hole. Using your thumbs (or pointer fingers, or something else), “dive” into the middle of the centered clay to start creating the inner cavity. Stop when you reach your desired floor thickness–this can either be gauged visually or with a needle tool.
.
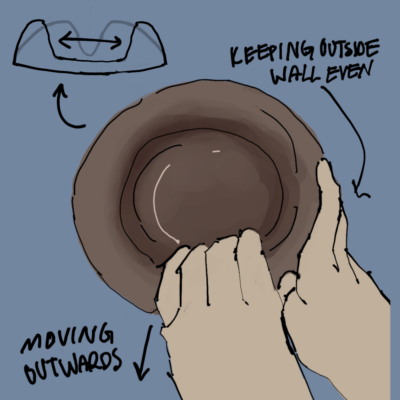
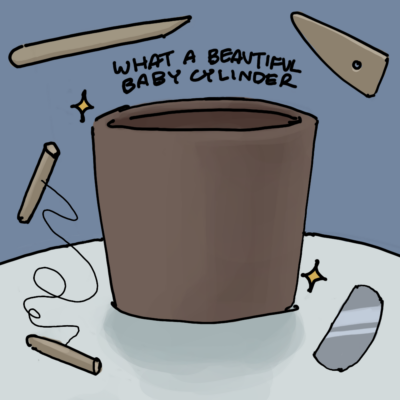
4) Widen the cavity. Pulling outwards with fingers inside of the drilled hole, slowly widen it until you reach your desired floor width. You’ll end up with something that looks like a donut with flat inner walls.
.
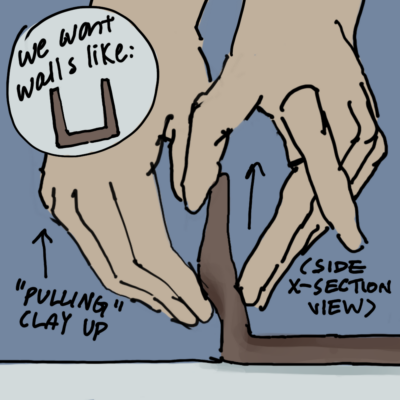
5) Pull the walls upwards. Gathering the excess clay from the outside of the lump, slowly pull upwards to elongate and thin out the walls. You’re looking for a slightly tapered triangle, thickest at the base. Make sure you pull evenly, as fluctuations in wall thickness can make your pot unstable. Repeat until satisfied! This is the exciting part, where you can define the shape and character of your vessel.
.
6) Make finishing touches. Scrape off excess clay at the foot of your pot; use a needle or wire tool to even out the rim; round the lip over with a soft sponge; and glide your kidney tools over the inside and outside walls to scrape off excess slip.
.
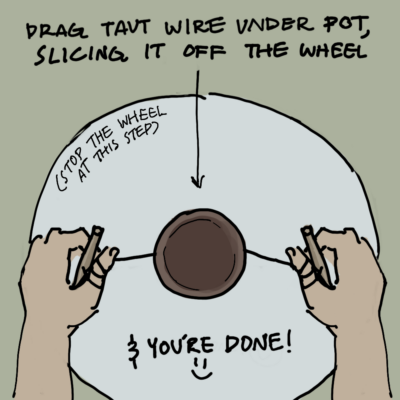
7) Slice your piece off the wheel with your wire tool, and set it somewhere safe to dry!
.
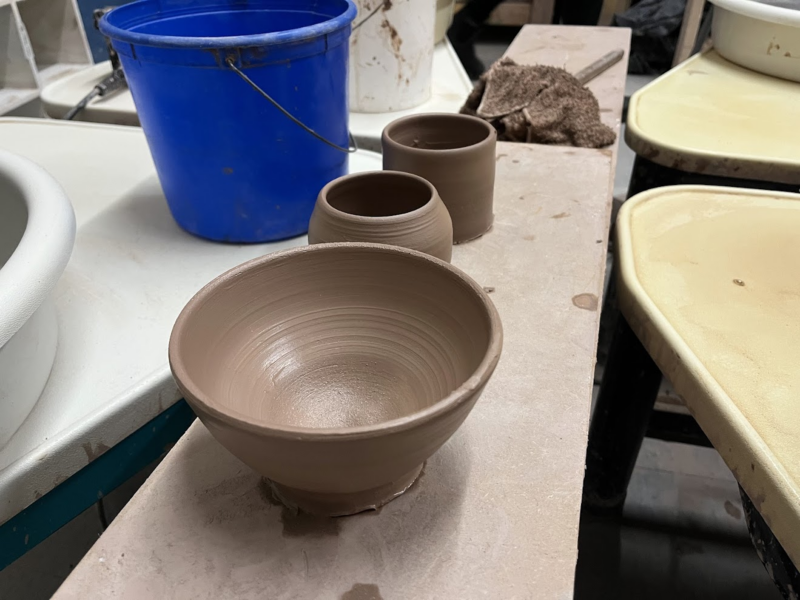
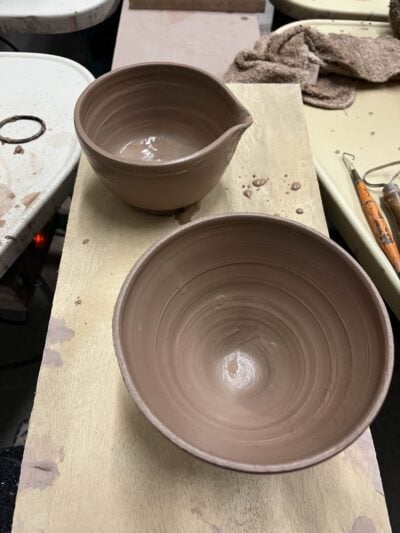
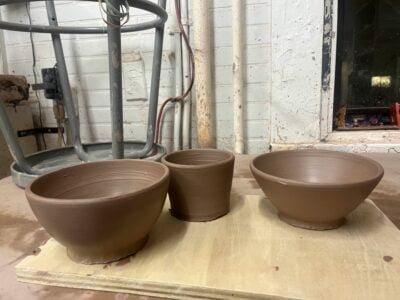
We started with lumps of clay that were about one pound each. It’s easier to center smaller amounts of clay, because they exert less force on your palms, but as a result, you’re limited in how big you can make your vessels. At the end of week 1, I ended up with the following bowl and two mugs:
they look bigger in this picture than they are lol
My takeaways from week 1:
- The speed of the wheel is important! It’s controlled with a foot pedal whose angle corresponds directly to the velocity, and my instinct was to just leave it at the same speed the whole time. However, because of physics, spinning faster gives you more leverage when pushing the clay, but it also exerts more centrifugal force on the clay body’s walls, potentially spreading them wider than intended. Similarly, spinning slower gives you more precision and is less likely to cause deformations, but you have to brace your fingers and move more slowly when pulling, lest you create a spiral upwards. Generally, I found that starting at the fastest speed while centering and slowly decreasing the speed with each subsequent step worked well for me.
- There’s no “correct” form for throwing. It’s truly vibes-based… all the instructors I’ve seen and the pottery videos I’ve watched feature slightly different techniques and hand positionings, especially when it comes to centering. In the class, we were encouraged to try out different ways of bracing our fingers, using our tools, controlling the amount of water on the clay, etc., to find out what techniques were most intuitive and effective for us.
week 2: centering city
In week two, I increased the amount of clay I was working with to 1.5-2 pounds and really focused on centering. It was definitely a struggle to wrangle the larger lumps, and I started using both hands to keep the clay in place, having previously just been using my right palm. Centering tends to take me a long time–lots of coning up and down, accidentally introducing irregularities, and then having to correct those issues–so one of my goals is to get faster, so I can get to the fun part of actually shaping the vessel. At the end of week 2, I had kept the following two bowls:
the one in the back is a matcha bowl for my friend’s birthday
And I had attached my first handle, to a lopsided cylinder I made back in the first class.
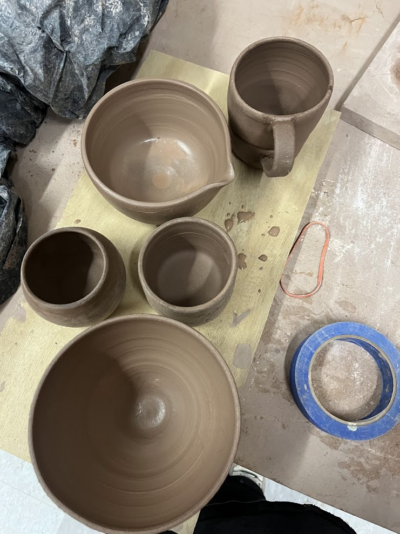
it’s in the top right
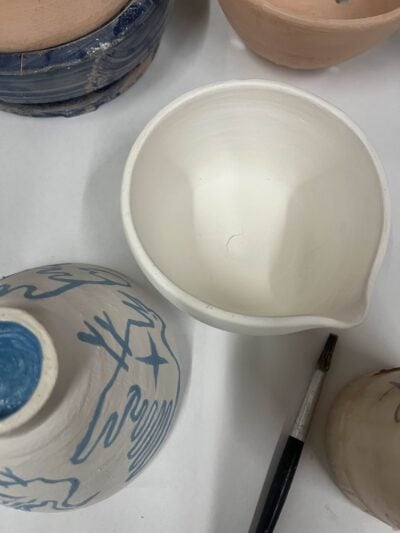
I also trimmed my two small cups from the previous week, shown above between the two bowls! Trimming occurs when a piece has dried about halfway and reached a texture referred to as “leather hard”; in this process, the pot is affixed to the wheel either with water or pieces of soft clay, and slowly “pruned” (idk how else to describe it). Here, potters can add features like a foot ring, carved patterns and ridges, and holes, or just smooth out and refine the shape overall. However, edits made at this stage are permanent, and although you can make a lot of edits still, the overarching shape of the vessel can’t really be changed anymore.
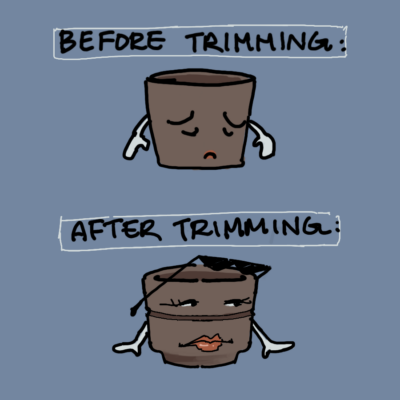
completely realistic diagram
Takeaway from week 2:
- Learning > end product. When you finish throwing something, you can either keep it (to be trimmed, fired, glazed, etc.), or you can slice it in half with your wire tool to see the cross section. This essentially allows you to see how well you did–if your walls are even, if the floor is the thickness you thought it was, and if the shape is what you intended. The instructor emphasized that although you do want to end up with finished pieces in the end, in order to improve as a potter, it’s important to slice (and therefore destroy) most of your pieces in the beginning so you can effectively adjust your technique. I tried to take this to heart–either slicing my pieces after deeming them finished, or just pulling and increasing the size of my pots until they collapsed, to see just how large I could make them.
week 3: bowls!!
I came into week 3 with two goals: improve my centering technique and make some bowls! Because of the way I center, I often end up with a wide, low skirt of clay at the bottom of my piece. This isn’t an issue for the final pot because I can scrape off the excess with a wooden rib tool and recycle it, but it does lead to a lot of clay that doesn’t make it in. So if I started with 2 pounds, I might end up only using 1.7 or 1.5 effectively. I wanted to improve the way I cone and manage the clay during centering in order to end up with more of a gumdrop rather than bell curve shape:
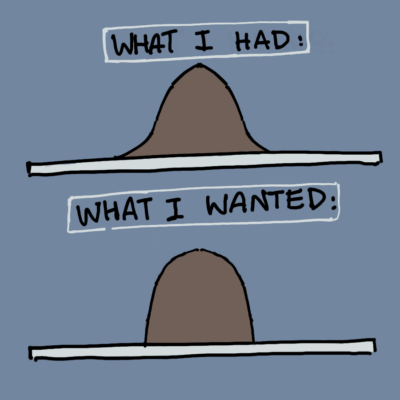
.
My second goal was to make some bowls! The steps for a bowl versus a straight cylinder are slightly different, but the principles are the same. The instructor advised me to set the wheel to a very low speed – lower than I would think – when pulling/expanding the bowl walls, and I found that this gave me a lot more control over the shape. I ended up keeping the following:
yay
Takeaways from week 3:
- Warm up! I started one of my sessions this week by throwing a little cylinder with a .75lb lump of clay, and I think it helped me get back into the groove of throwing without immediately jumping in with two pounds. It’s enough material to make a teeny espresso cup or ring dish :).
- Do the first few pulls with a wet sponge instead of my fingers. Basically, when beginning to pull the walls, I was struggling to get the clay up from the skirt of the pot without just scooping it right off the wheel. This is partly because of the problem I was working on last week, where I tended to leave a lot of clay in the skirt when centering. However, outside of that issue, there’s just always a lot of clay to bring up and smooth out at the beginning. I found that using a wet sponge on the outside of the wall and fingers on the outside helped me a lot more for those first two pulls. Then, I would switch back to fingers on both sides, enabling me to feel the thickness of the wall more accurately for the final pulls.
weeks 4-5: trimming & painting
In the last couple sessions, we trimmed, underglazed, and glazed our pieces. They actually get fired twice: first, to go from greenware (basically just dried clay) to bisqueware (fired, very hard/durable, but not food-safe), and second, to vitrify the glassy glaze. Unfortunately, tragedy struck after the bisque firing–the matcha bowl developed a tiny hairline crack…
:((
This meant that the piece was no longer watertight, or functional as a matcha bowl. I did still glaze it, just to see how the color turned out, but I couldn’t use it as a gift anymore :(.
Fortunately, the other pieces I put into the bisque firing did survive. Some I ended up scrapping before the firing, for the sake of not cluttering my dorm room, but the ones I did underglaze/fire/glaze are below. I’m especially excited about the berry bowl/colander and the bowl with birds on the side!
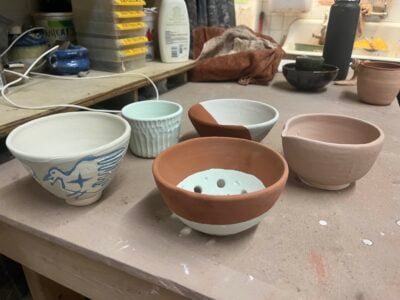
praying to the kiln gods
Don’t be fooled by the matte, muted colors of the glazes in the picture – after the firing, they’ll solidify into beautiful glossy colors through some chemical witchcraft. I won’t actually get to pick up my pieces for another month or so, depending on the studio’s kiln schedule, so I don’t have pictures of them for this blog (sorry to end on a cliffhanger). But I’ll definitely be posting a pottery update later this semester, and they’ll be in there. Speaking of which…
I’m super excited to be taking an intermediate wheelthrowing class this semester in the student center pottery space! It comes with studio access outside of class times, meaning I can practice whenever I want. I’d like to get better at throwing large vessels so that I can illustrate them, combining my drawing/painting experience with pottery. Also, at the end of the semester, if my friends and I have produced enough functional pots, we want to try to hold a little ceramics pop-up fundraiser.
I really love how process-focused pottery is: my instructor emphasized the idea that if you make something once, you should be able to make it again, and I think this helps me detach from the final product and really just invest in the process. It’s also so gratifying to be able to make functional objects that people can use in their daily lives–that aspect of utility is so special. Form and function fr.
some inspo to bless your eyes… (aka the reason why I wanted to start ceramics in the first place lol):
https://www.instagram.com/erin.ibo/