
how to draw dotted lines on chalkboards, mit style by Phi A. '21
dotted lines go brrrrr
A few months ago, I posted about how to clean old whiteboards. Of course, most MIT classrooms don’t have whiteboards — they have chalkboards. And there is one really, really cool thing you can do on chalkboards that you can’t on whiteboards: make dotted lines.
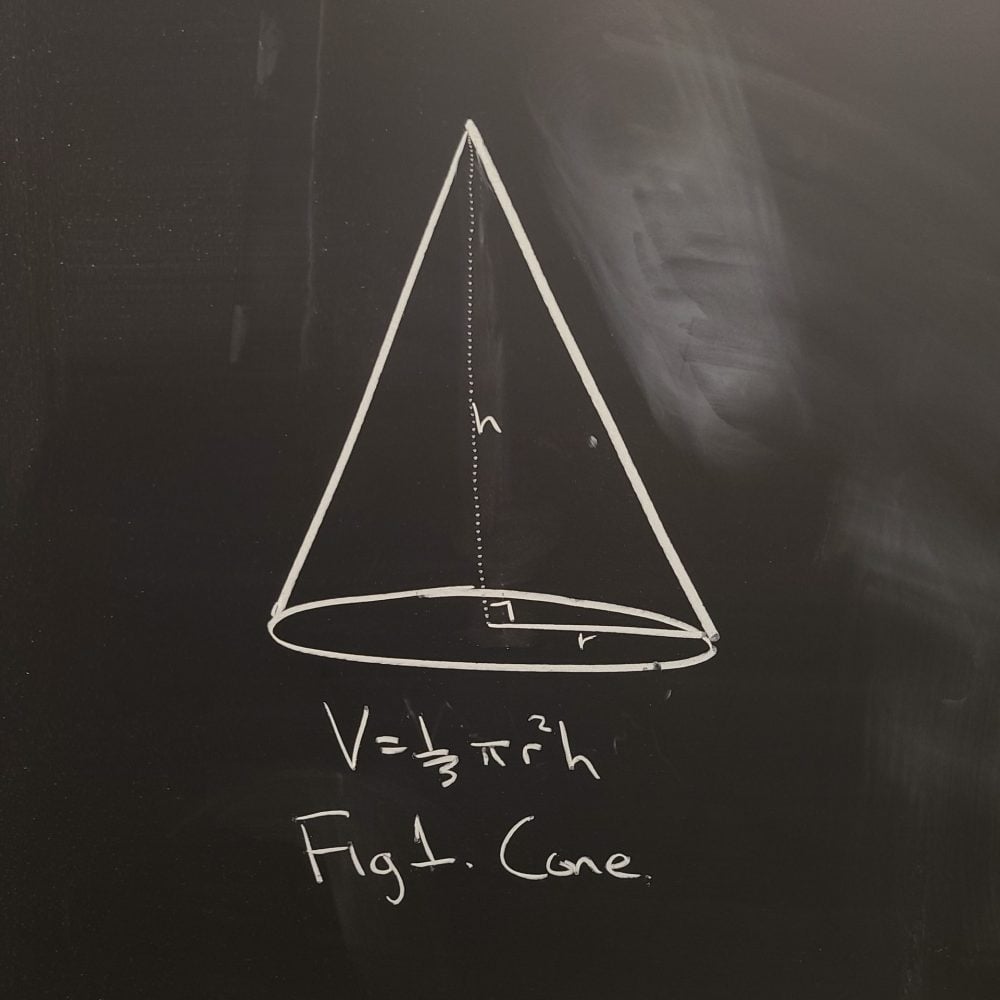
from the ancient days of hs geometry
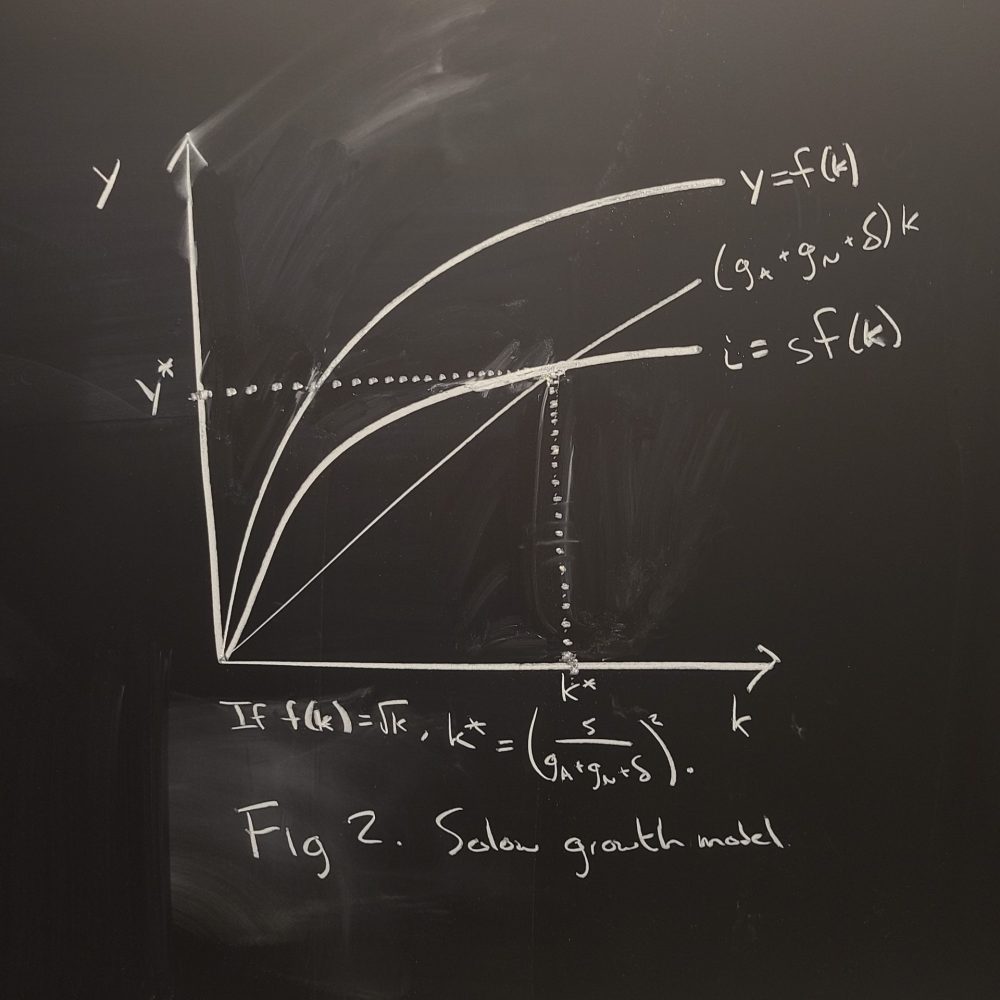
from 14.02
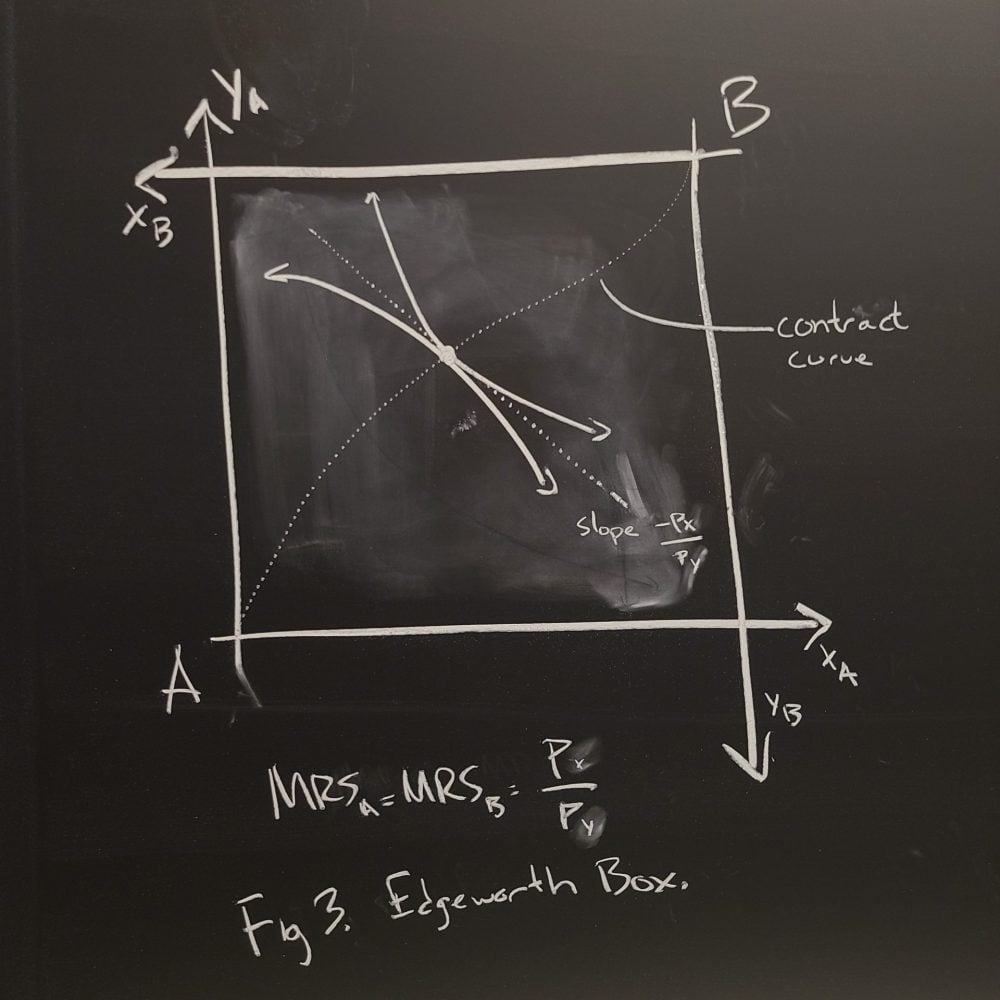
from 14.03
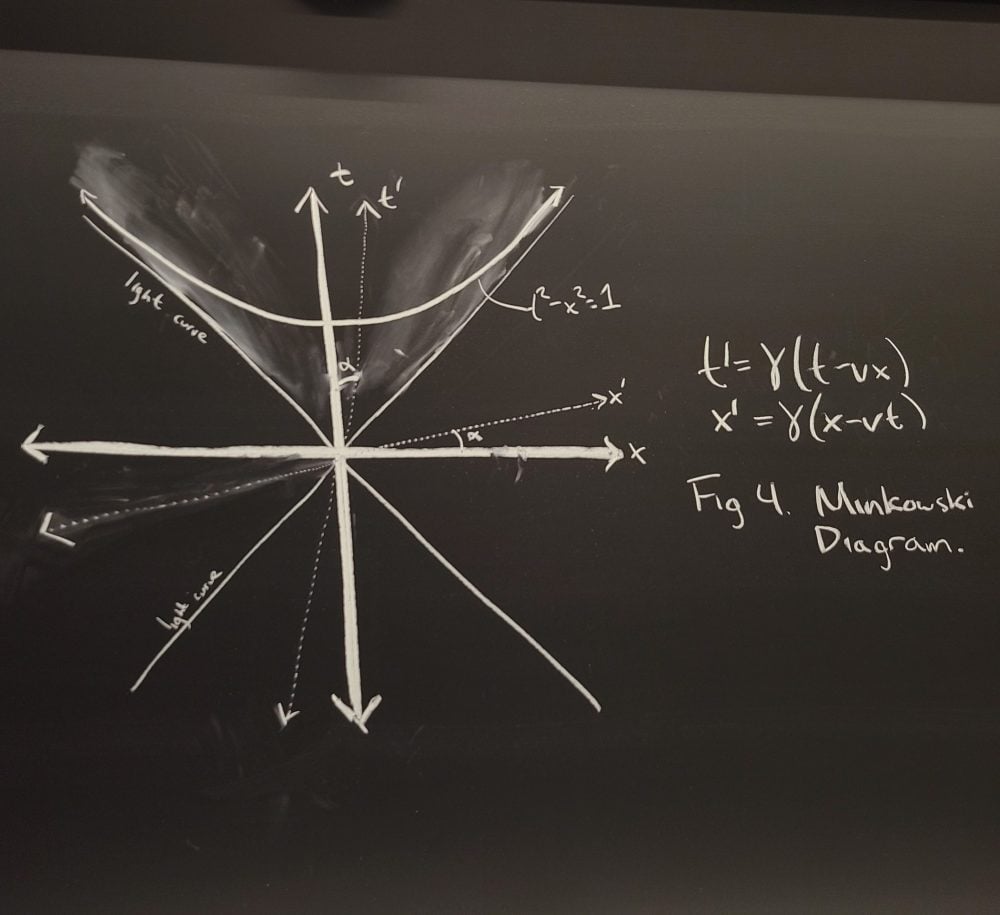
from 8.033
I learned how to make dotted lines over the summer that I lived in Evan T. 19’s room, where he installed chalkboards on one of his walls. (I talk about this more in the whiteboard post.) If we were in the same room, I would tell you that I could teach you how to draw dotted lines in about 20 seconds, and you’d succeed 99.999% of the time. But alas, I cannot teach you in person, so here is a how-to in blog form c:
infographic made using chalk and dotted lines :o
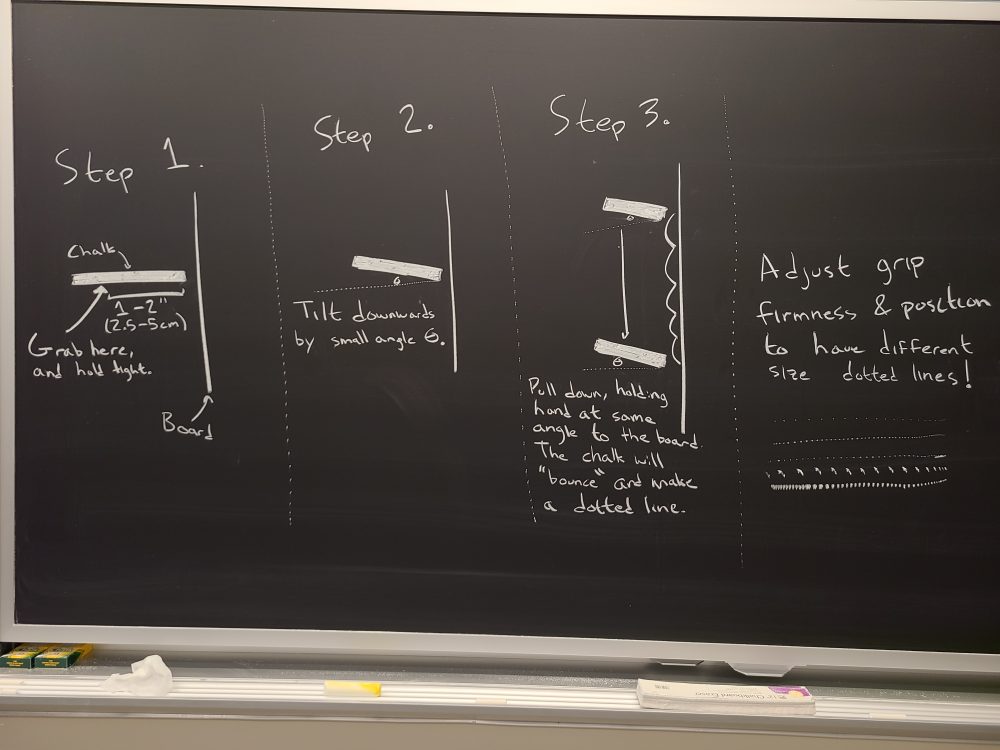
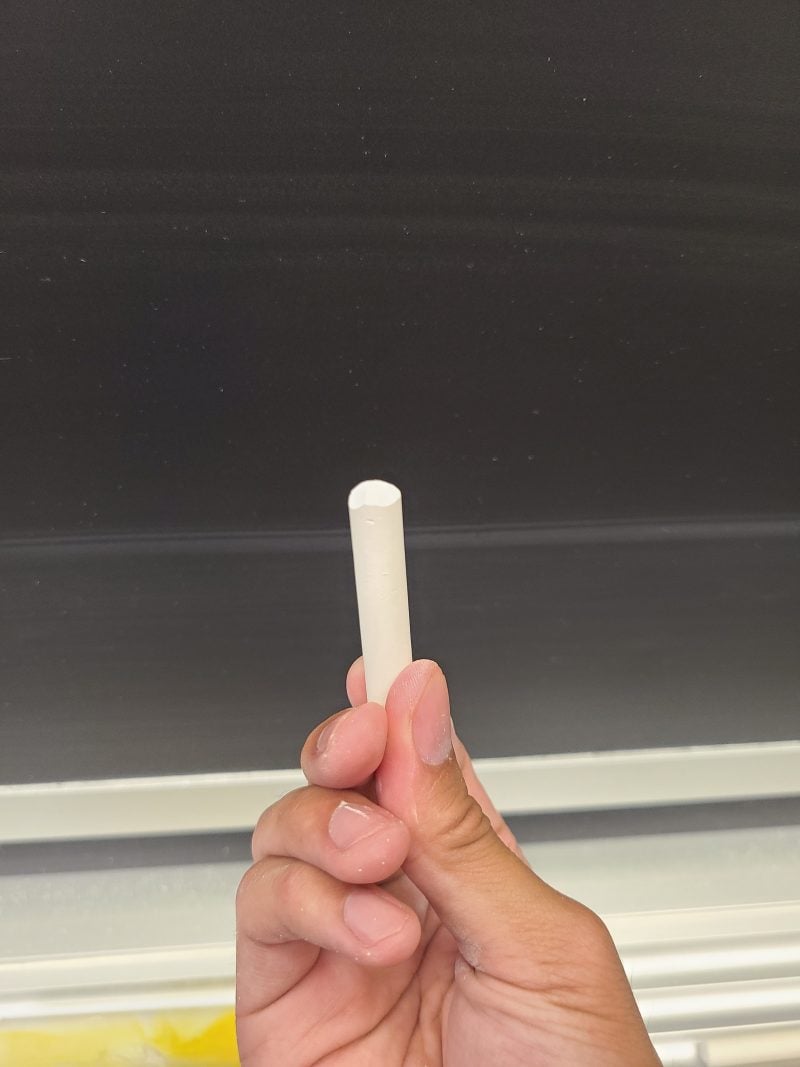
Step 1. Grip your chalk correctly. Hold your chalk about 1–2 inches (2.5–5 cm) from the tip of the chalk. (You’ll need to be further back if you have wide chalk.) When learning, I find that it’s easiest to grip it even further back, perhaps 3+ inches (7.5+ cm) from the tip. I like to use the grip below, in which I have three fingers pursed around the piece of chalk.
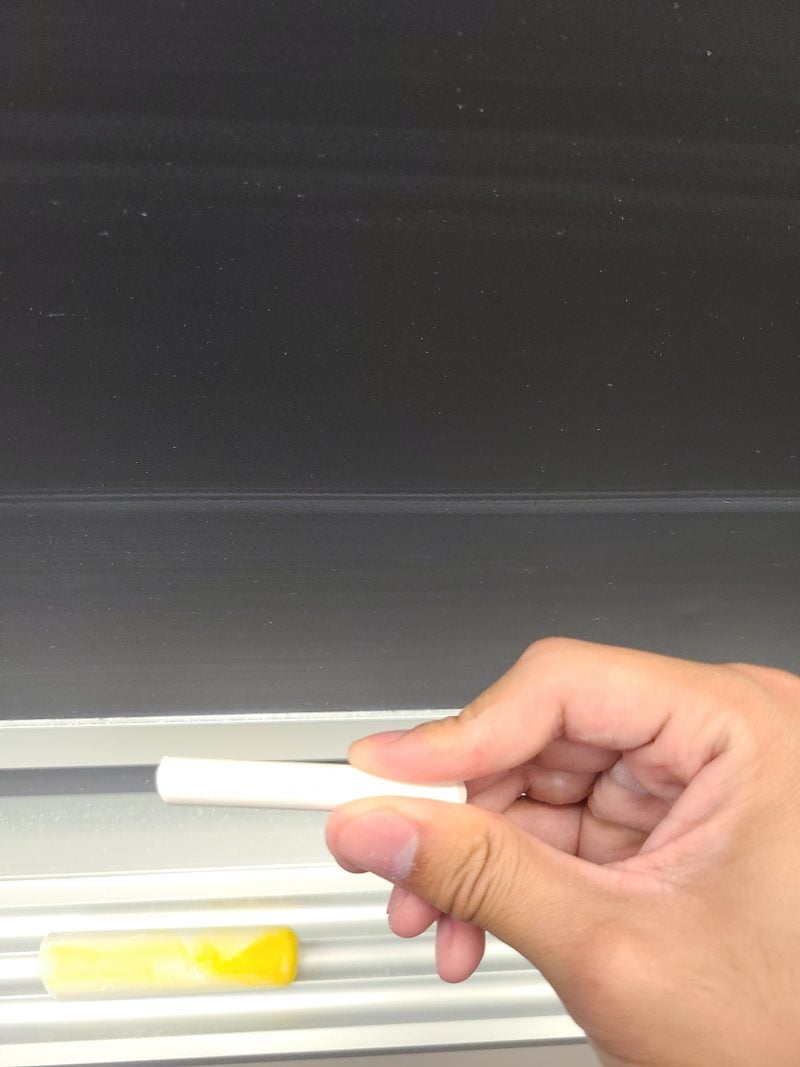
Step 2. Angle your chalk at a small angle \(\theta\) down from the perpendicular. The correct angle is somewhere between \(0^\circ\) and \(45^\circ\), but you may need to experiment with what works.
Step 3. Touch the chalk to the board, and pull the chalk downwards, while holding it at the same angle \(\theta\). You should feel your chalk “bounce” or “vibrate” along the surface of the board, creating a dotted line!
Troubleshooting: If you just get a solid line, you’re either pushing into the board too much, or you didn’t hold your chalk at the same angle throughout, or you need to grip the chalk a bit further back. If you have very faint dots, then you probably need to press the chalk to the board a little bit more. If your dots are very close together, then you need to loosen your grip slightly.
And there you have it! That’s it! You’re making dotted lines!
To change the shape of your dotted lines, you can alter the angle, firmness of grip, where you hold the chalk, and even how hard you’re pressing into the board. I encourage experimenting with these all to see what works best for you.
Once you’ve mastered the “downward dotted line”, you can make dotted lines going upwards, left, and right by following the same directions! For more of a challenge, try making curved dotted lines, which require you to rotate your wrist as you go along. For an even harder challenge, try to make dotted circles without lifting your hand off of the chalkboard. This requires you to rotate your wrist and your fingers as you go along.
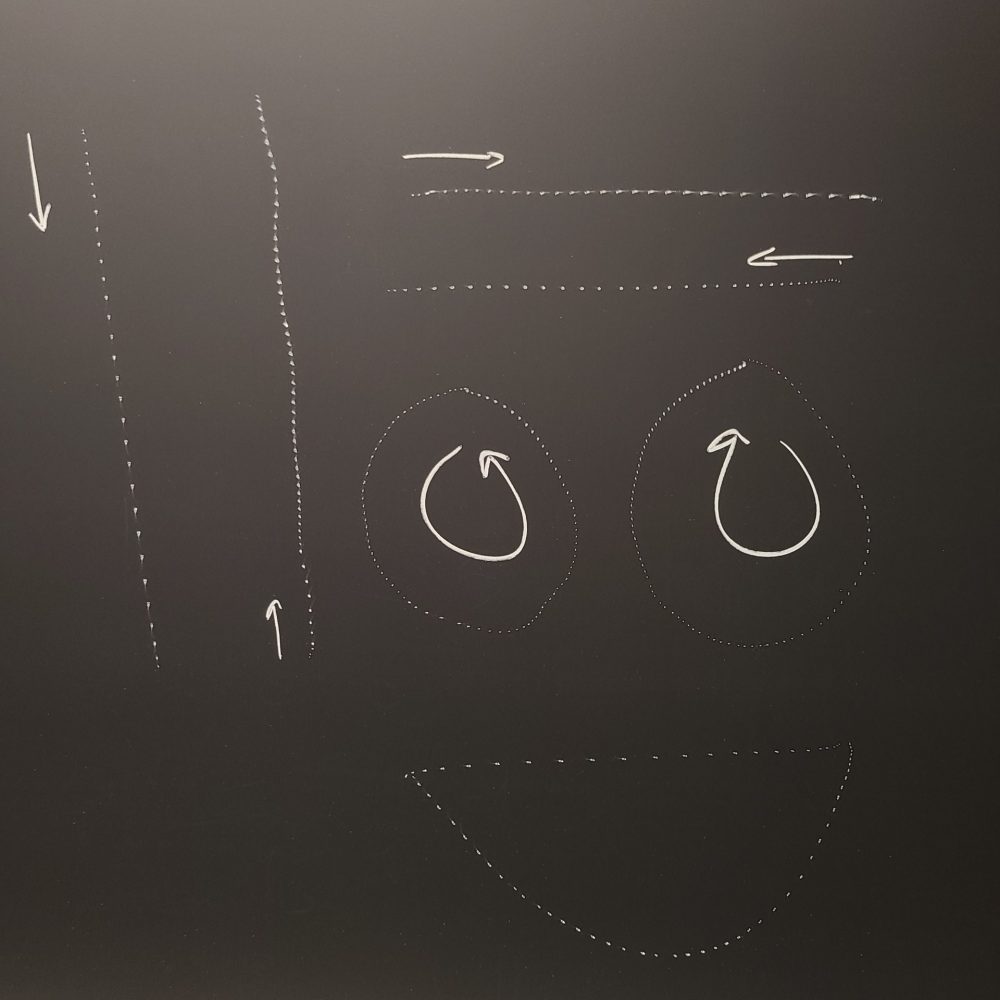
look it makes a smiley face
I leave you with a dotted spiral in chalk, made in one motion c:
