a semester in glass! by Shuli J. '22, MEng '23
i made a lot of things :D
As I mentioned in my last blog,01 which was uhhh a while ago oops sorry , this semester was my second semester learning with the MIT Glass Lab, and I had an absolutely amazing time. Here’s a walkthrough of all the different things I made this semester and some of what I learned! If you’re interested in learning more about glassblowing, I’ll include some explanations of technical terms too. (And if you know more about glassblowing than me, please feel free to let me know if I get something wrong!)
This semester, I was taking the beginner class for the second time: it’s standard practice for people to repeat this class twice before moving to intermediate classes because it covers a ton of content. When I took it for the first time last semester, I definitely learned each technique we covered, but I wasn’t fully comfortable with a lot of them, particularly the more advanced techniques from the later part of the class. Taking it a second time helped me get a lot more comfortable. I really enjoyed noticing how over time, some actions became more instinctive for me, everything just flowed a little better, and I was able to push myself to make more interesting pieces and see my ideas come to life. Here’s all the stuff I made!
The zeroth week of beginner class is partly learning about safety in the lab, since you’re going to be working with glass that is literally thousands of degrees hot. You also learn how to “gather”. This means putting a glassblowing pipe02 or punty. Both are long sticks that you put glass on the end of, but we'll get to the differences later. into the furnace, or crucible, where the molten glass is and collecting some on the end of your pipe. Finally, we learned how to take the glass back off the end of the pipe when you’re done working, by putting in a “neckline” all around the piece with a tool, adding water to the neckline to cool it down, and then hitting the pipe. The glass breaks at the coldest part, which hopefully is right where you wanted it to be, leaving you with a piece that’s neatly03 neatness not guaranteed separated from the pipe.
First week: paperweights
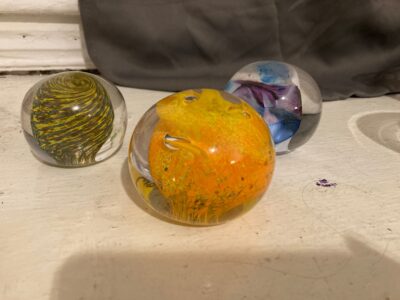

If you think about it, a paperweight is really just a lump of glass. It can be completely round on the outside, and completely solid on the inside, making it one of the easiest glass shapes to create. That’s why we start with it! To make these colored paperweights, you gather with a small amount of clear glass and color it using “frit”, tiny pieces of colored glass that will stick to the hot, clear glass. Once the frit has melted into the overall piece, you can shape it and make it look cool. Then you finish off by gathering more clear glass over the colors and forming it into a round shape.
The blue and purple one was my first piece of the semester, and I kept things pretty simple by just going for a mishmash look – I picked up some blue, purple, and white (which is harder to see here just cause of the lighting), and twisted the glass to make them all flow together. The firey-looking one was my next attempt. I got a bit bold here and tried to make it look like a real fire. However, I didn’t account for the optic distortion that the thick glass causes – the top of the colored section always looks really close to the top of the paperweight and “spread out” (as you can also see a little with the leftmost piece). Because of this, the flame shapes I put at the top of the fire don’t really show up – you can see them a tiny bit if you look closely on the left photo. The yellow swirl was my third attempt. Interestingly, this swirl was originally just yellow and blue, but the chemicals that were used to make those two colors of frit must have had an interaction, causing that weird brownish green to appear wherever the yellow and blue met. It’s not quite as cheery of a look as I wanted, but the swirl is pretty tight and even, so I felt good about it on a technical level if not an artistic one.
Second week: ornaments
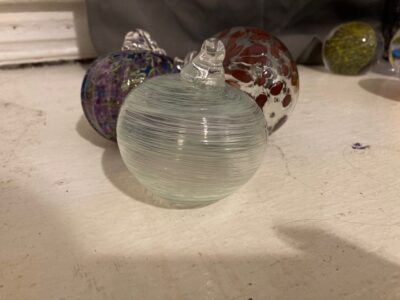
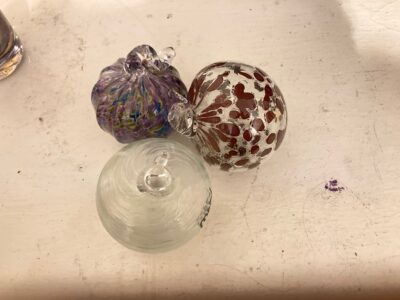
An ornament is basically a paperweight with a bubble in the middle, meaning that it’s a good shape for learning how to actually blow glass. When we were making paperweights, we gathered them on a punty, a pipe-shaped object that’s solid all the way through. But to make ornaments and all the other pieces, you gather on a pipe that’s hollow and has holes at both ends (like a giant metal straw!). You put air in one end of the pipe to blow a bubble in the glass on the other end. (Traditionally, putting the air in the pipe happened via a person’s actual mouth. But when Covid happened, the Glass Lab set up a really ingenious compressed air system, so now instead we attach rubber valves to the pipe ends and use foot pedals to control the air.)
My favorite ornament is the purplish one in the back – I thought I was coloring it plain purple, but we were accidentally using a bag of frit that had had a couple different colors mixed together, and the interactions they had with each other produced that cool mottled look. I really like the evil pumpkin vibe it has.
Third + fourth week: cups

Next up after ornaments is cups! This is another big jump in terms of technical skills. An ornament is pretty much finished once you’re done making the bubble inside it, but to make a cup, you blow a bubble, transfer the piece from the pipe to a punty, and then open up the bubble to create the top of the cup. Many useful objects in the world have this same approximate shape — for example, a bowl or a plate or an open-top box, if you think about it, is just a weird-shaped cup. This means the process of transferring the piece and opening up the bubble is a really important skill, and we spent an extra week working on just that.
In this picture, I have one clear piece and one colored one. Working with color always makes your pieces more difficult: the frits have different heat capacities from each other and from the clear glass, meaning that a colored piece might cool down faster or more quickly than you’re expecting, or even at different speeds over different parts of the piece. Particularly for beginners, who aren’t familiar with how each color can act, this can lead to a wide variety of minor disasters. So when learning a new form it’s best to start with a clear version. In some of the later pictures, I’ve omitted my mediocre clear pieces and just showed you the colored ones I made after getting some practice in.
The cup on the right is a perfectly fine clear cup. Its main issue, which many of my (and other beginners’ pieces) have, is that the lip is very thick. Making something thin is hard: thin glass gains and loses heat faster, and it moves around more, making it harder to control. It’s also easy to accidentally make something too thin and have it simply crumple in on itself. So, beginners err on the side of making things too thick, which has the less-serious side effect of heavy pieces that are a bit hard to drink from.
The cup on the left is one I’m proud of! The net/grid pattern (which I think has a name I’ve forgotten) is tricky to make, and although mine is nowhere near as good as the pros’, for a first try, it went well. I also really enjoyed the execution: this was one of the pieces this year where I felt the most in control of the whole process, where every action I took produced the result I wanted to and there were no surprises or accidents. It was a great feeling!
Fifth week: vases
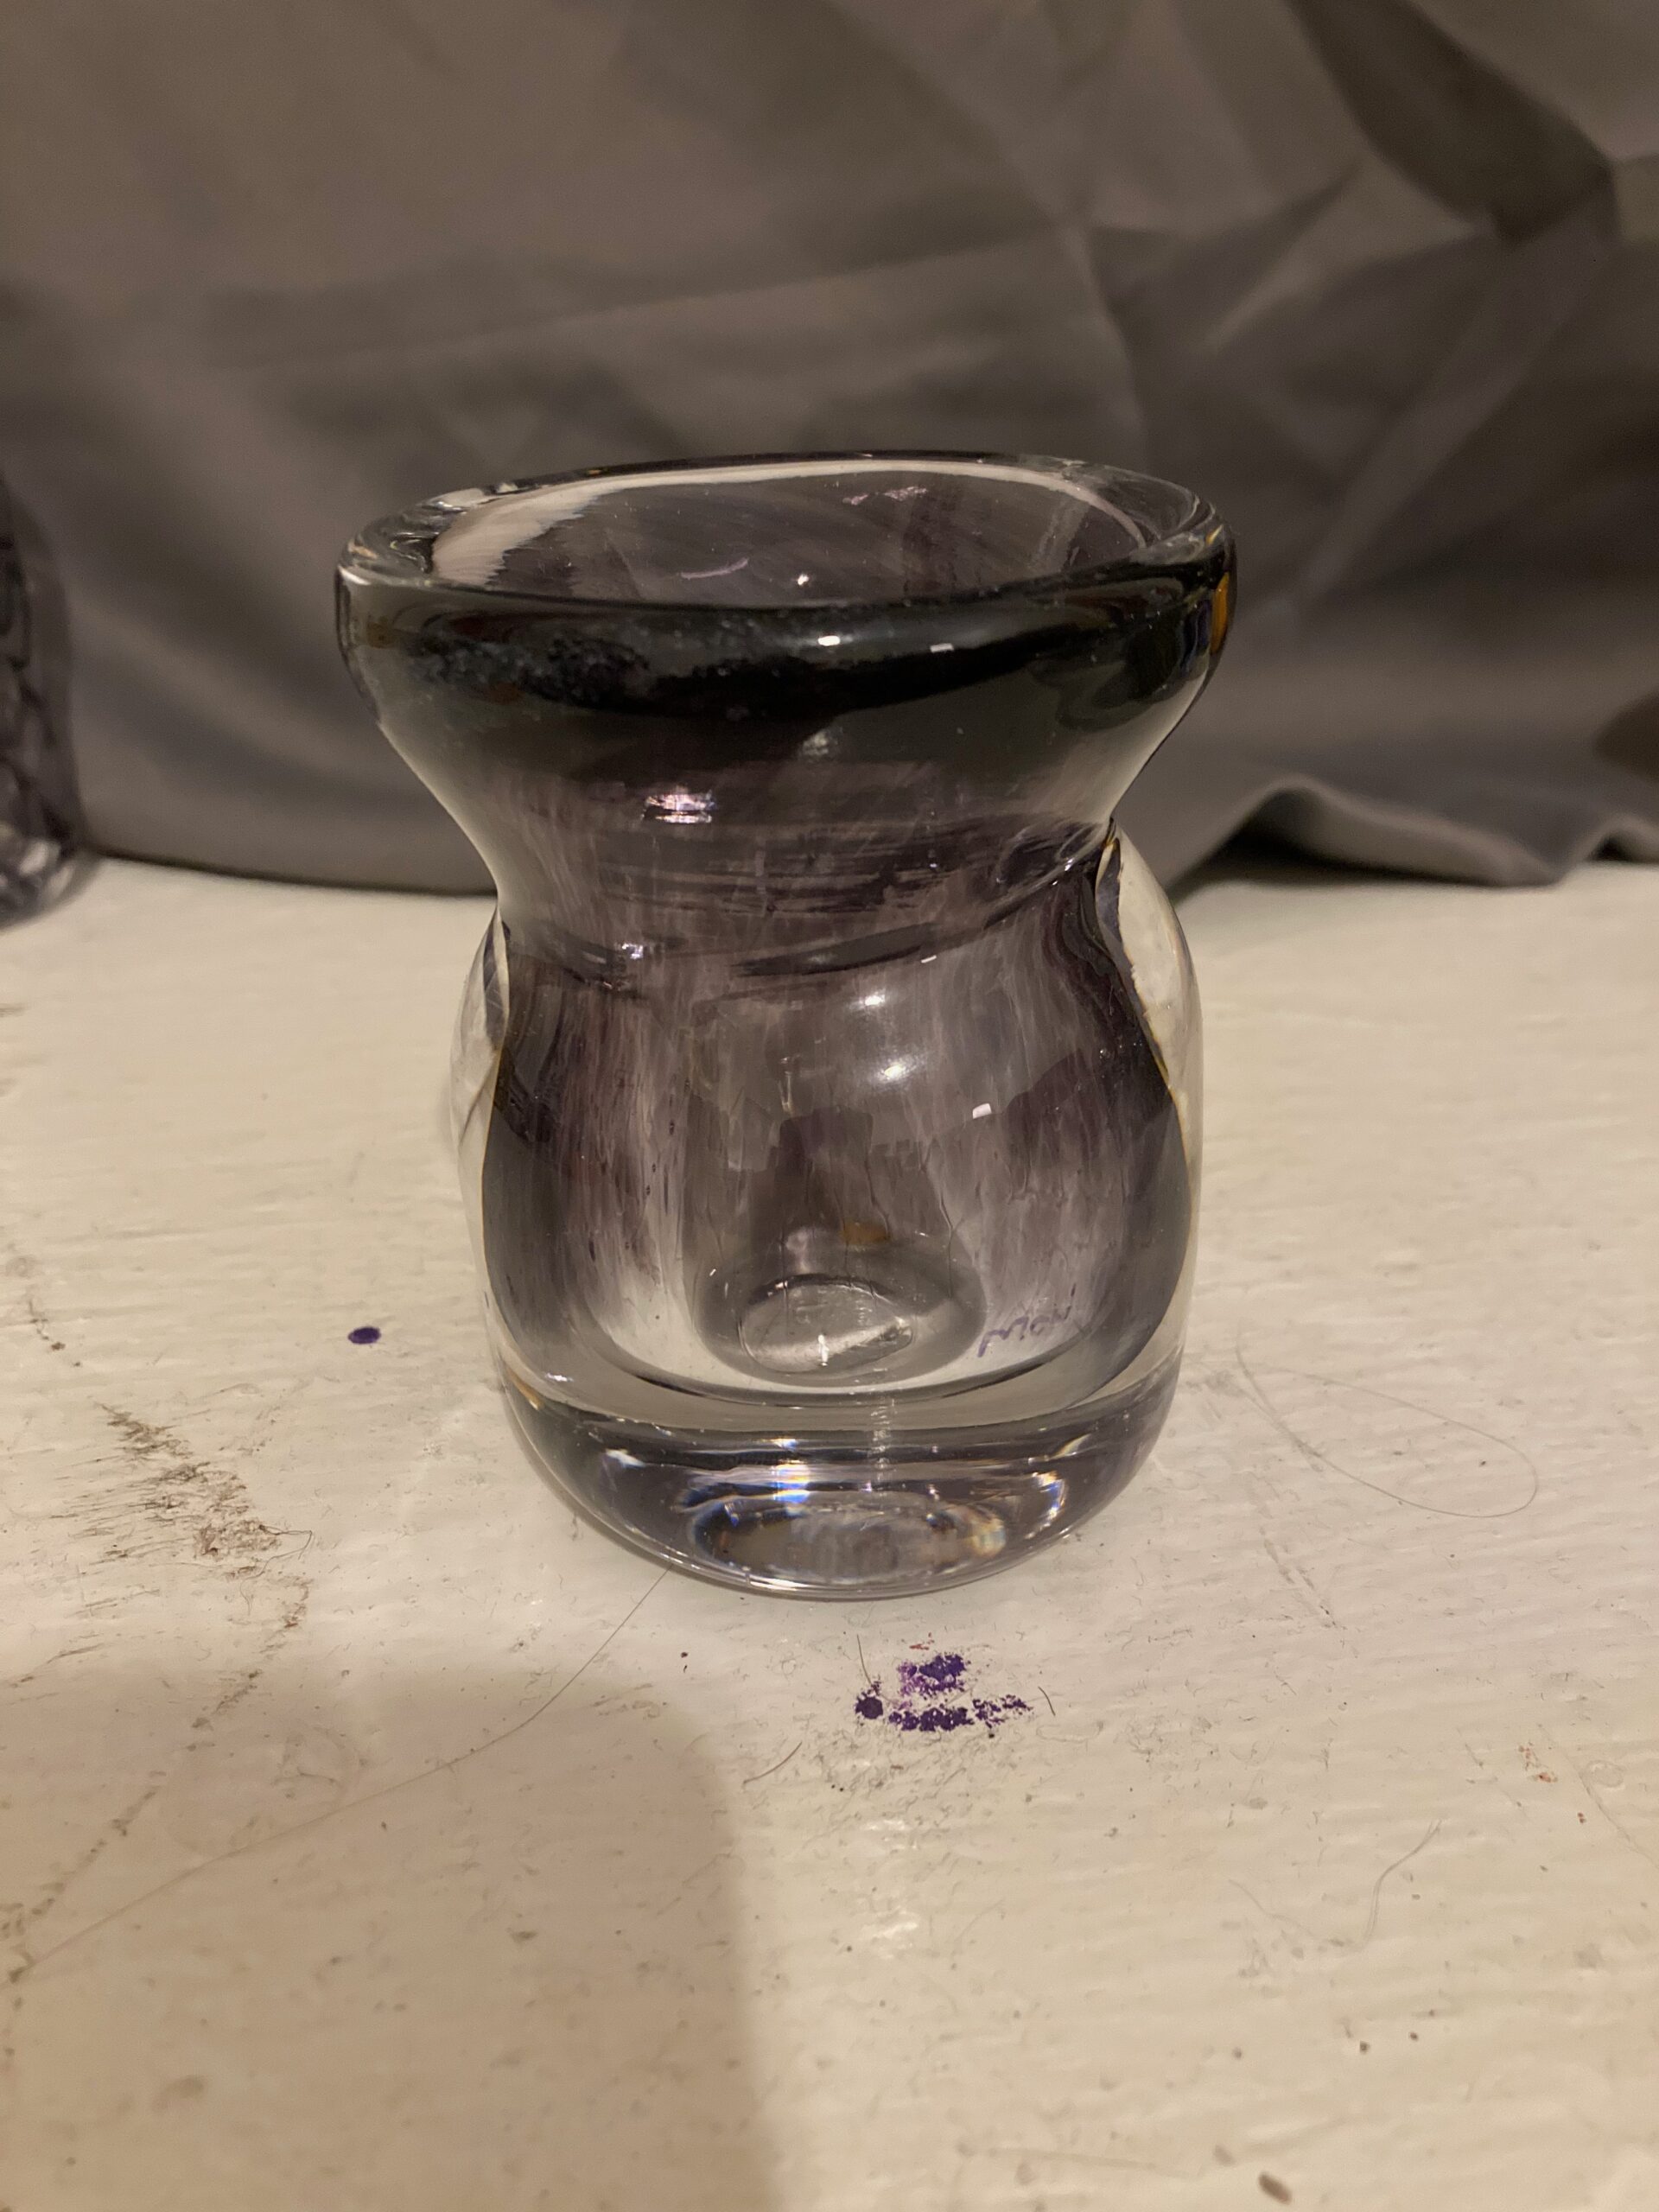
Like I said, vases (and bowls below) are sort of like cups that you did some extra things to. To make a vase, you add an extra neckline where the neck of the vase starts, but you don’t pull it in as much as you do for a neckline you’d use to knock the piece off, leaving a channel to hold flower stems, etc. This vase has an interesting origin story: I was working with dark purple for the first time, and I didn’t realize that purple cools down a lot faster than I had expected. Because of this, the glass was moving more slowly and when I tried to blow the bubble, it didn’t blow out as much as I thought. The result is a very thick and small vase — you can see how much glass is left at the bottom of it. Although this was unintentional, I think it looks pretty cool. And it was a good learning experience! Color, man. It gets you every time.
Sixth week: bowls
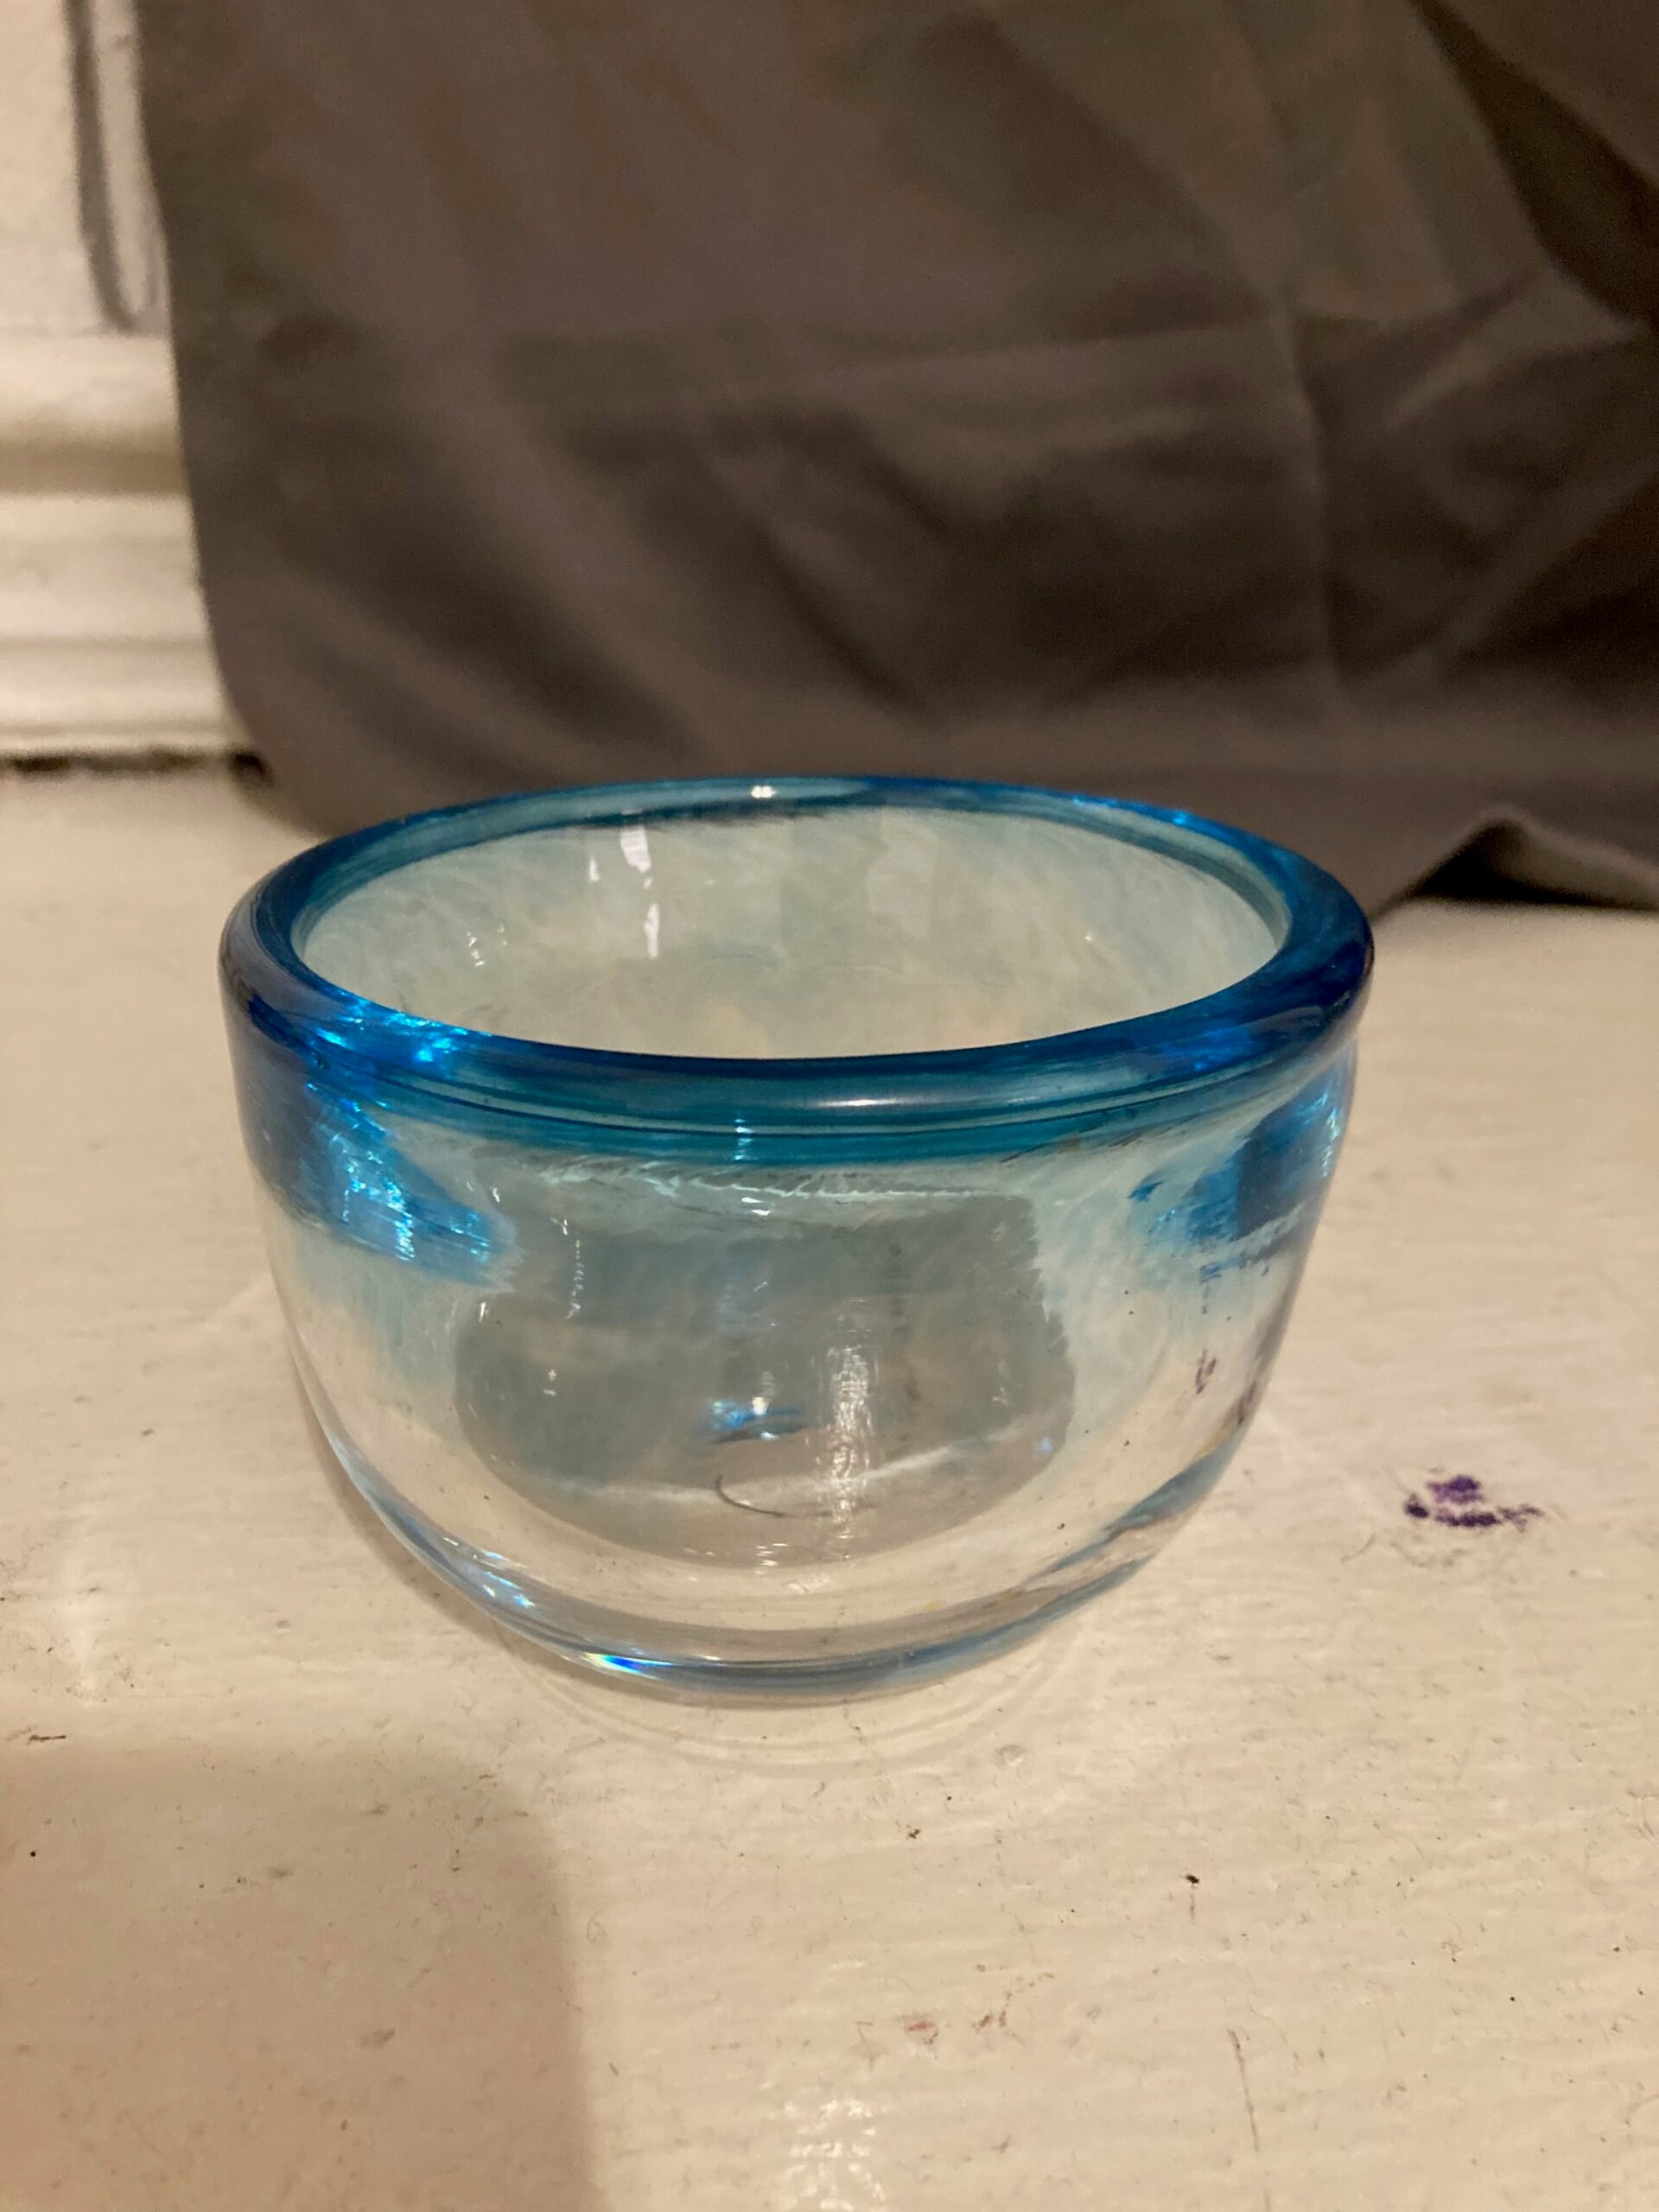
A bowl is a cup with an larger opening and a more gradual curve between the sides and the bottom. Getting that gradual curve requires a heat gradient between the top and the bottom of the bowl. For a cup, you want the bottom to be cold so that it stays thick, and the sides warm so that they are thinner and can be opened up. For a bowl, this is still true, but it’s also important to have the change be gradual and continuous so that there isn’t any sharp line in the bowl where the glass suddenly gets hotter and its width or angle changes more than that of the colder glass. Doing an okay job of this isn’t too hard, but doing a really good job is very difficult, so most beginner bowls are just a little screwy looking. I have a lot of slightly-screwy-looking clear bowls, but this colored one is definitely my best!
This bowl actually does have a bit of a sudden width change (you can sort of see the line, about 3/4 of the way up the bowl), but it’s on the inside, and the outside looks really nice! I was particularly happy with how the blue-to-clear gradient in the frit came out. The top lip of the bowl, where the blue is brightest, was actually originally a separate piece of glass, called a “lip wrap” because it gets attached as a long string of glass that attaches to the lip opening as you rotate the piece. Having a separate lip wrap lets you make the lip a different color than the rest of the piece, and it can also help clean up a messy lip. However, getting it to be the same width all around and smoothly integrated into the rest of the piece is tricky. I felt really good about how this one turned out!
Last week: student’s choice!
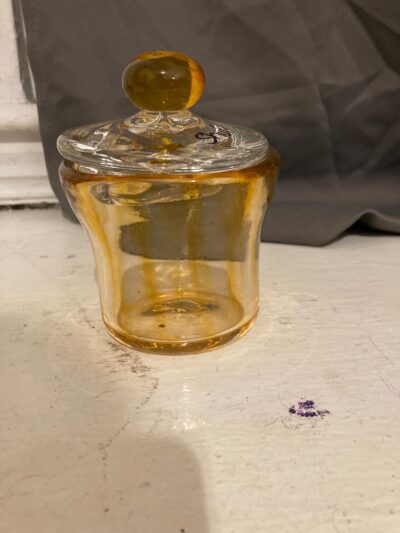
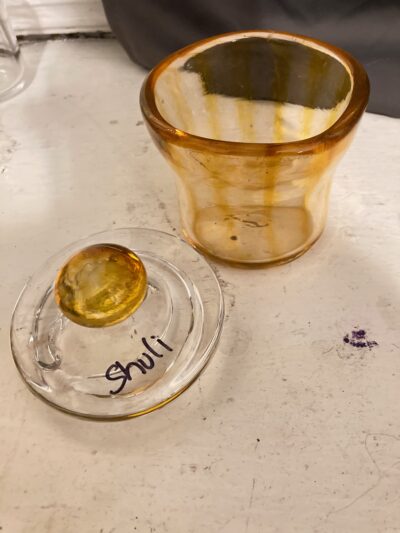
 For the last week, each student can bring their own idea and the instructors help us figure out how to make our piece a reality. I had a vision of a candy jar with vertical stripes and a matching lid with a little ball for the handle. The jar would be pretty easy, I figured, because a jar is just a wide cup. The lid was the part I knew nothing about: it was a totally different kind of object. To make it, I had to learn some new techniques, which was really cool! Making the lid and the jar match was also very hard — which I hadn’t expected — as you might be able to see from the fact that the top of my jar is wider than the bottom. The bottom section’s width is fixed earlier in the process, and by the time I realized I needed it to be a little wider, I could only adjust the top. But although the end product doesn’t quite match up to my original dreams, I feel pretty good about going out of my comfort zone and making something cool.
When I look back on everything I made this semester, I feel really good about the skills I’ve learned and the ways I’ve pushed myself to improve. I also feel incredibly lucky. The people who staff the MIT Glass Lab give so much of their time to teach us beginners, semester after semester, as we stumble through the mistakes that everyone has to make in order to improve. Although the lab does charge for their classes, the fees04 I know this because I'm graduating and was looking into how I could keep glassblowing after I move away. WOW was I surprised to see the price differential. are much, much cheaper than those of independent glassblowing workshops. And it feels like a community, one where people stop to say hi both when I pop into the lab to pick up a piece and when I run into them halfway across campus. I’m very fortunate to get to be a small part of such a wonderful place.
- which was uhhh a while ago oops sorry back to text ↑
- or punty. Both are long sticks that you put glass on the end of, but we'll get to the differences later. back to text ↑
- neatness not guaranteed back to text ↑
- I know this because I'm graduating and was looking into how I could keep glassblowing after I move away. WOW was I surprised to see the price differential. back to text ↑