
[Guest Post] How to Build a Three Story Fort by Ceri R. '16
by Zack I. '27
I’ve had all kinds of feelings about returning to MIT as staff a decade after I was a student here, but one of them is ✨delight✨ at seeing new generations of MIT students carry on traditions and make them their own.
As admissions officers, we talk about one way the residents of East Campus exemplify our motto—mens et manus—with their yearly Build. The details of the project change each year, but it’s always ambitious, driven by passion, and a feat made possible by community. In fact, when I first got to the office, our information sessions even showcased a picture of the 2015 roller coaster (which I rode, and which some of my classmates helped build.)
I’m really grateful that Zack I. ’27 offered to write up his experience as a project lead this year, giving you all a peek into this slice of MIT culture, creativity, and chaos. Everything below the line is his writing!
My name is Zack and this year, I was one of the project leads for East Campus Build. Every year, East Campus01 one of the undergraduate dorms designs and builds a large-scale construction project to throw a big party02 the Eastside Party on it as part of REX.03 Residence Exploration Week In the past, we’ve built rollercoasters, a rotating climbing wall, forts, and more. This year, we built a three story fort with a bouldering wall and net suspended in the middle of the second floor :)
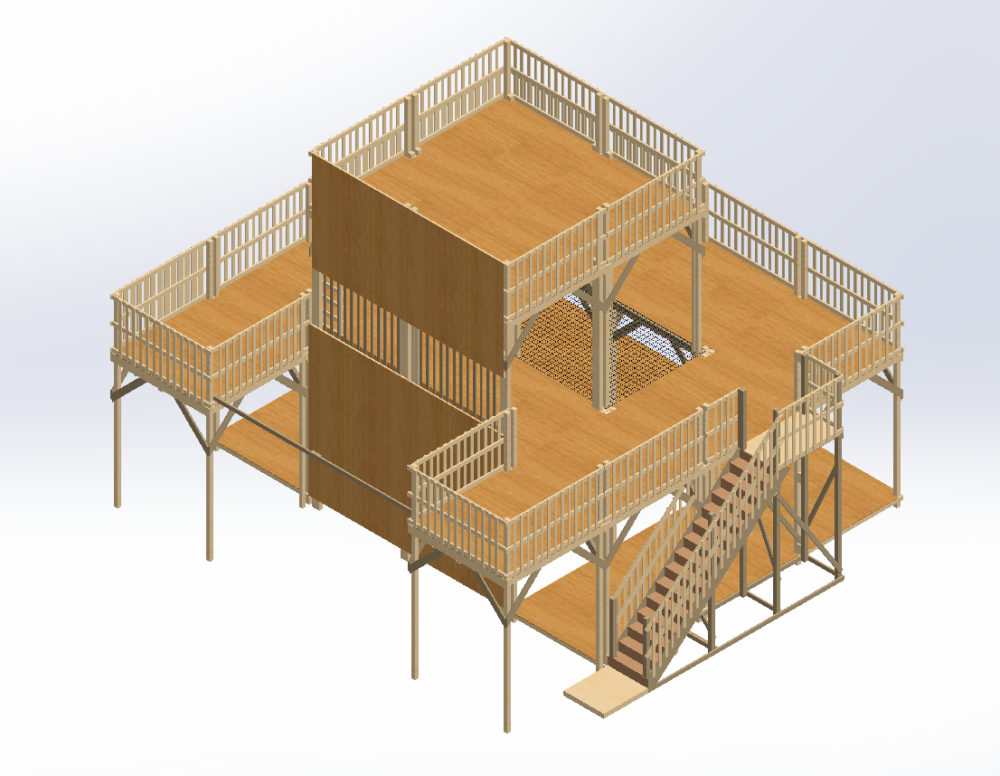
CAD model of our fort.
We started work on the morning of August 9th with surveying and flagging out the footprint. Doing this accurately is relatively challenging, however. One of the other project leads had past experience lining soccer fields and introduced us to the method he learned back then. We took three lengths of string, two of which were cut to the side length of the overall footprint, while the third was cut to the hypotenuse length. When all of those strings were held end to end to form a triangle, we knew the two side lengths had to form a right angle between them. We then flipped the triangle to mark the other side of the fort’s rectangular footprint.
This method is effective in theory, but again the physical implementation had a few main challenges. Our first issue was that the strings were slightly elastic, meaning once stretched the length was actually longer than what we measured it to be. We only have one measuring reel long enough, so for future years we’ll buy two more reels to form the triangle with them instead. Because our lengths weren’t perfectly accurate, our angle wasn’t perfectly 90 degrees. A small deviation from 90 degrees at the corner leads to wildly inaccurate measurements longer down the line, and it caused our overall footprint to slightly shift into a parallelogram. We did our best to combat this by holding up speed squares as a reference, but it was difficult to completely eliminate the parallelogram problem with the tools we had available to us. Once we had flagged out the positions within a margin of error we were comfortable with, we dug the holes and water-leveled the concrete blocks placed inside of them for the posts to sit on.
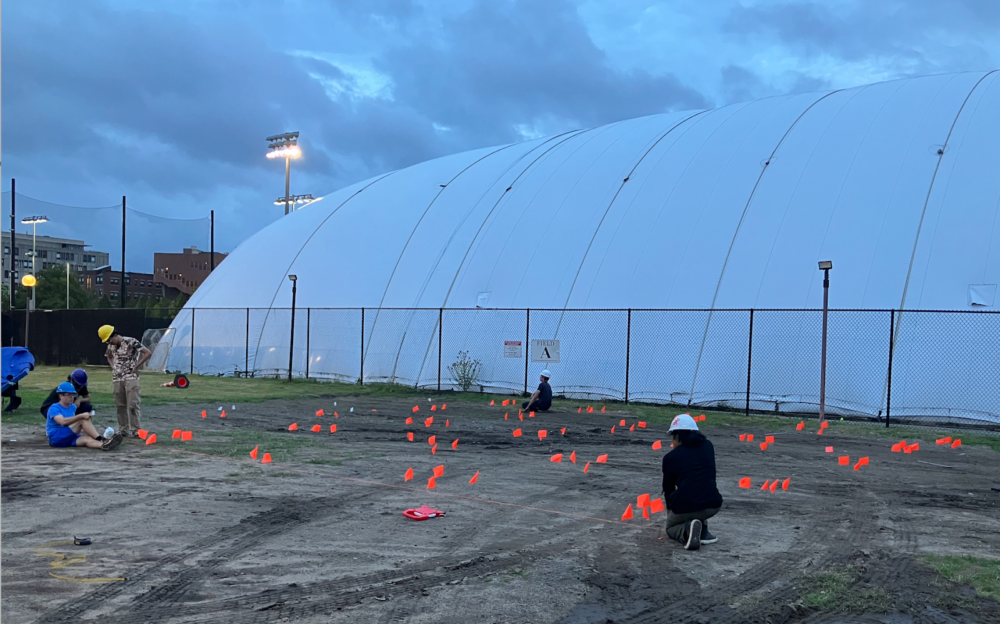
Footprint flagged featuring Santiago Y. ‘27 holding one end of the string.
And then we could start using the lumber! To begin, we constructed the ground frames and laid them on top of the blocks. This was where our first wood cut inaccuracies began to arise. 2x4s usually come in 96 inch lengths unless you specifically buy longer pieces. The side length of each rectangular fort unit is 96 inches04 more about those units later and people assumed that all of the 2x4s could just be taken and used for assembly straight out of the pallet. In reality, while most 2x4s were accurately cut, a sizable percentage were 96.25” or 95.75” or some permutation of mildly incorrect that went unnoticed until the piece was measured. When all of our ground frames were assembled and placed onto the blocks we found that the overall width and length of the fort were something like an inch or so off each. We should have taken the ground frames apart and recut the lengths that were slightly off to ensure everything was completely the correct dimension, but at the time we decided it was within our margin of error and chose to proceed with starting work on the second floor.05 which led to many more measurement problems later on
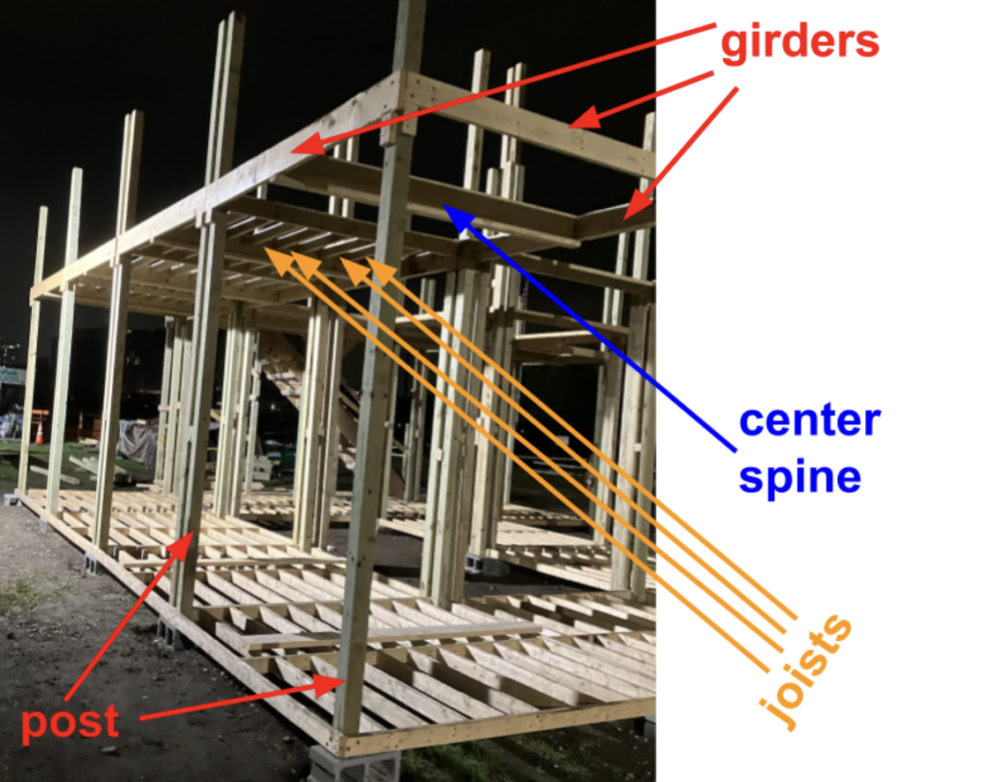
First, a little background about what exactly we needed to do to get a second floor unit in place. In recent memory, East Campus forts have been constructed from rectangular platforms we call fort units. They are supported by four 4×4 posts at each corner, and the posts are connected by girders bounding the sides of the top rectangle. Down the middle, perpendicular to two of the girders, we attach the center spine that splits the unit into two equal halves. The two girders parallel to the center spine are connected to it via 9 joists spanning horizontally across each half. After the joists are in place, we screw 3/4” plywood over the top as flooring and that forms the basic fort unit structure.
Beginning an upper floor means posts. Post raising is always the primary bottleneck with build because it requires a lot of hands to get the massive06 and heavy! 4×4 post raised vertically, level on all axes, hammered flush with the ground frame, and screwed into place. We had to structure our priority schedule around post raising taking place during the times when the most people were onsite. This meant the mornings and afternoons were usually spent measuring and cutting wood to the correct length in preparation and the evenings were dedicated to getting as many posts up as possible. Another thing we changed this year was the length of the posts we would raise. In the past we raised three story posts in one piece from the ground and they required a lot of manpower. This year, we chose to keep some parts of the posts in components and raise them to just their second story heights at first. Then, once the second floor was complete, we would raise the top half of the posts and attach them to the components below. This made it possible to make substantial progress with fewer people.
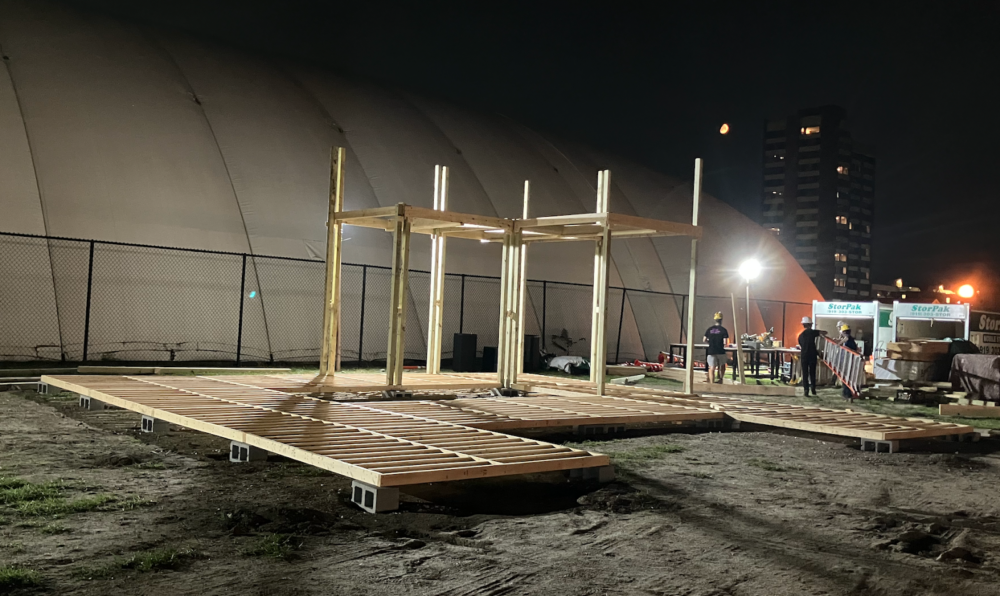
The first three units in progress.
We decided to reverse the classic East Campus tradition of procrastinating the stairs07 the hardest thing to build until the last day and finish them very early on. Marlow T. ‘27, one of the other project leads, had taken point on the stairs during the design process, so she primarily led their construction. The main concern she wanted to focus on with the stairs design was to ensure we didn’t have to manually cut the side profile for each step into the stringers.08 long diagonals that support the ends of the individual stair steps The stringers are made from long09 and expensive 2×12 pieces and we don’t use that type of wood for anything else so we buy very few of them. It’s difficult to cut the side profile accurately without weakening the wood. To avoid having to go through that time-consuming and difficult process for 2 out of the 3 stringers, we screwed 2×4 scrap into the side of the stringers at the correct height and angle so that the step ends could be supported on top of them. Stairs have a lot of small and intricate cuts that make them very time-consuming, so we set aside an entire weekend in our schedule to focus on their construction. This proved to be a great decision because having functional stairs that early on drastically improved our mobility while constructing the second and third floor.
After we finished the stairs, we returned to the main fort structure. It took about a week to get the components of the second floor frames up, and finishing that roughly corresponded with the first night prefrosh were here for FPOPs. One night, Paola R. ‘2710 a counselor for the Discover Ocean Engineering FPOP this year and one of our construction leads brought 20 prefrosh in one big group who all wanted to help build. We didn’t have enough tools for all of them at once, but we were able to set up an assembly line with half of them carrying the plywood sheets up to the second floor and the other half actually screwing the sheets in. I expected plywood flooring to take about a day to finish, but Paola’s army decimated the task in like two hours.
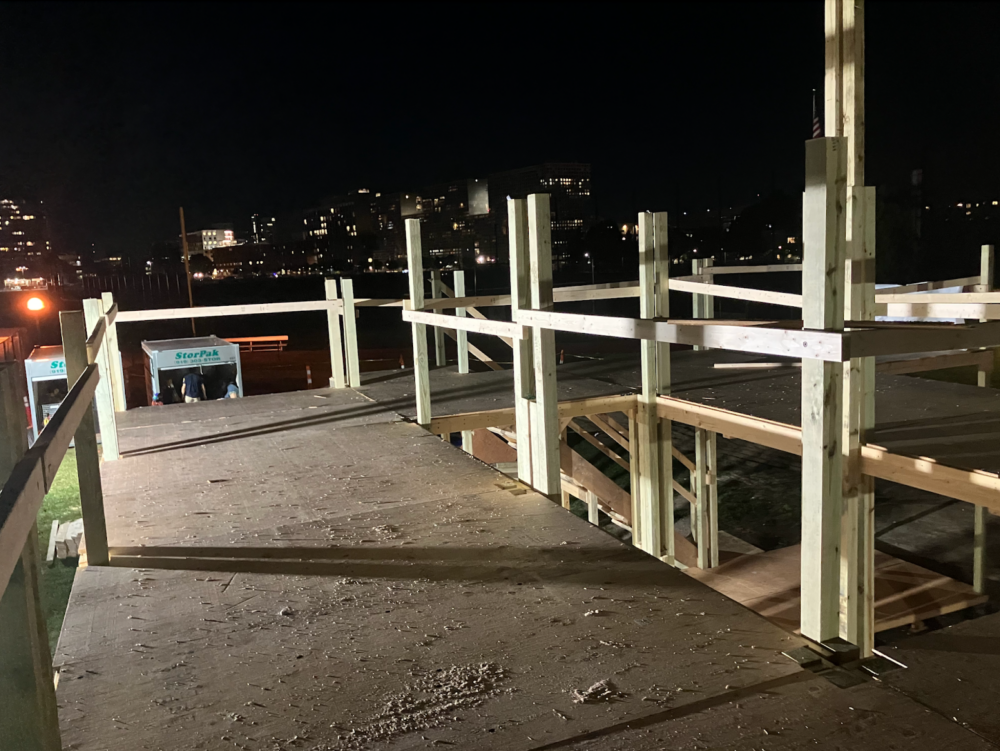
Second floor complete!
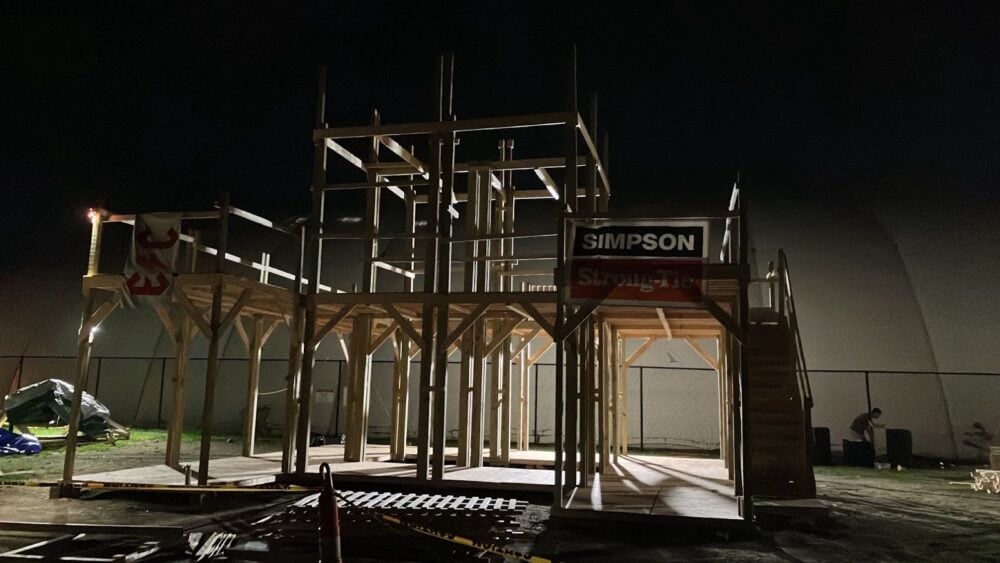
Third floor in progress (feat. our extremely helpful screw sponsor Simpson Strongties)
It may seem like it, but build isn’t entirely run by project leads and upperclassmen. Build is specifically designed to be beginner-friendly and an opportunity to learn basic construction skills and tool use, so freshman participation is encouraged. After the freshmen moved in for orientation week, we had them installing crossbracings to fortify the structure. There are two crossbracings in each corner of every unit, which meant this build required over a hundred total. Another task we used large groups of prefrosh to do efficiently was building and installing the railings. We built two jigs on the ground that made it easy to slot all of the appropriate pieces into place and simply screw everything together all at once. This allowed groups of prefrosh to mass manufacture railings on the ground before installing them on upper floors. With both the railings and crossbracings, we were able to parallelize multiple groups of prefrosh working at the same time to get those tasks done faster.
Enough of the overall frame in place meant we could start focusing on some of the more specific features of this year’s fort. We had our art leads Rory K. ‘25 and Jayna E. ‘27 paint the mural panels for this year on the ground and we raised the boards into place once they were done. The boards between the first and second floor were thick enough to be used as a bouldering wall, and the routesetters used the afternoon before the Eastside Party to mark and bolt in the wall’s holds.
While some of the smaller elements of the fort’s structure were being finalized, I embarked on a sidequest to rig up the net in the center. It took me about 5 hours to rig the net, which was far longer than I thought it would be lol. I wove a continuous strand of webbing through the edges of the net and the u-bolts installed into the fort’s frame and tied the webbing into a closed loop with a tensioning hitch. Because the net was brand new, though I tensioned it tightly as I put it up, after a hundred people sat in it over the course of a week it sagged a lot more than I intended. Hopefully if this net is used for future forts that stretch will be accounted for already and it’ll better maintain its tension over the course of the week.
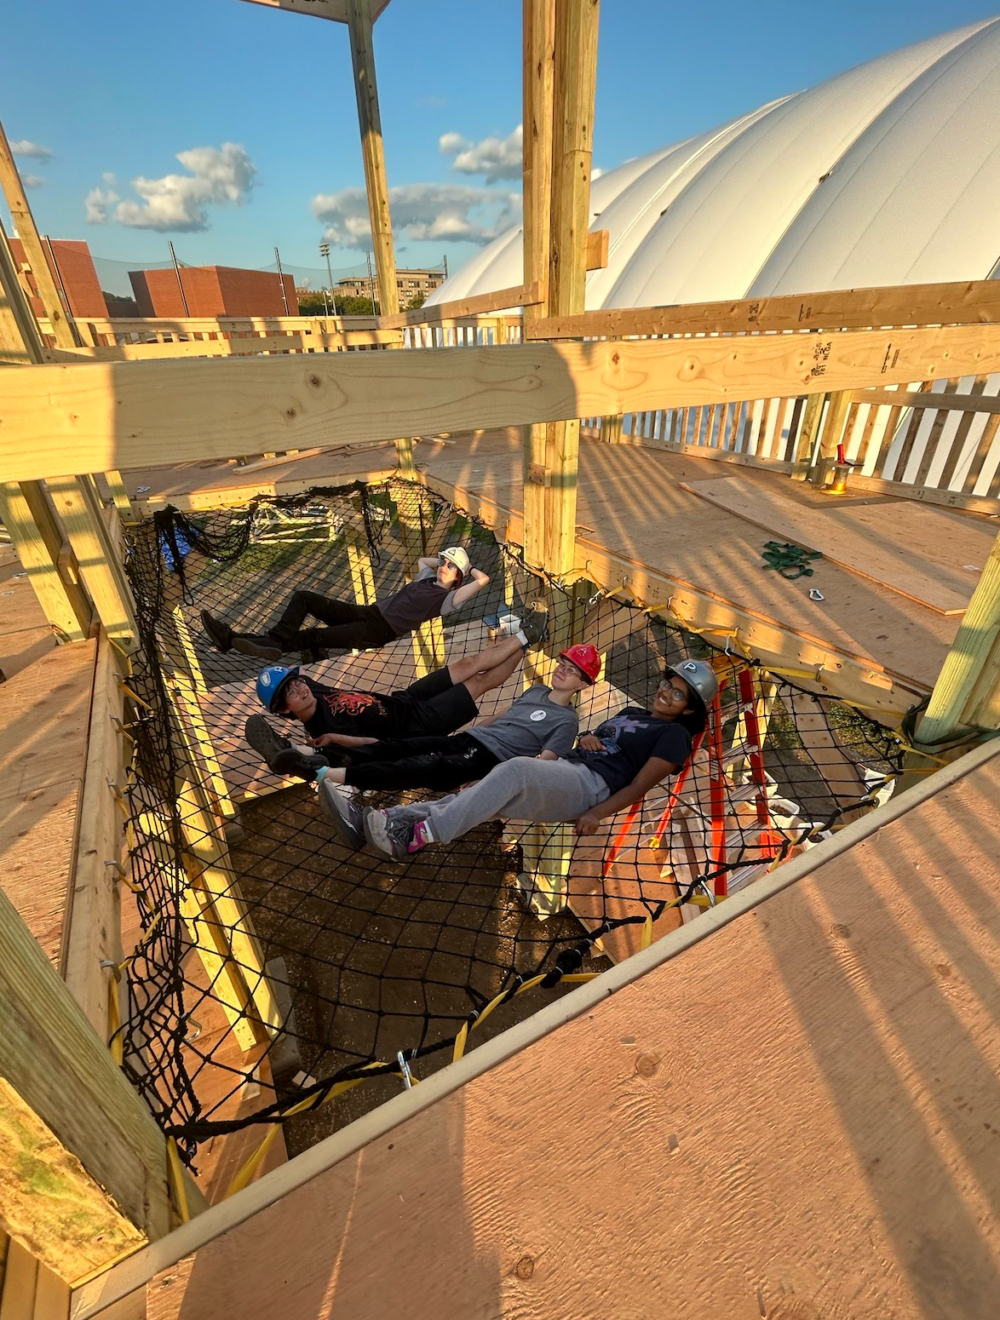
Sam V. ‘27, Rory K. ‘25, me, and Jayna E. ‘27 lying in the net.
The final step for the fort’s visual appearance on the day of the party is for the lighting team to put up the projects they have been working on over the course of the spring and summer. While lighting and general themed decorations went up, the DJ equipment was set up on the third floor. Eventually, we opened the fort up for the Eastside Party and everything was all perfect and amazing for the entirety of REX.11 until it was time to deconstruct everything and give away all of the wood we used, that was a lot of work too and not interesting enough to be more than a parenthetical at the end of this post but trust and believe it was also a time consuming process
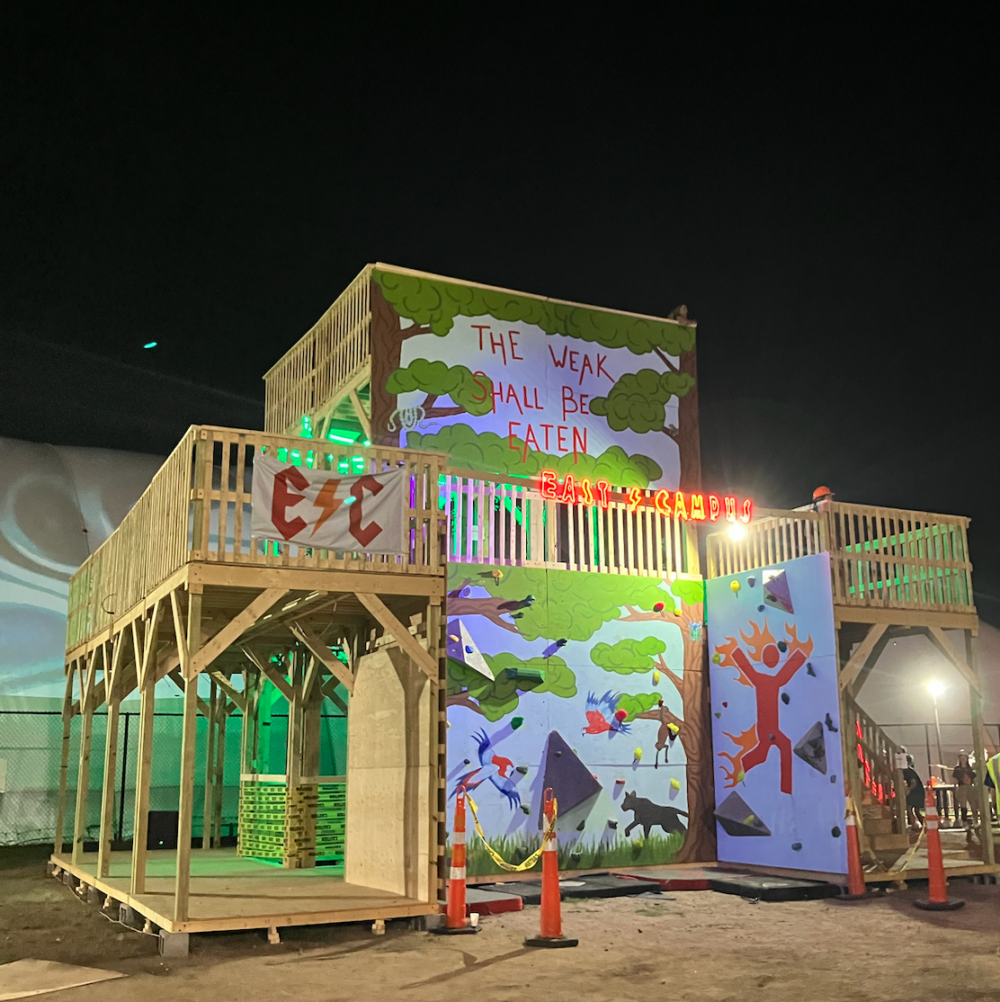
Finished fort right before the party :o
P.S. Every year we also have small builds12 which are, unsurprisingly, smaller builds next to the big build that are designed and carried out by separate small build leads. This year we had a treehouse with a dome on top of it designed by Jordan T. ‘25 and Hanu S. ‘26, a space trainer ride built by George J. ‘27 and Pablo H. ‘27, and a substance wrestling pit13 classic staple of East Campus REX every year led by Gage L. ‘26.
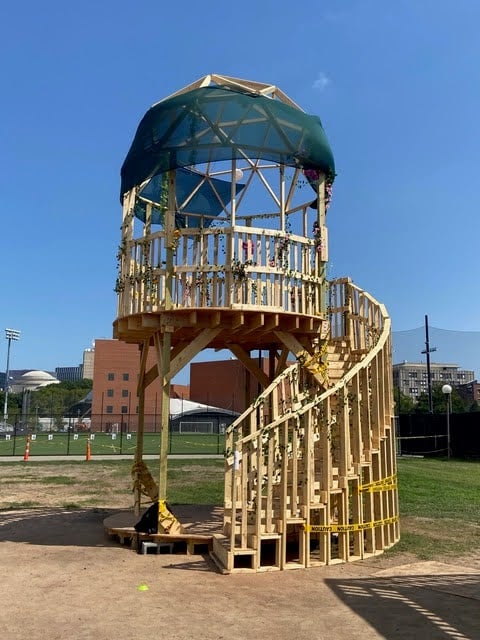
The treehouse topped with a geodesic dome.
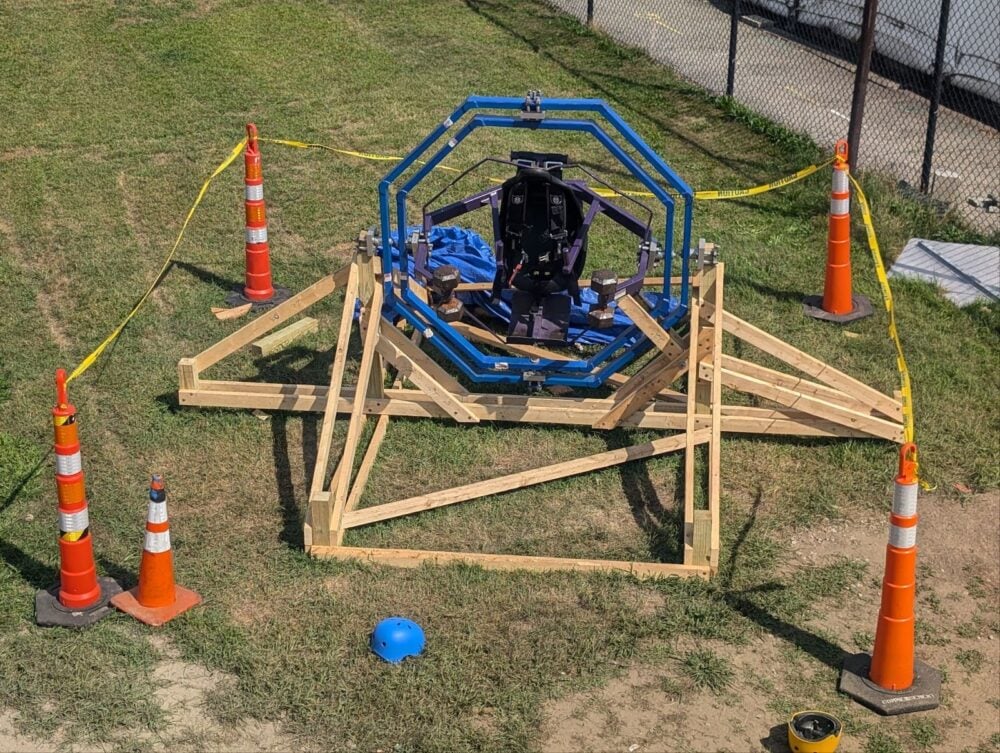
The space trainer ride viewed from the second floor of the fort.
- one of the undergraduate dorms back to text ↑
- the Eastside Party back to text ↑
- Residence Exploration Week back to text ↑
- more about those units later back to text ↑
- which led to many more measurement problems later on back to text ↑
- and heavy! back to text ↑
- the hardest thing to build back to text ↑
- long diagonals that support the ends of the individual stair steps back to text ↑
- and expensive back to text ↑
- a counselor for the Discover Ocean Engineering FPOP this year and one of our construction leads back to text ↑
- until it was time to deconstruct everything and give away all of the wood we used, that was a lot of work too and not interesting enough to be more than a parenthetical at the end of this post but trust and believe it was also a time consuming process back to text ↑
- which are, unsurprisingly, smaller builds next to the big build back to text ↑
- classic staple of East Campus REX every year back to text ↑