
HOW TO FORGE A DRAGON SWORD by Amber V. '24
and other skills picked up in 3.096
I’ve been blacksmithing for just shy of a year. This fall, I took 3.096: Architectural Ironwork, a class which not only counts as both 2-A credit and HASS credit for me, but also accelerated my blacksmithing knowledge and practice hours considerably. And I made a dragon sword!
First we had some lessons:
how to not burn yourself
Reach toward hot things (or potentially hot things) slowly. Feel the heat rising from them. I move differently in the forge. Generally you more often get burned not by red-hot pieces, which are obviously hot, but by cooling black metal that still holds a lot of heat.
how to taper, rivet, chisel, and assorted other skills.
tapering is when you make the end of a bar thin and pointy.
rivets are like double-ended nails that hold pieces of metal together. They are very hard to forge.
sheet metal can be cut and textured into leaves (or cacti, or, as a grad student in the class showed, into wavy table legs).
we also learned how to cut fitted slots and holes into iron using only hand tools.
chisel work is done by setting a hot workpiece into a vise (or, if it’s flat, laying it on an anvil) and molding the exterior with chisels. This is how you make dragons!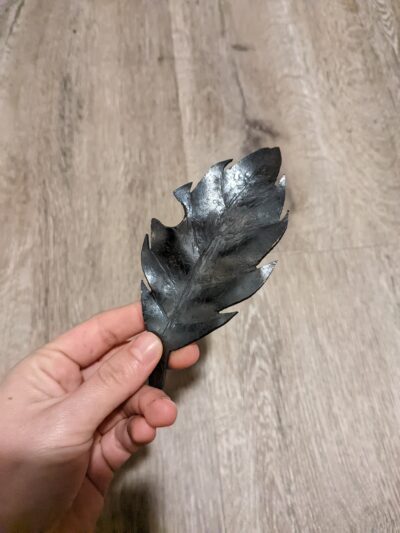
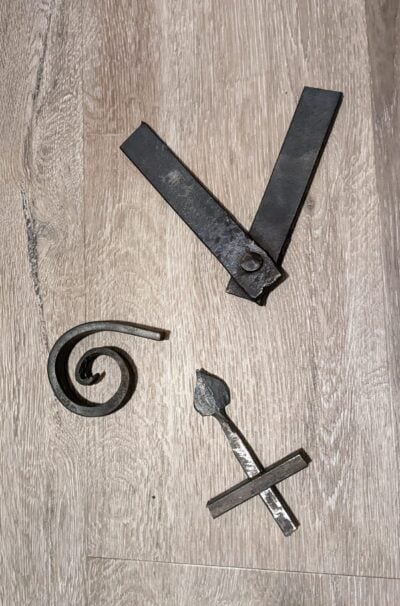
riveted V (for Velez), spiral, and fitted bars
exploratory project: bottle openers!
Each person chose their own element of ironwork to iterate 5 times in an exploratory project. I decided to make 5 bottle openers, since I already had a few from last semester and wanted to come up with new designs.
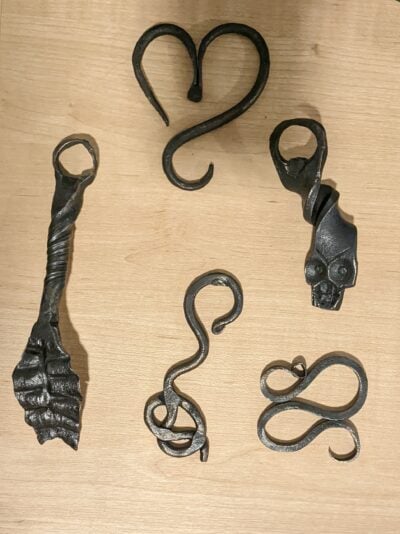
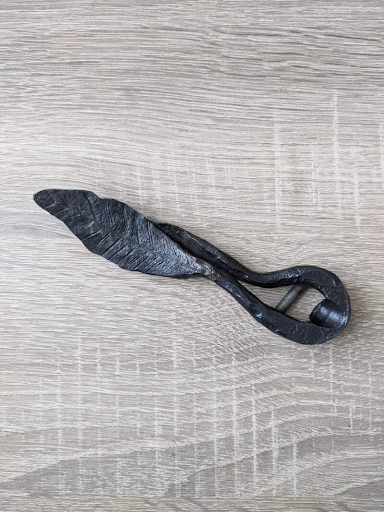
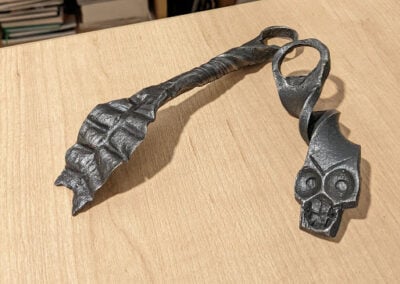
The first one I made was typical bottle opener fashion, made by punching a hole and shaping one end, then using a punch to flatten the tab of the bottle opener. This one was set opposite a skull, which I made while learning how to use chisels.
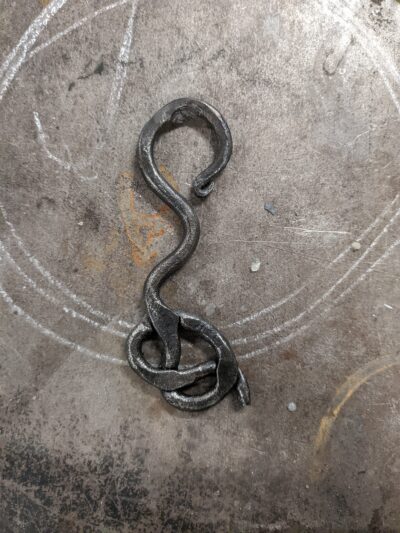
The second bottle opener was more unique: I tied some thin iron into a knot, inspired by my classmate’s project of tying knots and weaving metal. Then I bent the other side over and punched a tab.
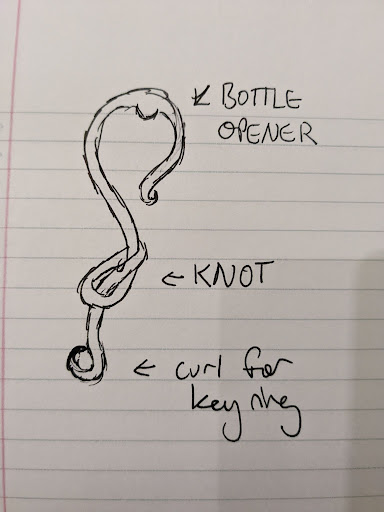
my original design! The key ring curl burned off in the fire, but otherwise pretty close
The third bottle opener is a cool wavy shape where the bottom curve goes perpendicular to the plane of the bottle and pops off the top. Unfortunately I didn’t make this one long enough to have proper leverage, so it only works with a moderate amount of effort.
comparison with my previous leaf design — has some light chisel work but is very flat
look at how 3-D the leaf is!
The fourth one experiments with leaves (a success!) and twists on a round bar (ehh), and has a normal punched out bottle opener opposite the leaf.
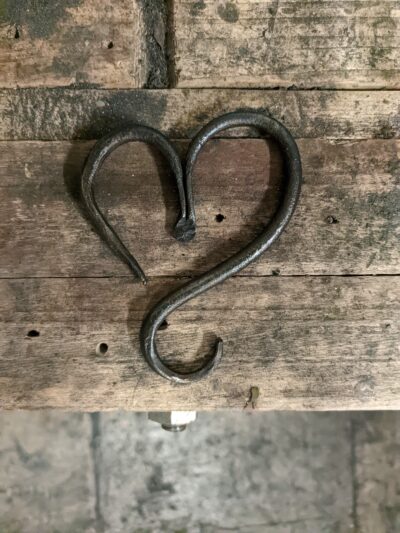
The fifth one, my personal favorite, is a heart with the bottle-opening tab at the crux of the heart. Getting the two sides of a heart to be even is about as easy as herding cats, and to add to that, I needed a specific amount of space between the tab and the sides of the heart. Happily this worked on the first try!
Now that I had made a bottle opener more times01 seven, counting the two from last year than I had opened a bottle, it was time to pivot to the final project:
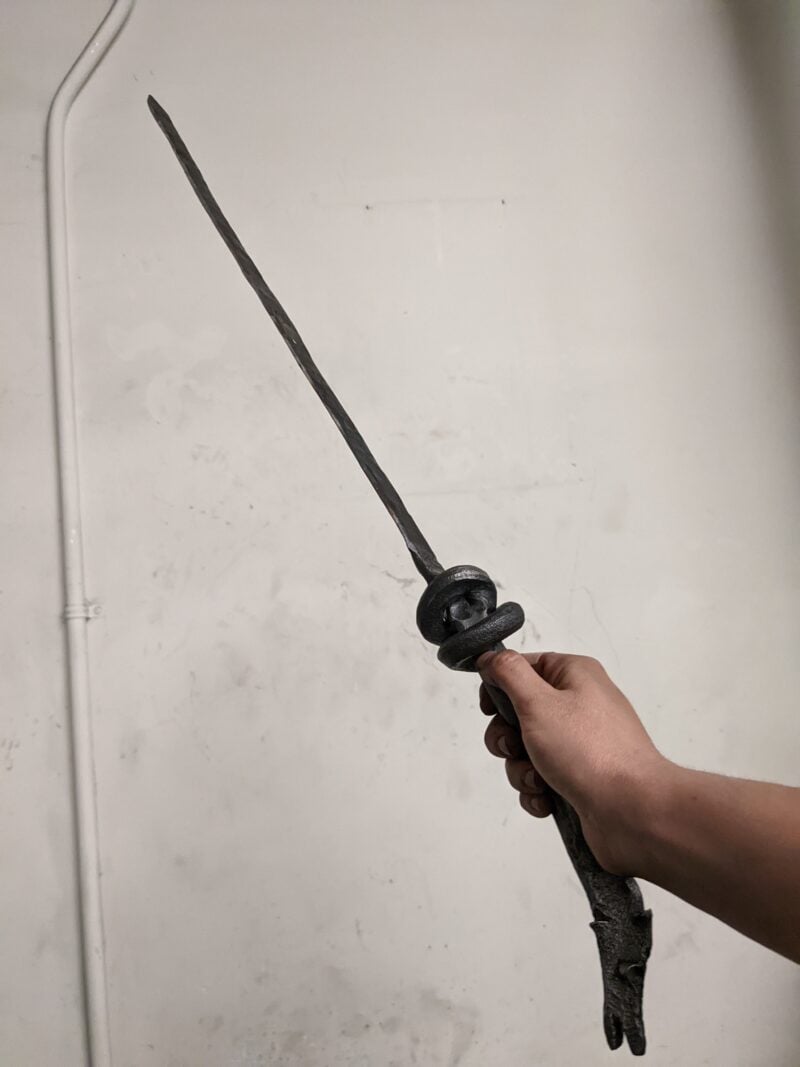
dragon sword!!!!
I designed my project around two parameters: I wanted to use new skills and tools and to design a project with a sculptural element. I was also excited by dragon-making, my favorite new skill from 3.096.
dragon horns for a different dragon
On the first or second day of class, the prof showed a few examples of modern blacksmithing, ranging from the “new and innovative” to the “artless.”02 my words Of the latter category was a reality TV show about making swords. “I hate this show,” insinuated the prof.
That week, I promptly looked up the show and watched 1/2 an episode.03 props to whoever manages to consume tv at this school It was every bit as overblown as promised. I decided I wanted to make a sword.
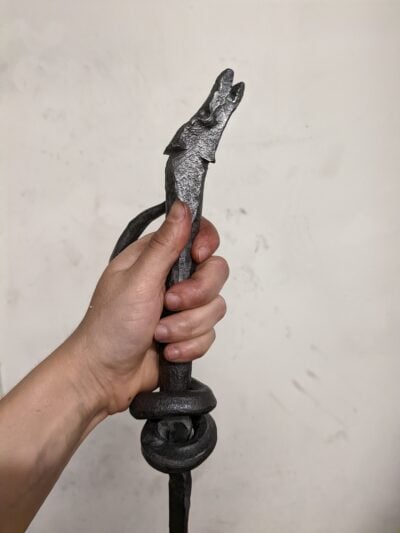
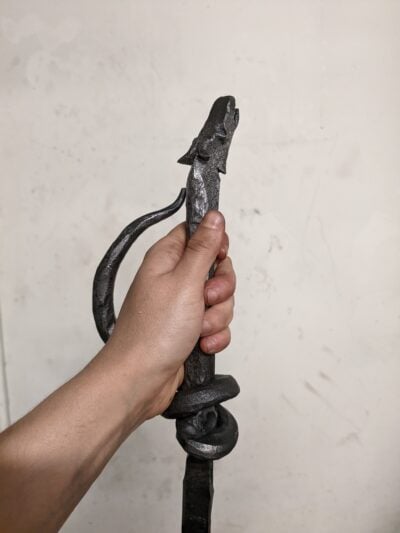
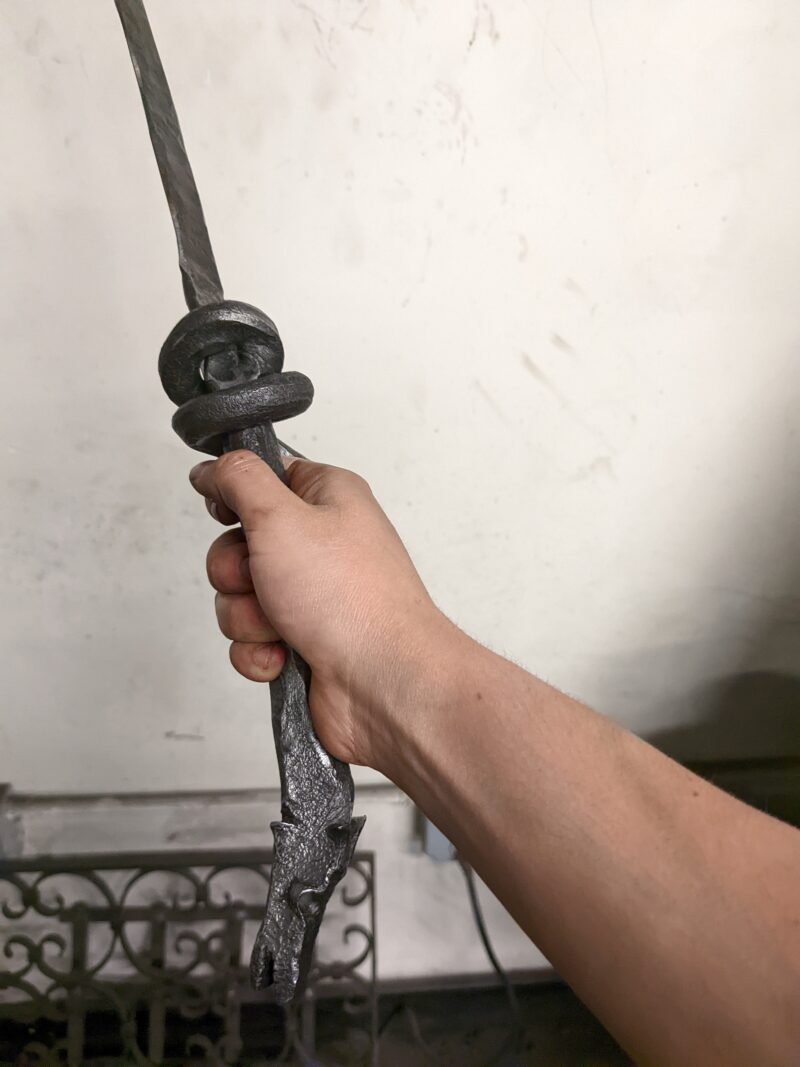
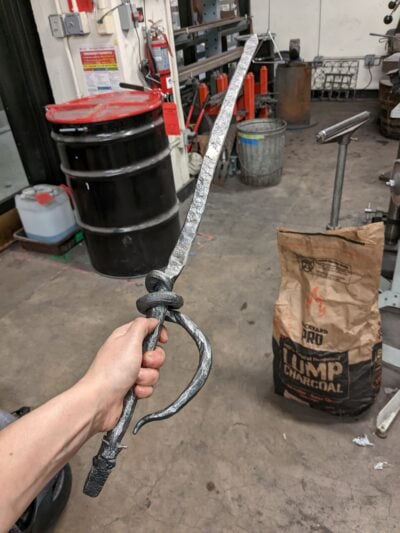
How better to combine dragons and swords than to make the hilt be a dragon?

notice the precise measurements
I started looking for inspiration and was pleased to find that while some creators had attached dragon heads to various parts of swords, generally the hilt or the thumb guard, no one had created a hilt that was also a sculpture of a dragon.
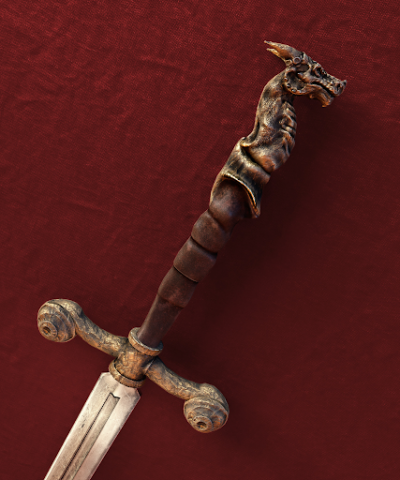
common example of dragons applied to swords
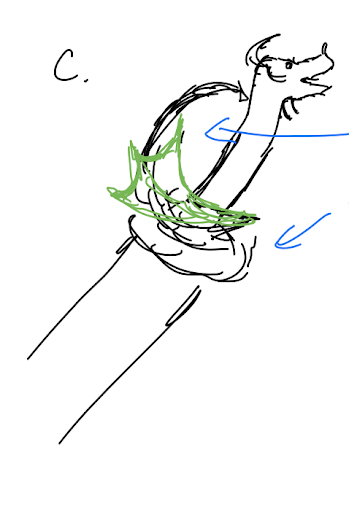
As you can see in my drawings, the dragon hilt is quite sculptural, but also serves functional purposes:
the tail wrapped around the hilt is also a guard against other blades;
the tip of the tail is a thumb guard;
the head is also a weight to counter-balance the sword and make it more ergonomic to hold.
Technical development and process
The tools which were most new to me in 3.096 were the power hammer, the hydraulic press, oxy-acetylene torch, and chisels. I wound up using all four of these during the design of this blade.
I followed these steps:
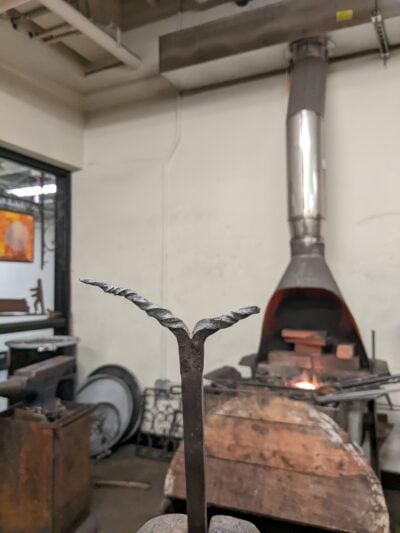
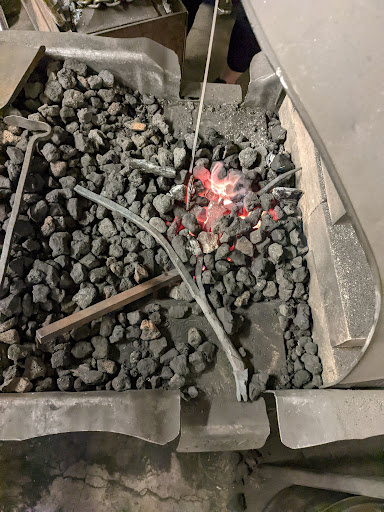
- Make the dragon head
- the horns look small and measly but actually took a long time to hammer out
- split the bar — ½ for the blade, ½ for the tail
- I cut it with a bandsaw and slammed it against the anvil to get the two pieces to separate.
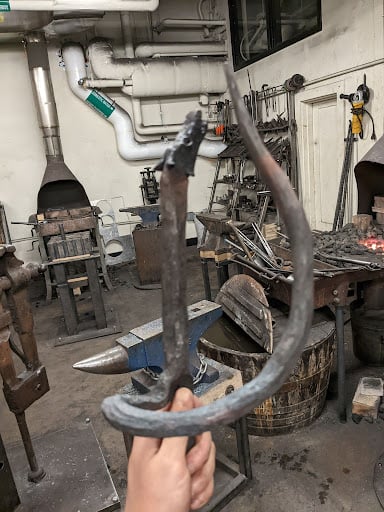
- taper and wrap the tail
- tapering the tail was the first major challenge: due to the odd T-shape, it was hard to heat the necessary sections of the tail in order to hammer it from a square shape to a round shape.
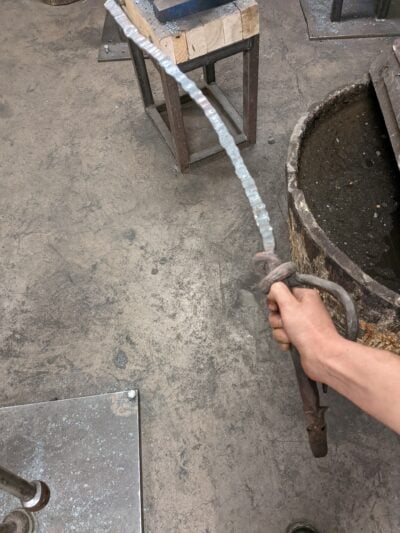
- Wrapping the tail was even harder. I was hammering perpendicular or diagonal to the direction of the sword, which reduced the force of my blows significantly. The tail was usually cold04 cold as in below 460 °C, which is the temperature needed for iron to turn red by the time I got it in position. Fortunately, the oxy-acetylene torch came to my rescue.
- the oxy-acetylene torch is a handheld torch that heats up to about 3200 °C. I clamped my sword in a vise and asked someone to heat up sections of the tail while I wrapped the tail with giant pliers.
- lengthen the blade
- the hydraulic press squeezes down with a pressure from 1000-3000 psi. It makes hot iron look like play dough. You can squash a workpiece in seconds when it would have taken several rounds of hammering to achieve the same result.
- Drunk with power, I squashed my sword cleanly and evenly along the length of the blade — except in a few places, where I squeezed it a bit too much.
- hammer the blade
- could use a power hammer, but those are too loud to be turned on during the work day, so I mostly used a handheld hammer.
- it was a 4lb hammer, though. A significant improvement from the 0.5-1.0 lb hammers I used last semester.
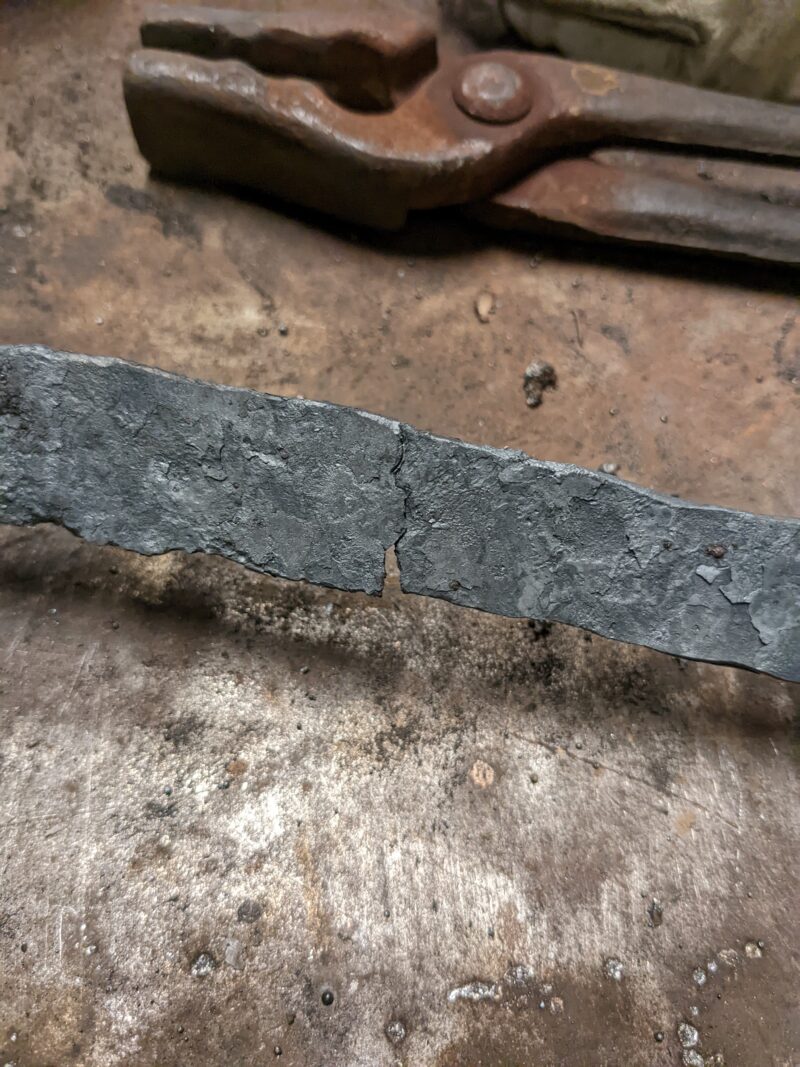
- But remember the thin sections of the blade? They became weaker and more brittle as I re-heated the sword and hammered it by hand, and eventually, a small piece on the end of the sword broke off entirely. I went and welded the other thin sections to ensure that they didn’t break off, too.
A solution to this would have been to use stoppers in the hydraulic press to lengthen out the blade evenly. I learned that these existed the week I finished my sword, but will likely employ them the next time.
- grind
- I used a sander to make the sword sharp and an angle grinder with a wire wheel to make the blade and hilt shiny.
- sandblast
- how many sandblasters are hanging out in unassuming basement rooms? Unknown, but more than 2.
- The wire wheel of the angle grinder can’t get into super tight corners, like the dragon’s face when the tail was in the way, but the sandblaster was more powerful.

shiny!
- polish
- everything smelled like beeswax.

reflection
After finishing the project, there are a few things I would change if I were to do it again:
1. make the dragon more dragon-like
I would emphasize the dragon’s features more. In particular, the horns were quite small, and the scales weren’t very pronounced.
Too much heat can distort fine detail, so it would probably have been best to do the dragon head at the end, right before wrapping the thumb guard of the tail, rather than at the beginning. I generally avoided getting the head too hot while heating the tail or other elements of the sword, but am still a bit worried that the scale detail and sharpness of the ears and horns have been diminished from excess heat.
I also added no scales to the tail, since I assumed I would be hitting it with a hammer later in the process. However, I wound up wrapping the tail most effectively with a pair of pliers. Scales would be quite feasible.
2. balance the sword

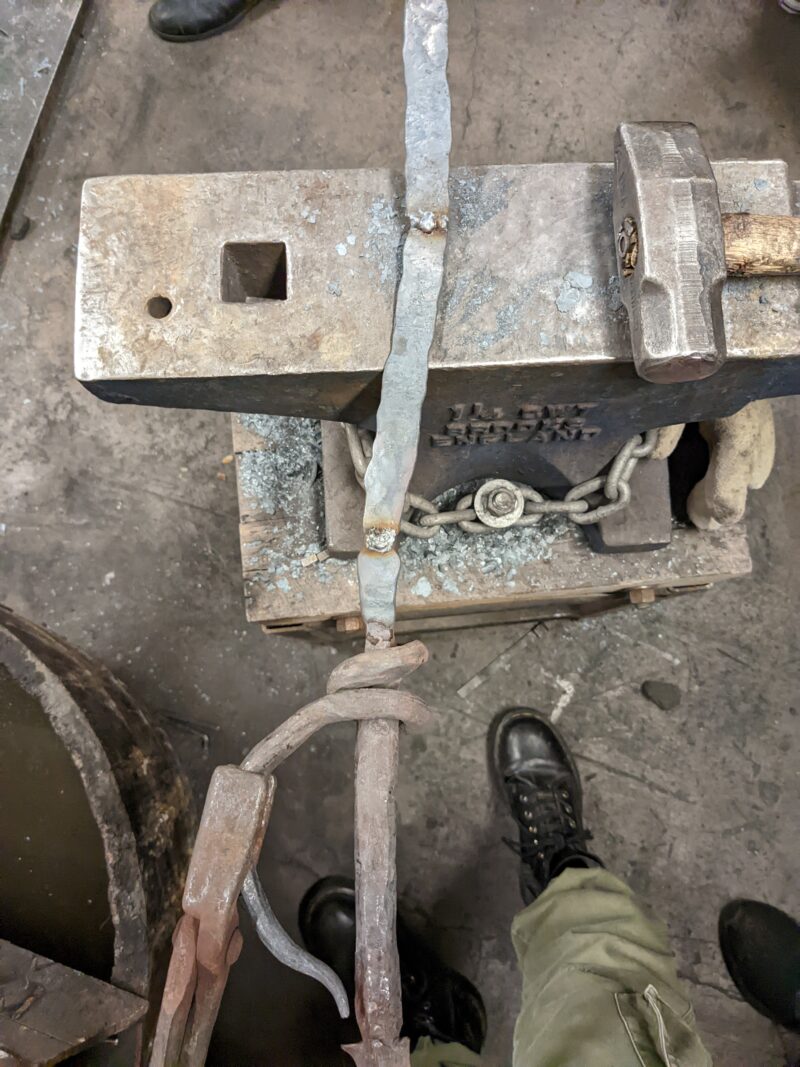
Sword balanced on my tongs at about 1”.
Finally, I wish I had conducted a dimensional analysis of the sword at the beginning. When I finished the hilt and roughed out the blade, I realized the balance point was about 1” down the blade. I set up a systems of equations05 of force and moment. hello, 2.001 to determine what the final length of the blade needed to be for the balance point to be 2-3”.
However, my measurements were a bit rough. Since I had already forged the hilt, the best way I could get a measure of how much mass was in each part of the sword was by volumetric analysis via water displacement in graduated cylinders. This gave a degree of accuracy to 1mL, or 1g.
I would be able to get higher precision by weighing an unforged bar on a scale, then marking on the bar which section would be forged to a blade, which to the hilt, etc. This would have been vulnerable to other sources of error, however, such as loss of mass due to oxidation.06 in the form of metal flakes that fall off your piece when you hammer it.
Ultimately, the tip of the sword broke off during forging, so the balance point is still around 1”.
All in all, I’m quite pleased with how the sword came out. The sword cuts through paper and cardboard, and I have to remind people not to touch the tip.
I enjoyed learning how to use the hydraulic press, and I hope to employ both that and the power hammer into future projects, since they make many processes such as tapering and lengthening material much more efficient.
I am also excited to gain more skill with chisel work. The dragon head was my first three-dimensional chiseled sculpture, and I hope to design more expressive and dynamic monster heads in the future.
- seven, counting the two from last year back to text ↑
- my words back to text ↑
- props to whoever manages to consume tv at this school back to text ↑
- cold as in below 460 °C, which is the temperature needed for iron to turn red back to text ↑
- of force and moment. hello, 2.001 back to text ↑
- in the form of metal flakes that fall off your piece when you hammer it. back to text ↑