Make a Lamp! by Amber V. '24
and cart the pieces of it from IDM to IDC, the forge, Metropolis, and back again
This fall, I enrolled in EM.S21: Design and Make a Lamp. It’s a 3-unit, half-semester class under IDM01 Integrated Design and Management and the Infinite, as in, it’s in the basement. The final project was pretty much as the name suggests — no rules other than the fact that your lamp must turn on — and throughout the course we learned about all types of making, from woodworking to 3-D printing.
I was thoroughly impressed by everyone’s lamps at the end. This blog covers my design process and experience in the class, then highlights each lamp in the final showcase.
casting, cutting, CNC’ing, oh my!
Each day featured a new design process, a guest lecturer, and lab time to test out the process for ourselves.
The head lecturer, Andy MacInnis, had a lot of woodworking background, and he delivered lectures on joinery, finishing, and casting. For other topics, he brought in various experts: one of the TAs had worked in a 3-D printing company and gave a lecture on the uses and failures of 3-D printing. Another TA had deep knowledge of laser cutters and showed us a lot about 2-D structures in design. Cody from the Hobby Shop came in to walk us through CNC machining, and another guest lecturer showed us CAD modeling.
I came in to this class expecting to have a good time but not pick up many new skills, since I already had experience with most of the processes. The class seems to be designed for business and design students, and I was one of few engineers. However, I found that I gained a lot of insight about laser cutting, 3-D printing, and casting. I’d also never CNC machined before. I particularly enjoyed TA Alex Crease’s lecture about design materials and scalability.
The course staff were also extremely approachable and patient. Andy let me take the class even though one of my Harvard classes overlapped with a weekly lab, and trusted me to make up lost time outside of class.
Designing a cactus lamp
This project drove home two vital design principles:
“Keep it simple, stupid” ~Prof Amos Winter
“El huevon trabaja doble”02 translation: A lazy person works twice ~my dad
I started with a bold and complicated lamp design. I’m from the Sonoran Desert, have inked desert plants into my skin, and wanted to do something that mirrored desert fauna.

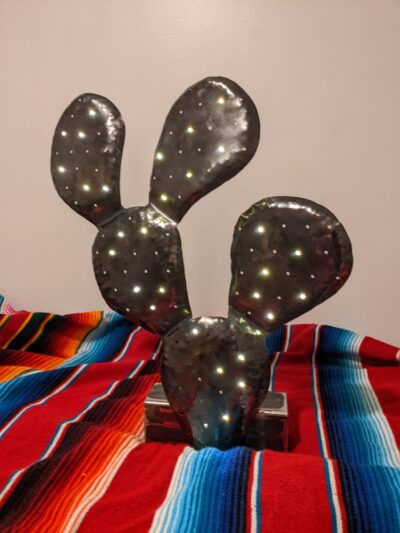
prickly pear
I like rustic designs that focus on craftsmanship. I’ve done the most work with metal, so while I had some initial thoughts about doing the base of the lamp in wood, I knew I wanted the body to be metal.
My first design, Design A, had so many desires:
- a 3-D metal structure that could be viewed from all sides, like the trend in Neoclassical sculpture
- with adjustable leaves (nopales)?
- flowers cast or 3-D printed in resin that encased lights
- thorns, also resin, that showed tiny lights
- a base that is metal or wood
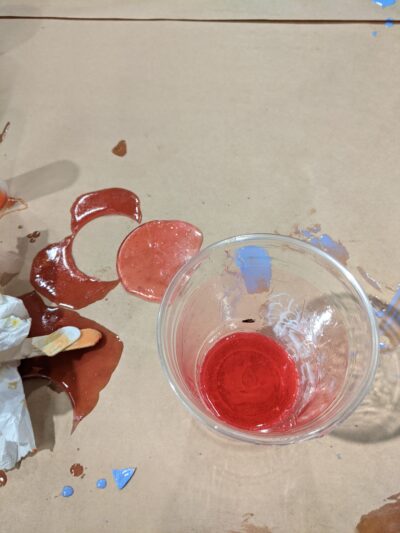
sample hardened resin — fairly translucent, kinda pretty
spoiler alert: this was over-ambitious. It looks simple enough, and probably could be done if I had more time; but there were lots of constraints that cropped up. Resin flowers and a metal base: how will you connect them? How will you insert the many lights? Can you design an electrical framework to power the lights, or do you need a bunch of separate plugs? How will you access the wiring within the metal frame? The list of questions went on.
I quickly ran into an issue: having too few design constraints made it difficult to solidify any part of the project.
- I didn’t want to start on the CAD03 computer-aided design for thorns because I didn’t know how wide they would need to be to fit into the nopales
- I didn’t want to model the flower because I didn’t know what type of light I would use
- too many unknowns = impossible to start
Possible solutions:
- Choose a few constraints arbitrarily (ie, download light fixture CAD designs) and use those to CAD out the entire design.
- CAD and laser cut the base structure, forcing yourself to commit, and move from there.
- personally I think this was the less choice option, however it is the one that I chose. Next time, I will CAD the entire model before making cuts.
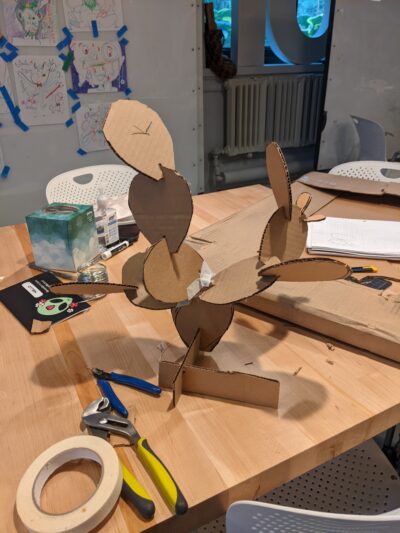
we ideated first with cardboard — cheaper than steel, faster to cut
Forging the Body
I knew I needed to test some materials, so in the midst of my design crisis, I whipped up a sample
nopal04
Spanish for prickly pear pad
and went to the Fabcreator laser cutter at
IDC05
one of my favorite makerspaces! Consider this blog a tour of labs at MIT
. This laser cutter is special because it can cut metal, and if you ask nicely, sometimes you can do it for free. 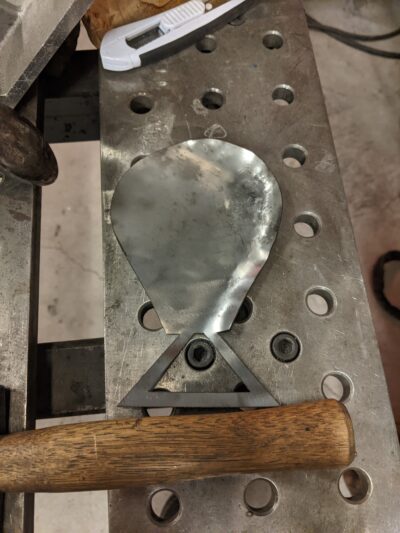
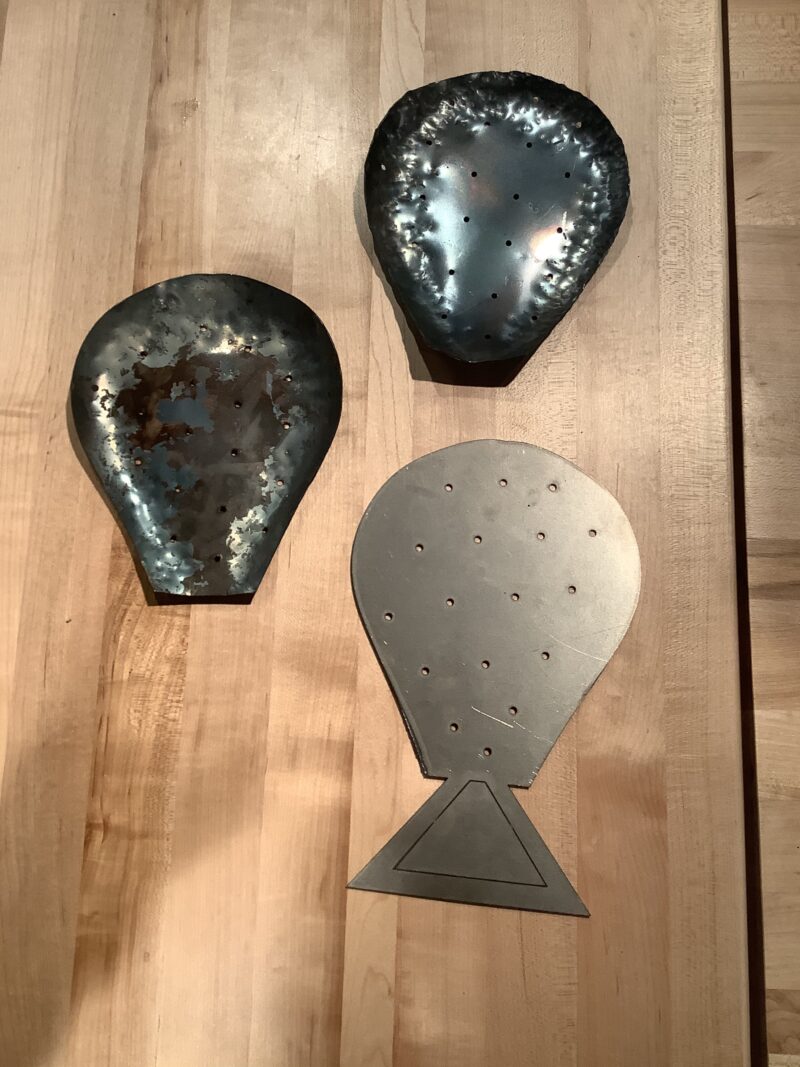
Then I took the nopal to the Hobby Shop. I had an idea of cutting a nopal-shaped dip into a thick plate of steel, which I would use as a mold to hammer my piece into shape. However, there were no sufficiently hefty steel plates to be found, so instead they directed me to the blacksmithing equipment. I hammered it cold, and learned that doing this was possible, albeit slow.
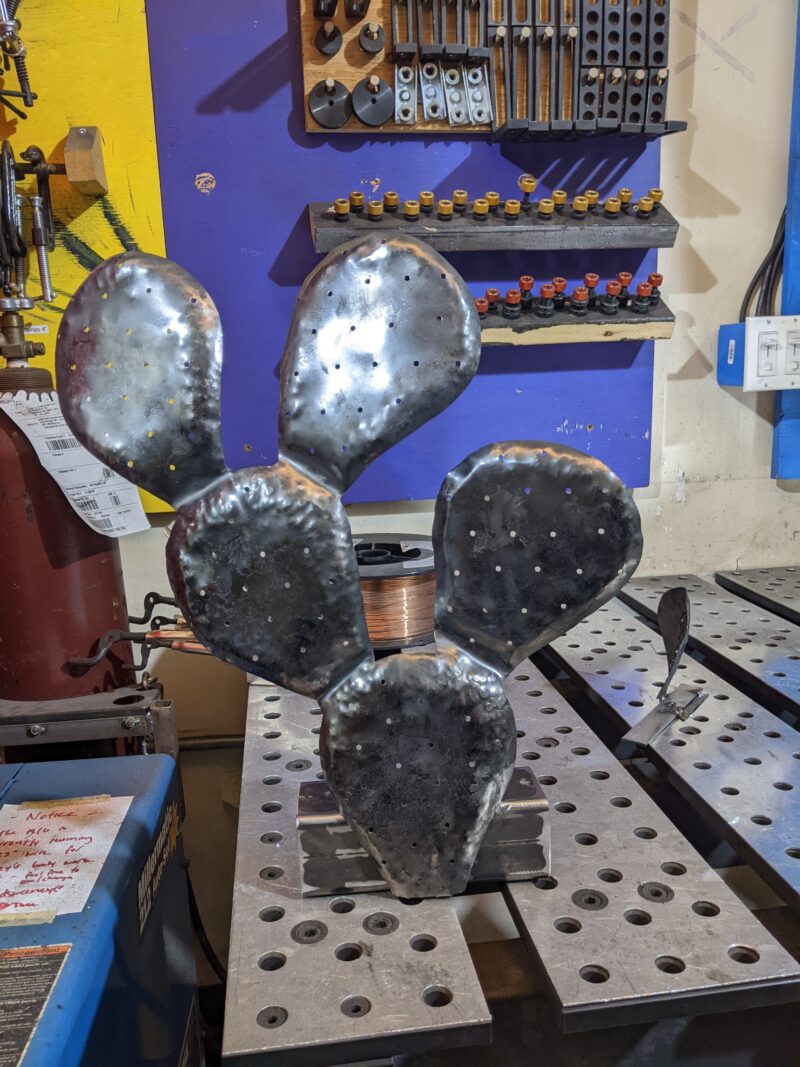
Satisfied that hammering sheet metal wouldn’t be a total disaster, I outlined and cut the base.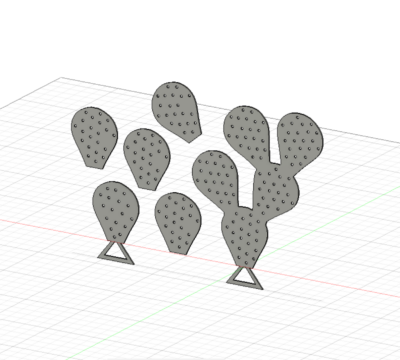
I had intended to weld the single pieces on to the back of the big pieceTl;dr lights were not meant to happen — I did some experiments with clay, silicon molds, and resin, and realized I would need to invest more time into molding and casting before I could design flowers that satisfied me.
But the metal base was going well. I’d cut it in steel, which is stiffer, but easier to weld. I then went to open forge, chucked it in the fire, and hit it with the hammer a lot of times. Cue montage.
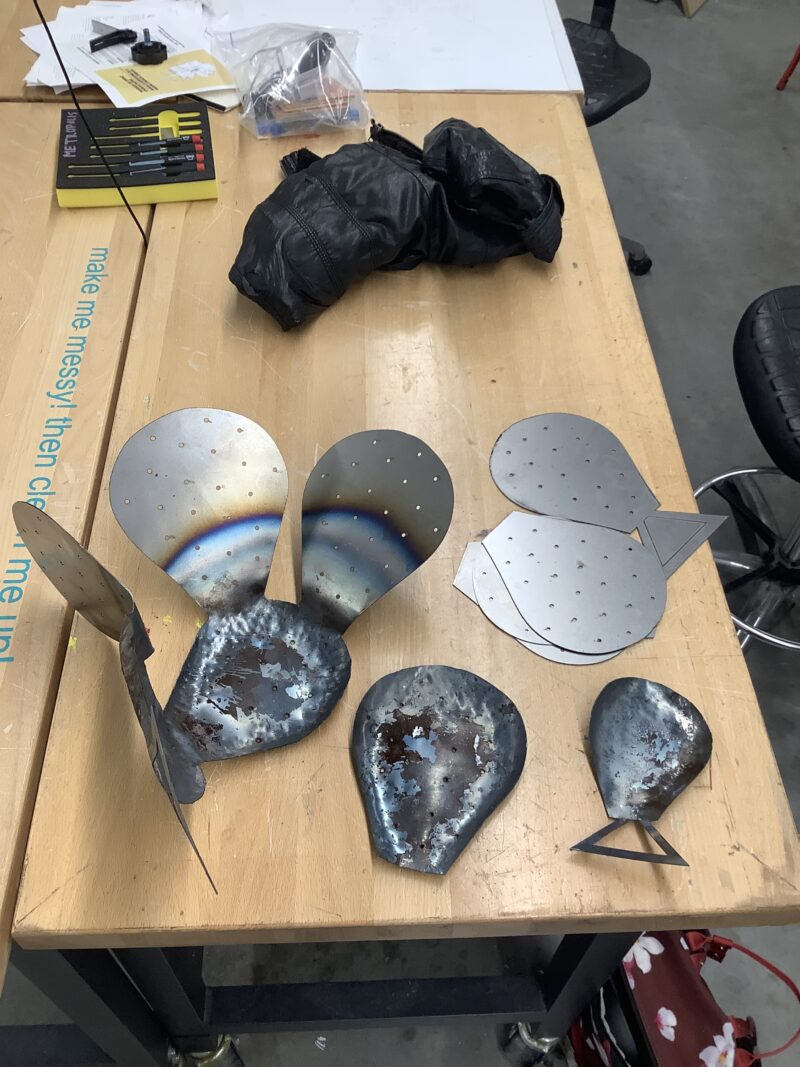
I learned a *lot* about forging sheet metal during this process — namely that it can be quite annoying to work with. Unlike working with thicker pieces, sheet metal deforms quite easily, so you have to be careful not to mess it up and undo your own work.
Forge instructors James and Mike kindly let me hang out for several extra hours to get the project done!
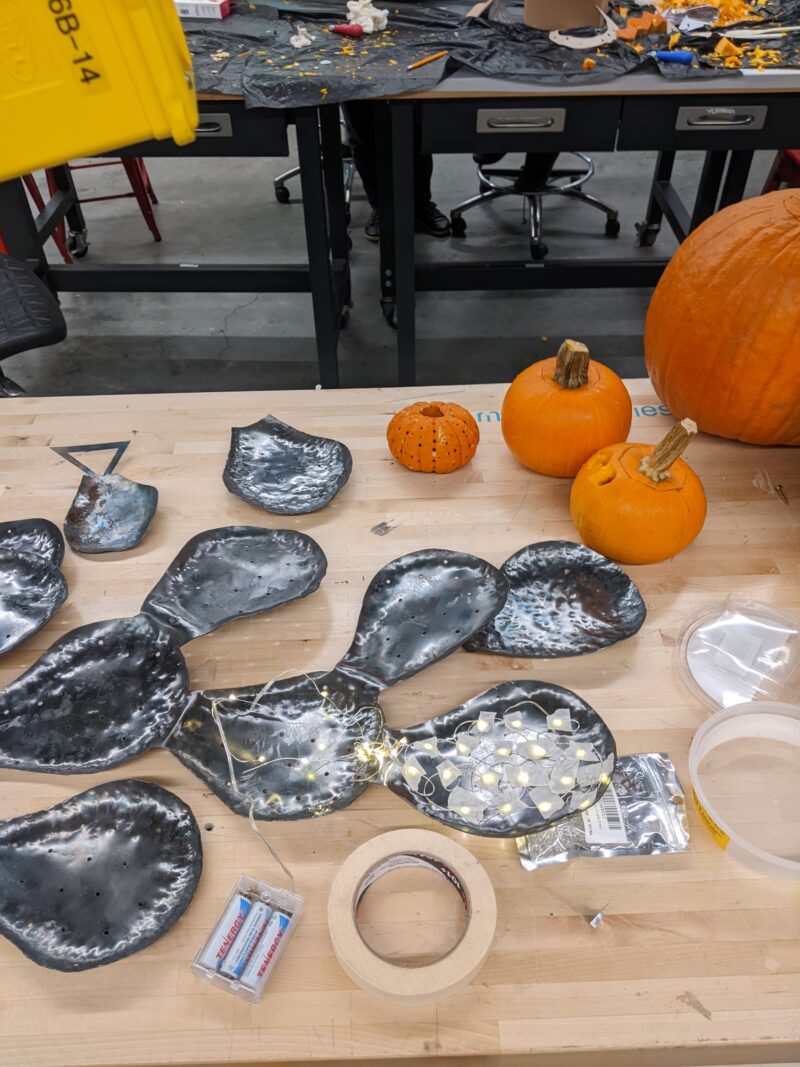
However, fitting the individual nopales into the big structure wasn’t going swell. The sides deformed more dramatically than the base or top during forging, so nothing fit perfectly. I think this could have been fixed with a mold to hammer into — although I did love the organic, unique shape each nopal took on, so maybe there isn’t need for a fix.
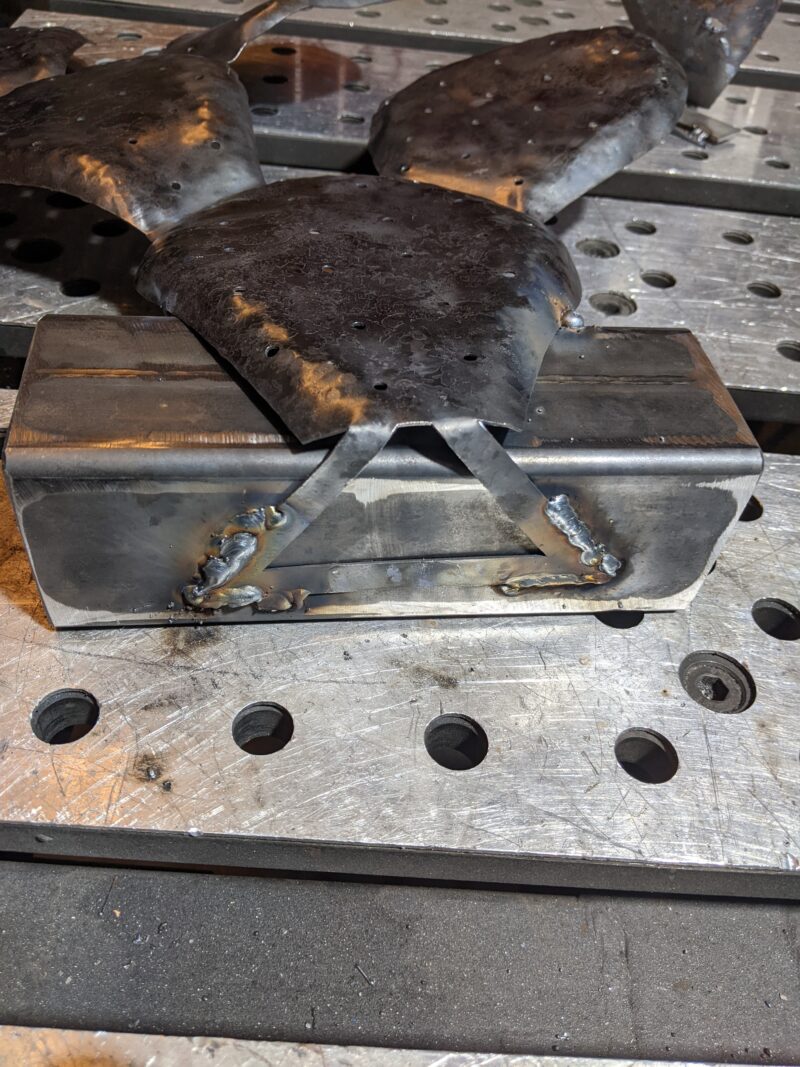
I opted to only use the front piece, going for a more simple, polished look.
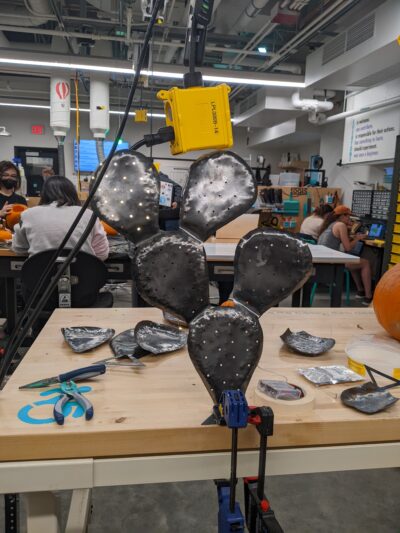
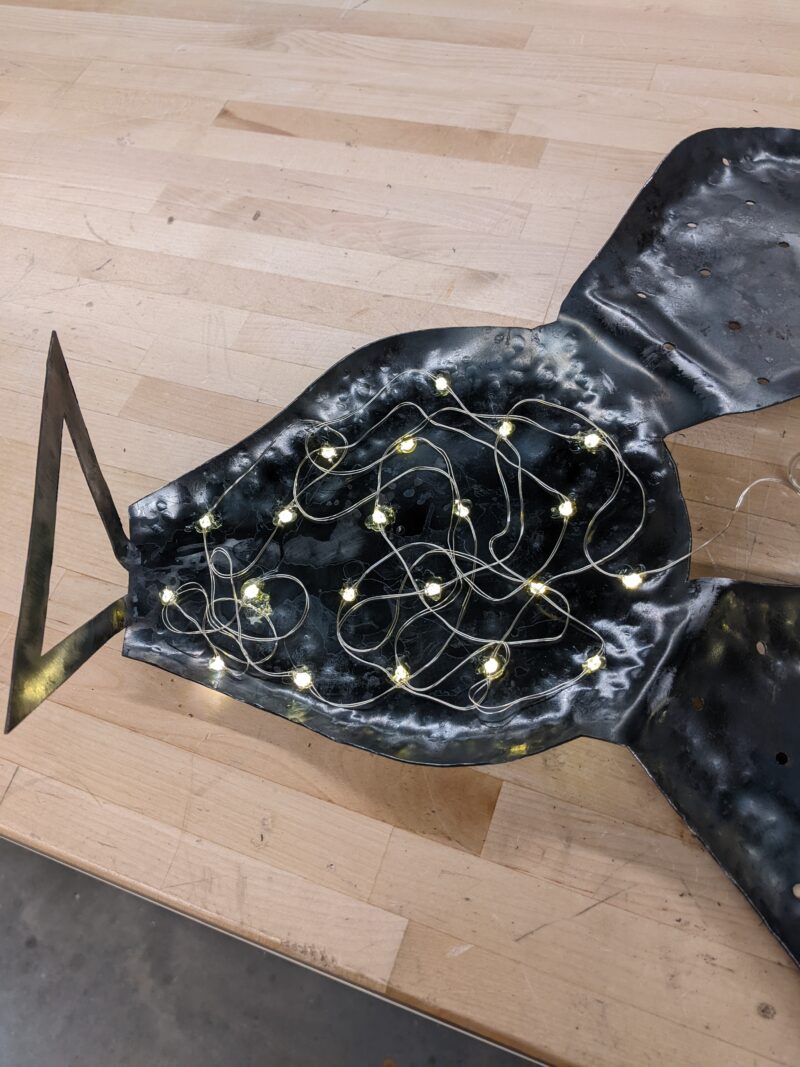
front piece, clamped to the table
Let There Be Light
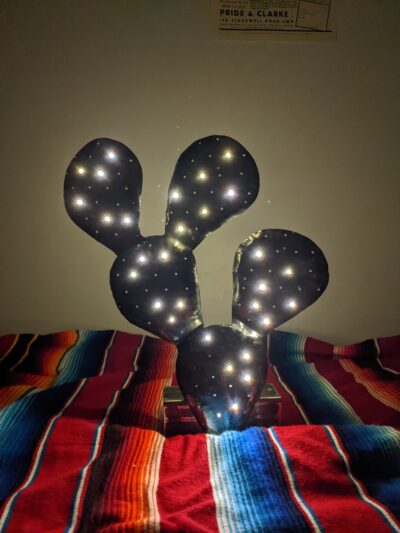
I decided to go with fairy lights and hot glue them into the holes of the nopales. The hot glue works as a diffuser, and there was just one on/off switch, which was good for simplicity.
Next came the base. I had simplified a lot, from removing the resin flowers and spines, to taking away the back; now the lamp was just metal. I had the option of adding a wood base, but at this point I was on a roll with metal.06 also at this point the lamp was due in 16 hours, and I wanted to stick with processes I knew I found some scrap square tubing in the practice bucket of Metropolis, then scurried over to D-Lab to weld it on.07 there is welding equipment at Metropolis, but I haven't been welding-certified in that lab yet
Welding sheet metal onto thicker metal is tricky, because thin metal melts much faster, and it’s easy to burn holes in your glorious new project. I practiced on my prototype pieces, figuring out feeds and speeds. Then I clamped down the actual piece, pulled on my big bulky gloves, set the welder tip an inch from the fairy lights I’d just hot-glued on, then realized my mistake and sighed. Hot glue fumes at 3000 °F might be bad, and starting a fire would be so embarrassing.
Fortunately hot glue is forgiving, so I just ripped off the fairy lights and set to welding.

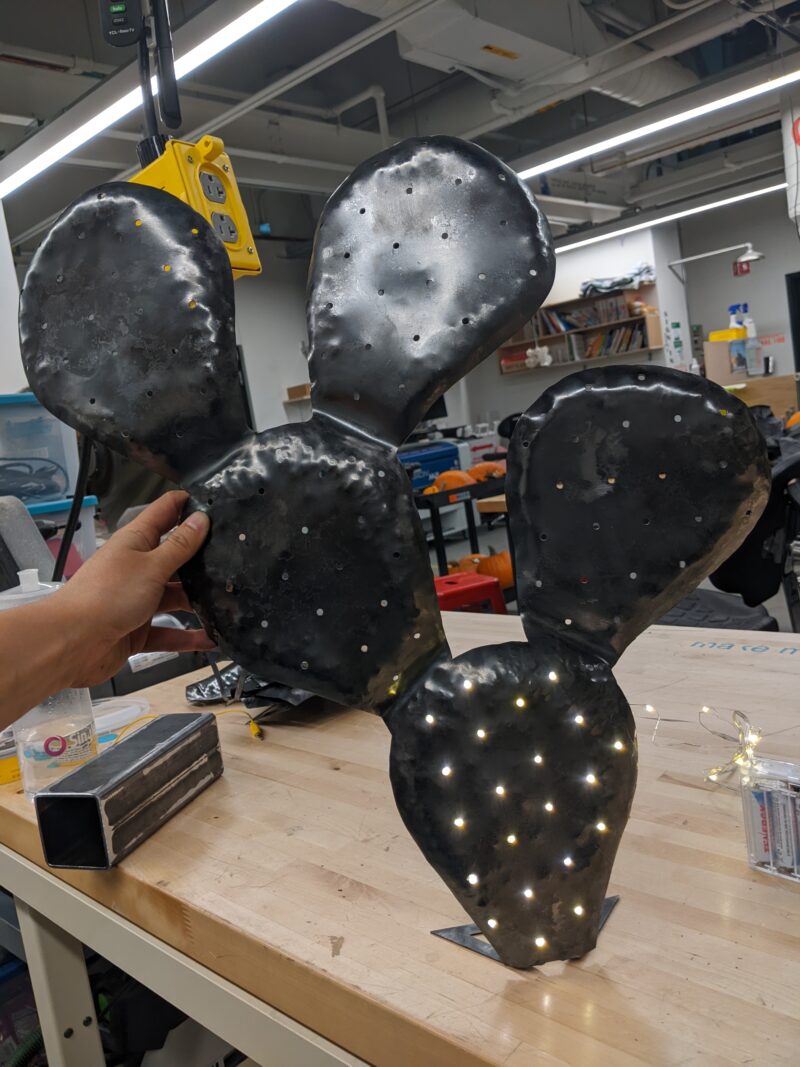
Welding done, I hot-glued my lights on again, then killed the overhead lights and turned my lamp on.
All in all, I enjoyed the process of this lamp quite a bit. I deepened my metallurgy knowledge in forging and welding, since I’d rarely worked with sheet metal. I also re-discovered the joys of hot glue; it’s been a feature of my costumes since.
I love how the light reflects off the wall behind the lamp and illuminates its shape.
reflections
I wish I had devoted more time to iteration — I feel that more components such as flowers could have been added if I spent more time developing a way to incorporate them with the main structure. I also think I could have incorporated more new skills I’d learned during lectures in this class, rather than sticking with a material I know well.
Also, I keep skipping the step of fully CAD modeling my designs. I usually CAD a few core pieces and understand the rest mentally, which usually works but will bite me when my designs get more complex. In this case, I didn’t know how to model the metal distortion that comes with forging,08 or frankly if doing so is possible; the process is fairly organic, and perfectly repeatable only to the very skilled so I didn’t think a full model would be especially useful. My goal for my next project is to CAD the entire thing.
The Showcase
There are about 20 people in the class, and we’d spent the past half-semester designing and working alongside each other. It was joyful to see everyone’s final project and hear about their inspiration and process.
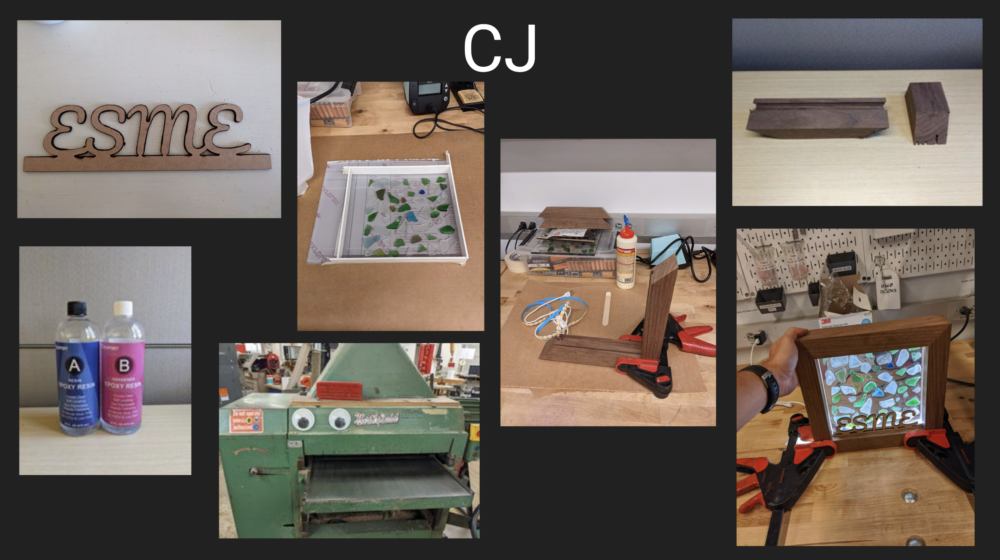
CJ: Lamp for 1-year-old daughter Esme
CJ used sea glass in resin with a wooden frame and lights around the edges to create a lamp for daughter. He discussed trying to incorporate as many new techniques as he could into the lamp, including joinery, laser-cutting, and resin. Pictured above is a machine in the Hobby Shop for smoothing out wood.
Andrea: pokemon lamp
Andrea 3-D printed a pokemon lamp in soft blue and white colors; it looked almost squishy, and very cute.
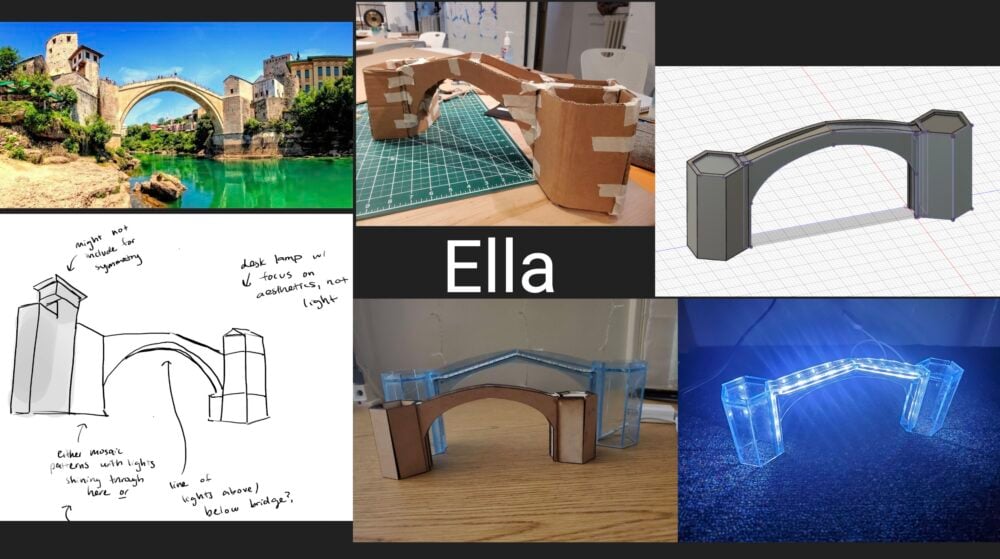
Ella: lamp of the Mostar Bridge
Ella designed her lamp to look like the Mostar Bridge from her home country of Bosnia.
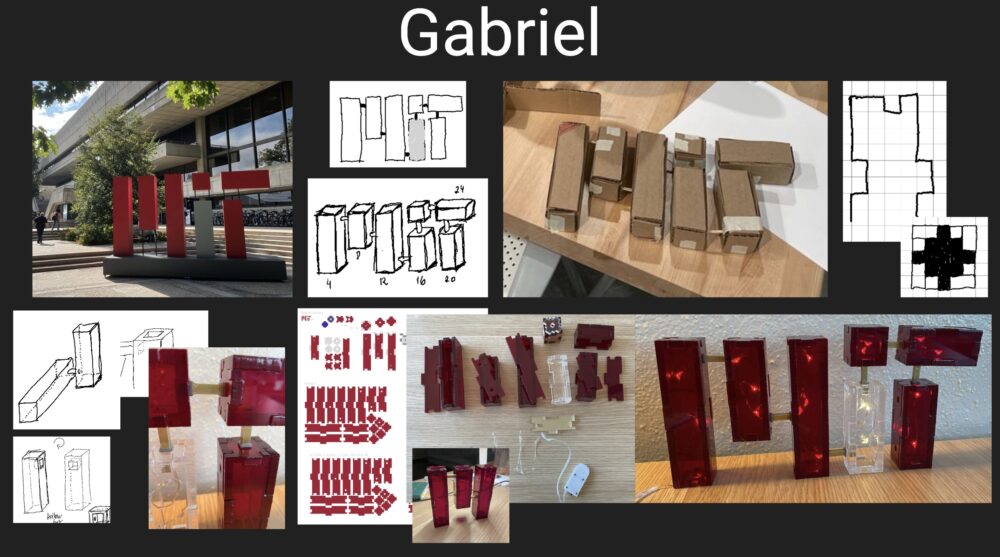
Gabriel: MIT logo
Gabriel laser-cut the body of this lamp and strung lights inside.
Ilani: galaxy lamp
Ilani laser-cut a galaxy shape of acrylic and hung 3-D printed stars from it. The lamp hangs from the ceiling.
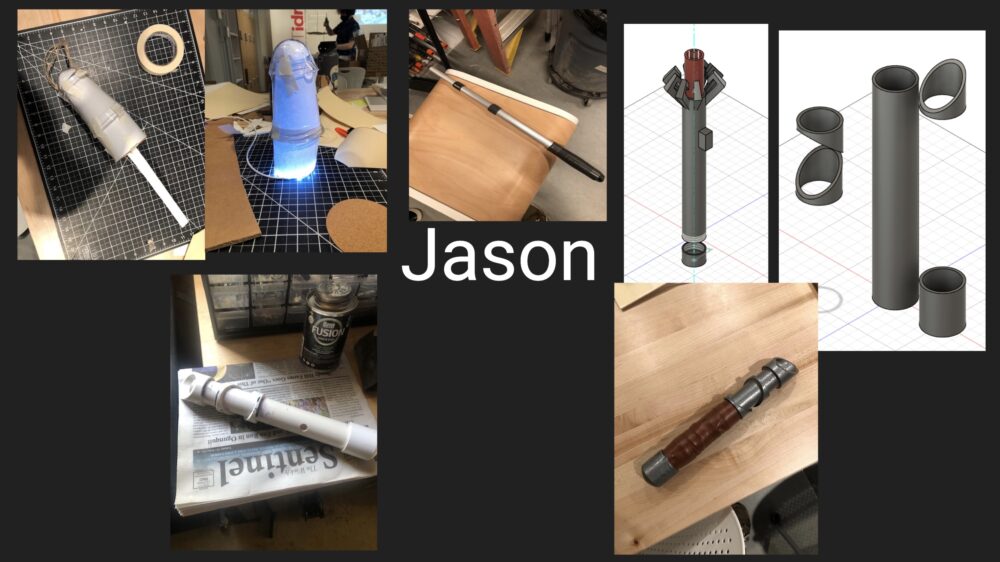
Jason: Light saber for son
Like CJ, Jason also designed with a particular audience in mind: his 5-year-old son. He talked about the process of interviewing his client to figure out what he wanted, and then the process of trying to make the lamp indestructible enough to survive a 5-year-old.
The light saber is 3-D printed and has a light inside.
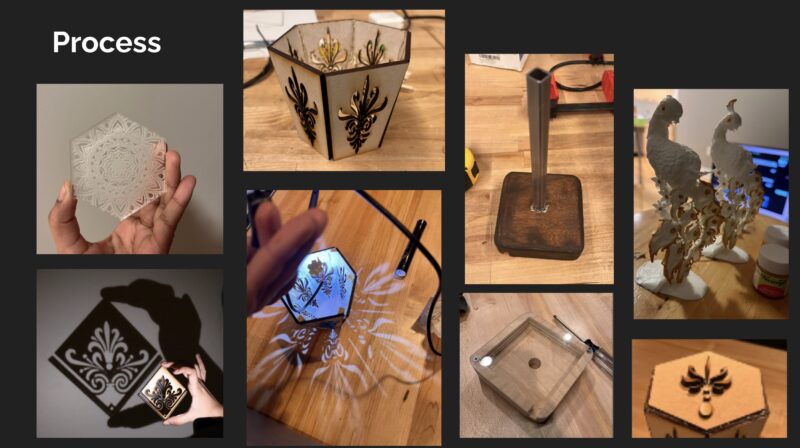
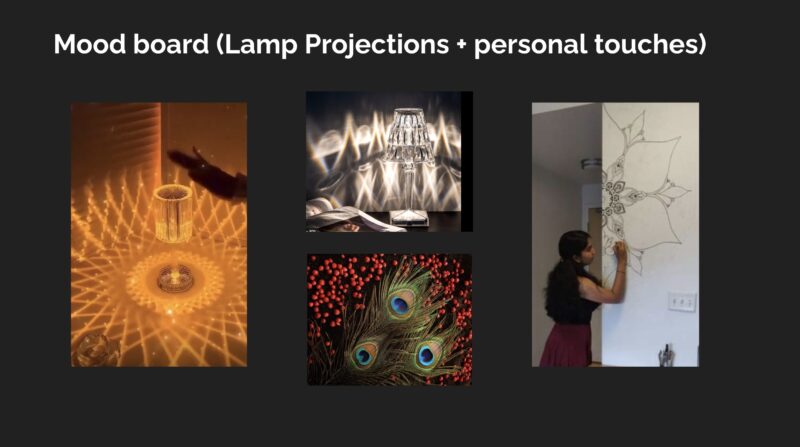
Krishna: peacock lamp
Krishna focused on light projection and did a lot of iteration and experimentation about how light would scatter through different cuts of wood. Her peacock feather design is inspired by Krishna the deity, who wears peacock feathers.
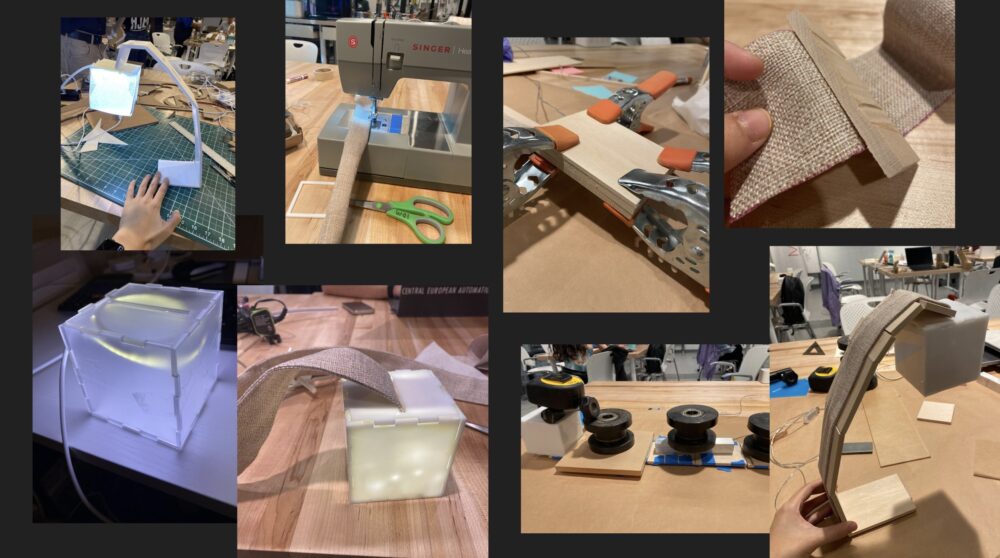
Lydia: Scandinavian-inspired lamp
Lydia focused on simplicity and made a lamp that folds into a box for travel, or unfolds and counter-balances. She used only wood and fabric, and focused on artfully designing the spacing for the fabric and wood pieces; her work has a lovely simplicity.
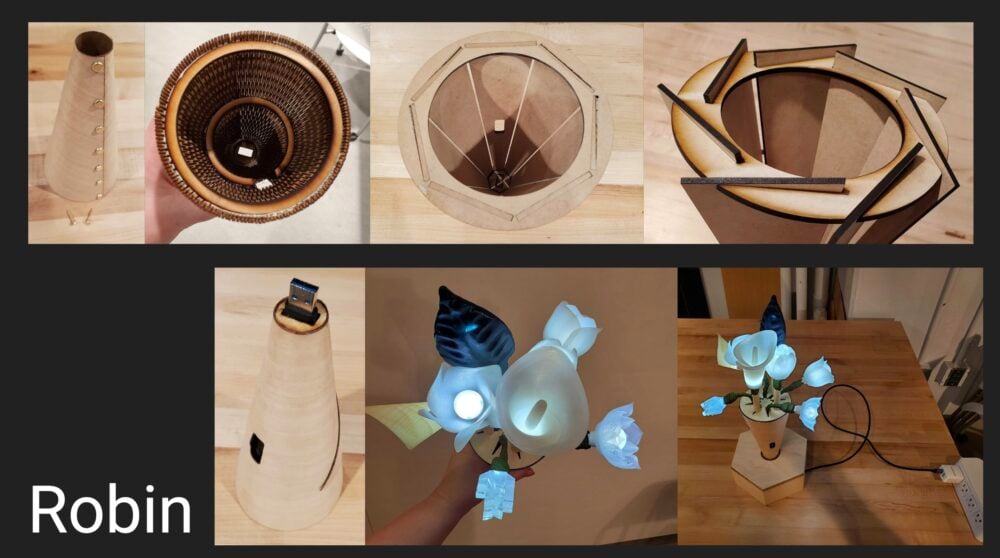
Robin: bouquet with removable flowers
Robin’s lamp is a bouquet with flowers that are connected to a charging port, so you can remove each individual flower depending on how much light you want. You can also pick up the whole bouquet and carry it around like a torch!
I saw Robin iterate each piece of the lamp several times; her process was cool to watch. She tried out different cast and 3-D printed designs for flowers, and the bouquet base apparently took several different takes. She bent the wood after boiling it to get a continuous curve.
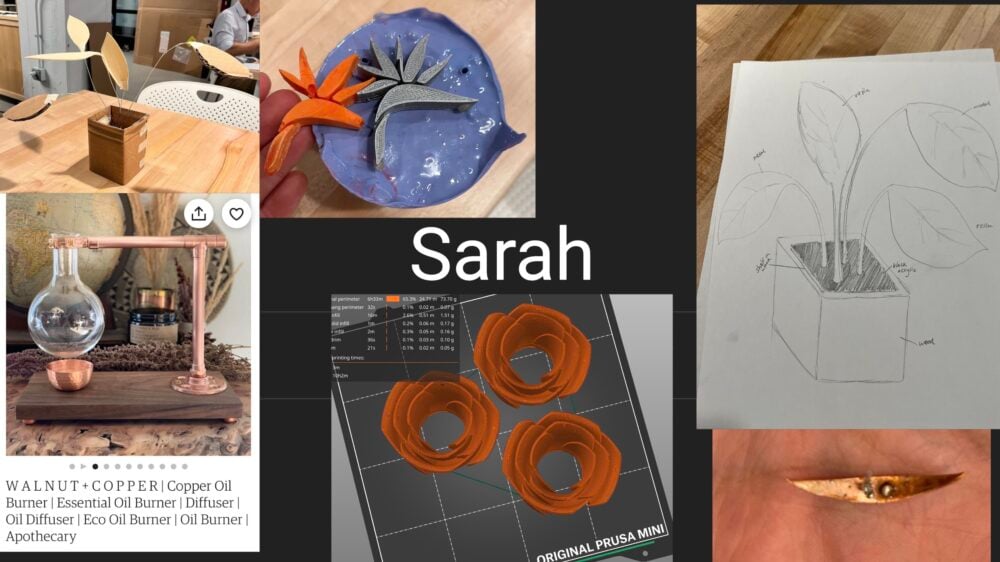
Sarah: copper bouquet
Nearly all of Sarah’s lamp was copper; I loved the look. She talked about the difficulty of working with copper, which work-hardens over time.

Sruthi: cactus lamp in a box
Sruthi 3-D printed a cactus, then made a resin cast with a hollow inside for the light. She discussed the process of laser-cutting the box sides and ensuring everything fit, as well as her design for hinges.
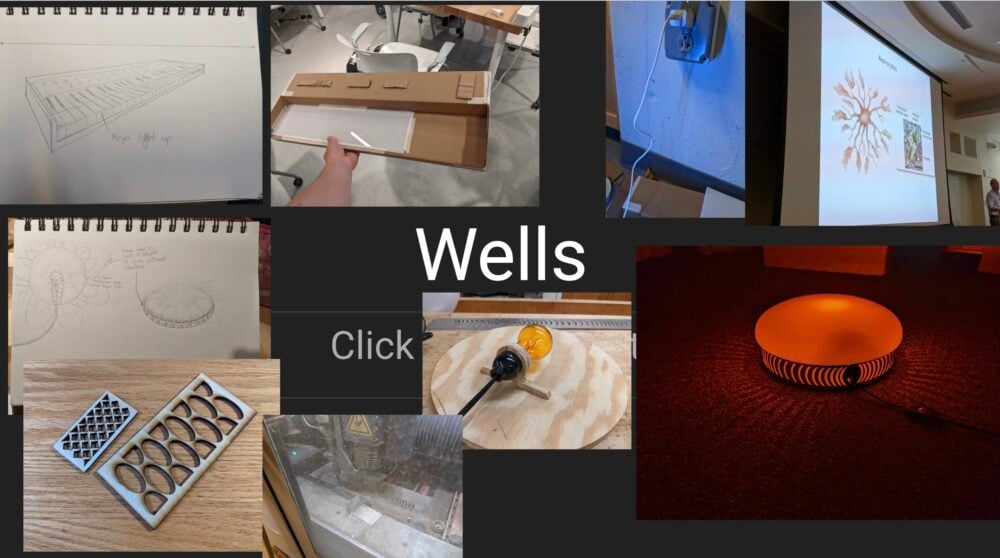
Wells: shadowcasting
Wells focused on shadows and light, and like Sruthi, did a lot of experimentation with differently sized holes in wood/metal and how point sources of light would play with those holes. He waterjetted a base for a light that threw lines of light and shadow all around itself.
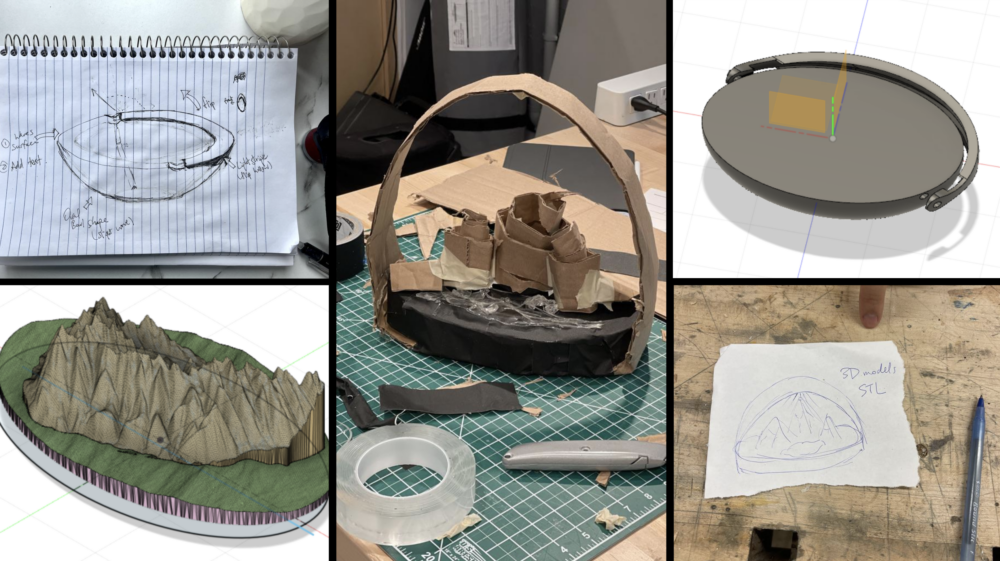
Yvette: light on a mountain
Yvette is a photographer, and drew inspiration from photos she took while hiking the Swiss Alps. She made a lamp that played with shadows cast on mountain ranges by 3-D printing a mountain range and designing a light that rotates across the mountains like the movement of the sun. The mountain range is also interchangeable with other mountain ranges.
I loved hearing how she used topographical maps to CAD the mountain range in Fusion 360, so her printed mountains are accurate representations of the actual mountain range she hiked.
I was so inspired by the range of approaches, from focusing on audience, to trying to use all of the skills we recently learned, to playing with light and shadow.
If this class sounds interesting to you, there is a 12-unit version with greater focus on electronics being offered next spring!
- Integrated Design and Management back to text ↑
- "translation: A lazy person works twice back to text ↑
- computer-aided design back to text ↑
- Spanish for prickly pear pad back to text ↑
- one of my favorite makerspaces! Consider this blog a tour of labs at MIT back to text ↑
- also at this point the lamp was due in 16 hours, and I wanted to stick with processes I knew back to text ↑
- there is welding equipment at Metropolis, but I haven't been welding-certified in that lab yet back to text ↑
- or frankly if doing so is possible; the process is fairly organic, and perfectly repeatable only to the very skilled back to text ↑