
MIT-vangelion: Behind the scenes! by Jenny B. '25, MEng '26
how we made the Pi Day 2023 video!
We–Jebby, Jenny, Kai, and Isbla–animated this year’s Pi Day video! If you haven’t checked it out yet, lookie here. To achieve this, we ate nothing but ramen noodles and slept in the basement of Stata like 6.14101 Robotics: Science and Systems students /j (but also a bit /srs towards the end (mostly Isbla and Kai tho)). Below is a blog post about the behind the scenes process featuring OpenToonz 🤮, the t h i r d dimension, and lots of Neon Genesis Evangelion.
Kai sums up these 2 months perfectly:
Storyboarding
Isbla: I actually didn’t know that I was going to be in charge of this year’s Pi Day video until Karen, one of our lovely admissions officers, said that they needed someone to do it this year because Audrey was going to be in Wales. Initially, I was like “haha what if MIT had an anime opening because there’s so many weebs in this school…jkjk” but then I was like “… unless??” So now we have a Pi Day video in the style of the Neon Genesis Evangelion opening–all because one weeb decided it was a “funny” “spectacular” and/or “fresh” idea.
The video goes kinda fast and is abstract02 probably easier to animate hehe and also in the spirit of the original NGE anime opening sometimes, so it might be hard to discern a storyline, but there indeed is one.
Basically, Giant Aliens, called “angels” in the NGE universe, have come to steal MIT’s silver tubes due to their magical properties, i.e. the ~magical~ acceptance letters inside them. Stu and Tim gather MIT students to defeat the angels using the MIT cheetahs, which are a parody of the Evas lol.
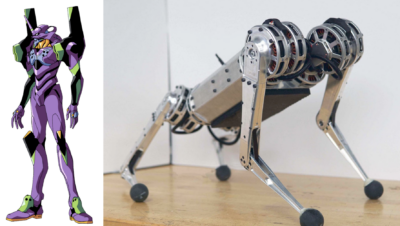
Left is a giant robot/an Evangelion from NGE, right is an MIT cheetah. There is some resemblance…?
The dude with the brown hair is a prospective student who develops magical powers and shatters Ramiel, the blue, octahedral angel who is also the best girl in NGE /srs.
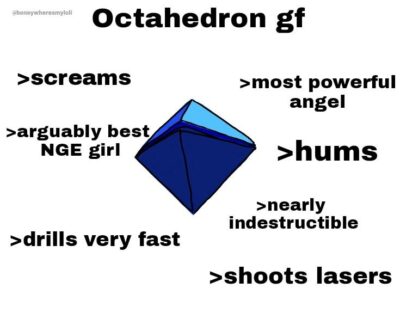
ramiel is best girl
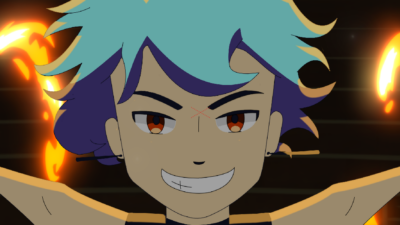
One of the students is last year’s Pi Day video’s protagonist, who uses their fire spinning prowess to defeat Matariel, the spider-lookin’ angel after Stu blinds it with some smoke spouted from a silver tube. Tim defeats Sachiel, the angel with a red orb, by releasing a magic rope from his silver tube and tripping Sachiel. Here are screenshots of my Google Slides presentation to Karen that demonstrate that my head is mostly full of limp scribbles.


Animating
(A note on OpenToonz)
Isbla: We used OpenToonz, which is the free, open-source version of the software that Studio Ghibli uses, to do most of our animation because Procreate’s animation software looked a bit sus. Basically, it’s a digital painting program with a t h i r d dimension: time, in the form of video frames. You can do fancier things like define keyframes and interpolate between them, as well as define the duration of frames and layers.
The moment I saw “Studio Ghibli” on OpenToonz’s Github repo, I was hooked, but then I was /devastated/ to learn that OpenToonz is kinda stinky because it keeps crashing for no reason and doesn’t have the greatest effects library implementation :( . But it’s definitely good for beginners! I’m just gonna do everything in Blender’s grease pencil from now on because I’m also interested in learning 3D stuff…
Kai: OpenToonz was actually mostly fine for me; it only crashed once! It probably kept crashing for Isbla because she did all the rendering in it; I was just using it to color. I did run into a few issues owing to its stunningly bad documentation, but I think for personal animation projects in the future I’ll likely use OpenToonz; it’s definitely capable enough for simple animations.
Character Designs (Isbla, Kai, Jebby)
Jebby: If you’ve seen last year’s Pi Day vid, you might recognize who the firespinner is!


I drew up the character designs for both the tech guy and the student who gets their silver tube in the end. I was definitely going for a cyberpunk vibe with the tech dude.
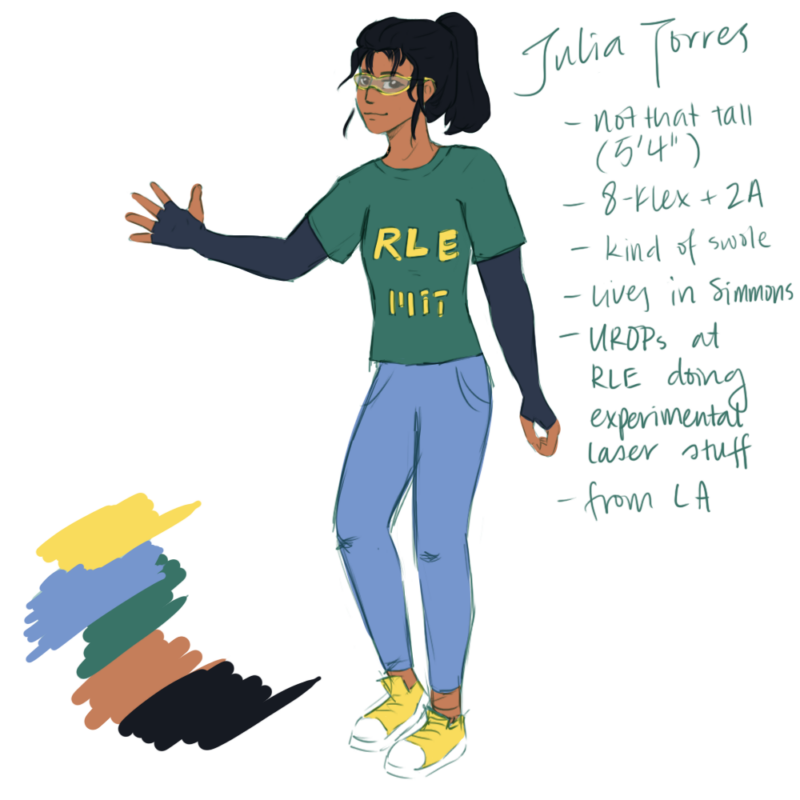
Kai: I designed the girl who operates the giant laser! She UROPs03 Undergraduate Research Opportunities Program at the RLE04 Research Laboratory of Electronics and uses their laser to lead Matariel astray >:3 Her design was heavily inspired by someone I knew in high school whom I really looked up to as a person and an engineer. Although she didn’t apply to MIT, I always felt that she would have done well here.


Line Art (Isbla)
I’m proud and terrified to say that I did all the animated line art for the video! I thought assigning this to one person would allow the drawings to be consistent, but honestly, I really should’ve done mostly the keyframes and split the in-betweening with someone else because I probably had to draw >600 frames. I am also VERY much a beginner at animation, so I think I’ll definitely be faster at this if I were to do it again.
There’s many guidelines on how to animate, and I devoured many a video on “how to not make anime hair look like turd.” Here’s a couple principles for doing 2D animation that are especially important to the making of this video:
> Pose to Pose + Straight Ahead
There’s two main animating processes: pose to pose and straight ahead animation.
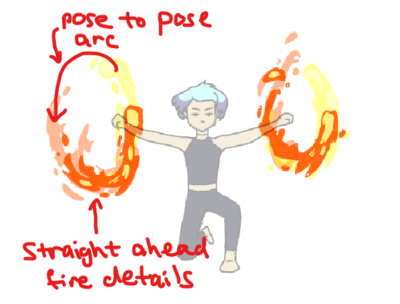
Pose to pose is when you define the key frames of your action sequence and animate the halfway points recursively like a binary search. This is good for planned motions like an MIT cheetah pouncing, where you know how your animation is going to look at the major turning points.
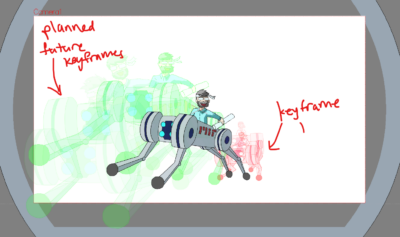
Straight ahead animation is when you see where the animation takes you, i.e. you draw the key frames sequentially without planning the start and end of the action. This is great for drawing highly entropic things like fire, where it’s not productive to plan out the start and end of the sequence.
> Anticipation
The concept of anticipation is important in animation to emphasize actions that would otherwise look rigid. To generate anticipation for a certain action, you generally want to animate an action that is the “opposite” of the main action before the main action. For example, check out this clip of our prospective student shattering Ramiel. He doesn’t just raise his hand immediately, but hunches down in anticipation of the action. This brings more life to your animation, but for some reason looks really cartoonish if you do it irl? I think it’s because animations have to work harder to convince us that they are good imitations of real life, and therefore benefit from exaggerated actions.


> Squash and Stretch
Squash and stretch are also important guidelines that make animations seem more alive, and it’s what it sounds like. I generally don’t see it employed in anime, so I decided not to go too ham on this. However, Western animations use it a lot:

Coloring (Kai)
Since Isbla and I were the two people in our group with drawing tablets, we decided to split up the animation work into lineart and coloring. I got to do the coloring which was very fun! It was also less intimidating than doing lineart for 600 frames by hand lmao.
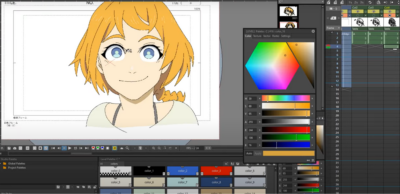
Once Isbla finished the lineart for a scene, she would send it to me and I’d open it in OpenToonz. On each frame, I used colored lines to denote regions of shadows, highlights, or different colors (I don’t have an example of this from the pi day video since I colored over all the scenes already, but here’s roughly what it looks like in OpenToonz at this point – screenshots taken from the tutorial video I watched to learn to color):
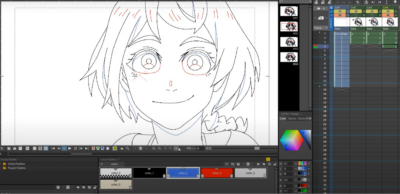
Then you fill in each region with the corresponding color and clean things up, and yayy the frame is done :)
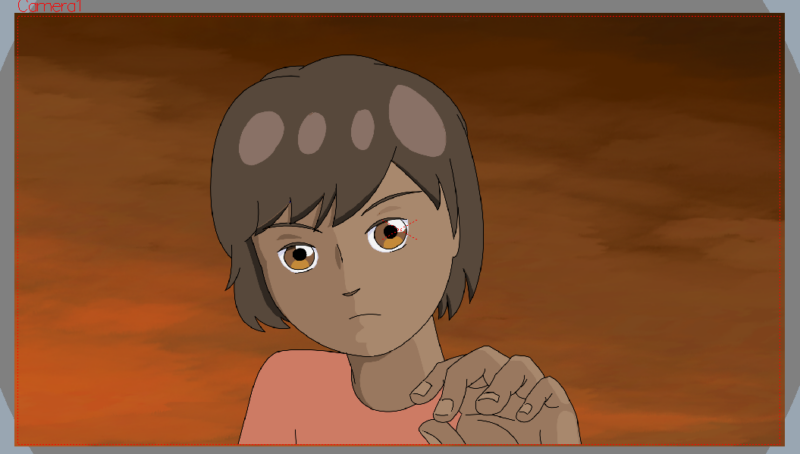
I went sort of overboard with highlights/shadows in some scenes, but it was really fun to see things turn out smoothly. For instance, I really enjoyed how the prospective student head turn sequence turned out, as I wanted to make it look like they were turning towards the light and I think that effect was accomplished.


Backgrounds (Jebby)
I’ve already seen most of MIT’s past Pi Day videos. They’re freaking awesome, and the people who worked on them are freaking awesome. So when I was asked if I wanted to work on this year’s Pi Day video, my answer was an obvious YES. When I learned that this year’s vid was based on Evangelion, my answer was a DOUBLE YES (I am an Evangelion enjoyer).
I chose to work on backgrounds for two reasons:
- Practical reason: I use an iPad and the Procreate app for digital art. Like Isbla said, Procreate’s animation feature isn’t as fine-tuned as industry-grade animation software like OpenToonz, so it just makes the animation process a lot harder than it already is. On the other hand, OpenToonz isn’t available for the iPad, and I don’t have a drawing tablet that I can hook up to my computer. But although animating with Procreate has its share of unnecessary obstacles, it’s great for making still images.
- Personal reason: I have a bad habit where I straight-up refuse to do backgrounds whenever I draw something. It’s my weakness. Most of the stuff I draw are a bunch of characters just floating in the void, and any attempt at a background usually doesn’t turn out that great. This was a good chance for me to challenge myself to draw actual, complete backgrounds. Do they still need some improvement? Definitely. But I’m really proud of myself for the outcome!
The process itself was pretty straight-forward—I started off with a sketch, then line art, added flat coloring, and then some shading and fancy rendering.
BLENDERRRR (Jenny Z)
AAAAAAAAA I remember back in 2018 (I took a gap year, I know I am O L D) I binge watched all the pi day videos up to the BB-8 one as a source of comfort as I waited for decisions so I definitely wanted to give back once I got here. In freshman year, two of the upperclassmen (Jamie ‘19 and Kristen ‘19) on my hall were leading The BIG PI(E) and my froshy self decided to get very well acquainted with canned peaches and butter as we prepped the massive pie all night. Now that I’m in my senior year, I’m super grateful I was given the opportunity to come full circle and help this year’s pi day video come to life!
I was mainly tech art support for this project – animating sections in Blender that would otherwise be too tedious/painful to do in 2D. I’ve been self learning Blender since before COVID and it felt great to put my skills to the test and see my hard work pay off :’)
> Intro Sequence
Blender has built-in text and fonts support so I found some fonts similar to the original and it was already looking pretty nice. Each piece of text is a mesh plane, so it was super easy to start off with the PI DAY text angled so the top is closer to the camera for the strong perspective look and then unrotate + move away from the camera to match the movement from the original intro.
I then added bloom by assigning an emissive material to the text and changed the colors of the text by interpolating between the light blue and the orange-red gradient keyframes. I was hoping that Blender would have some option that would allow me to easily add a white border around the text (PI DAY and the 3.14.23 date), but I ended up just outsetting the mesh and assigning a white material to the border.
> Ramiel cell fracture
When Isabella mentioned she wanted Ramiel to break into a bunch of pieces (which would be super tedious to do by hand in 2D), I offered to try to do it in Blender! I knew that Blender had a free Cell Fracture add-on, so it was just a matter of tweaking the settings a bit to get a good distribution of sizes and breakage points.
To get the pieces to explode a bit more naturally (and so I wouldn’t have to keyframe 70 pieces), I took advantage of Blender’s physics system and set each piece as a rigid body. Once they were rigid bodies, I could control their movement by adding Force Fields into the scene – Charge, Turbulence, Wind – and tweaking the values to get the end effect we wanted. To make sure the style didn’t look too different from the rest of the scene, I added line art around each of the pieces using Blender’s grease pencil line art option to keep the 2D look and composited it with Jebby’s beautiful backgrounds!
> Course 6 hologram
The spinning hologram is mostly just me trying to understand how to holographic emissive materials in several different ways – I basically took a cylinder and cut it into these smaller subpanels and put fun hacker things on each of them. I found this amazing hologram shader tutorial by Derek Elliot and thought it was perfect for the course 6 character.
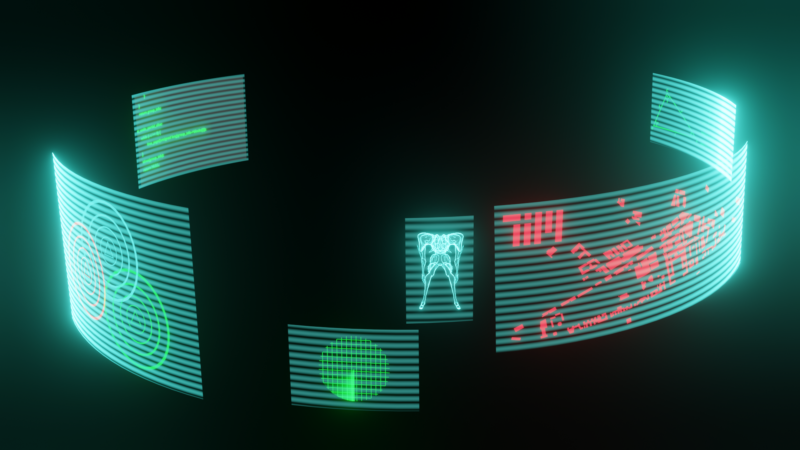
Components from left to right: Concentric circles for triangulation, random scrolling hacker code, radar shader tutorial from Simon 3D, 3D model of Sachiel I found online with the hologram shader, simplified MIT map, trigonometry
> Stata 3D model
I actually used this 3D scan of the Stata Center for a class project last fall so I just did a bit of preprocessing work to make the model easier to work with and fit the style better. I baked all the textures and combined the mesh into one piece so it wouldn’t clutter up the scene and used the same Blender grease pencil modifier to add the line art automatically. I think Isabella did some post processing magic for it to add depth of field and more contrast as well!
> Smoke
I considered using Blender’s built-in particle simulation to do a real smoke sim, but since the rest of the video is much more anime, it would’ve looked a bit out of place. After doing some searching on Youtube, I found this anime smoke and explosion tutorial by Kristof Dedene (highly recommend this channel btw if you want to do any vfx/anime/stylized effect).
I ended up using 4 small smokes + 1 torus to get the end effect. I had them trail after one another and then spread to fill the screen – manually keyframed -_- – but I think it turned out pretty nice! Kristof even covered how to make the smoke disappear (shader magic) which was perfect for the firespinner entrance!
Overall, I had so much fun learning more about what Blender is capable of while working alongside such great artists!
VFX (Isbla)
Tldr; After Effects is poggers, and you can (most of the time) make a bad animation into a good animation with VFX. At first, I played around with the lighting effects in OpenToonz for sooooo long trying to get that anime bloom™ effect, but as mentioned above, OpenToonz is slightly stinky; effects at the edges of fill boundaries don’t render well.
So I had to begrudgingly use After Effects because it’s easier than learning Blender for effects when I had <12 hours to edit the whole video :P; begrudgingly because I would prefer using free, open source software. It turns out I really like After Effects because of its ease of use and endless lighting options. I’ll be very sad when I graduate and no longer have free access to Adobe products. To demonstrate the power of After Effects, here’s a scene before and After Effects.

Also this tutorial is really great for After Effects.
P.S. join the Motion Design Club for After Effects tutorials! Email me ([email protected]) to add yourself to [email protected].
Editing (Isbla)
I used the free version of DaVinci Resolve 16 to edit the video, which for an editing noob like me, was pretty intuitive. And especially since we already had a set soundtrack, it was basically dragging and dropping our animated clips. However, I didn’t know the best format to render in, so there ended up being some pretty obvious rendering artifacts. See if you can spot them! As a note to self, pls change the key frame setting from automatic to every 1 second.
What do we do from here?
Isbla: I think the best thing about this whole process is how much each of us learned– storyboarding, animating, making backgrounds, navigating esoteric software docs, to name just a few. Now we’re all better equipped to make even cooler things in the future :) I for one will definitely be animating some more in the future, so stay tuned!
Check out our other projects!
Jenny Z: @studio57crafts on Instagram
Isbla: @isbla.rt on Instagram
Jebby: >:)
- Robotics: Science and Systems back to text ↑
- probably easier to animate hehe and also in the spirit of the original NGE anime opening back to text ↑
- Undergraduate Research Opportunities Program back to text ↑
- Research Laboratory of Electronics back to text ↑