
welding spiels by Audrey C. '24
metal hot glue gun go brrr
One of my favorite places on campus is the Metropolis makerspace. It’s where I learned how to 3D print, lasercut, weld, and fiddle with electronics. It’s where I realized that I can too can be a “maker,” that makery skills are learnable with the help and support from the community. I really appreciate the commitment Metropolis (and its sister shop The Deep) have put forth towards making, well, making as accessible to the MIT community as possible.
Kind of a tangent, but I want to shout out the fact that Metropolis has also been investing more supplies and equipment towards what’s typically classified as “craft.” This includes embroidering, quilting, crochet, linocut printing, screenprinting, and stained glass. While I’ve loved clothing alterations and drawing all my life, why haven’t I been able call myself a maker until I’ve learned how to operate heavy machinery? I feel like broader maker culture devalues craft as less hardcore and less cerebral compared to stuff like CNC machining. Yet craft requires creativity and getting your hands dirty all the same. There’s undeniably a gendered aspect to how crafting has historically been relegated as a frivolous feminine pastime. Anyways, I’m glad that Metropolis is legitimizing craft as a Real and Cool form of making. I can speak on Metropolis/The Deep because I’m most familiar with them, but many other makerspaces on campus similarly operate under the idea that everyone is a maker.
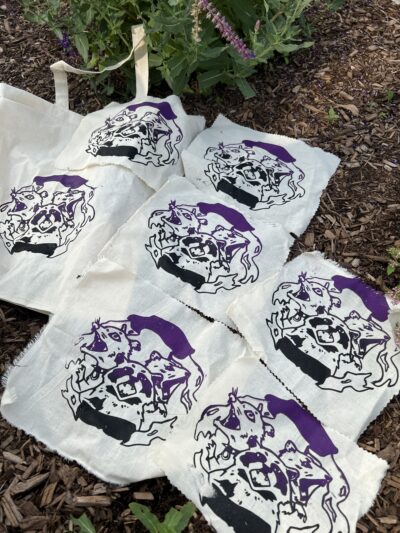
patches i designed during a screenprinting workshop at Metropolis
Mentors, who are student volunteers, have helped me out a ton when I was starting out, so I signed up to do the same for others last year. Within the blogger team, Kano, Anika, and Gloria also mentor for Metropolis! It’s a pretty good gig. We’re typically responsible for running one open hours session and one equipment training session each week. During open hours, MIT community members can come in, work on their thing, and have mentors/staff around to ask for help. In order to learn how to use the makerspace equipment or learn a new skill, people can sign up for training sessions.

we got these super cute polaroids with magnets to signify what people should poke us about!
This past semester, I’ve been running MIG01 Metal Inert Gas -- I will explain more in a bit! welding trainings as my weekly equipment training. Aside from welding being a useful skill (it’s the strongest way to join two pieces of metal), there’s a bit of an art to the technique. I learned how to weld about two years ago to make some steel spinning props (that I have yet to finish, oops). Since then, I’ve gotten more practice through random personal projects that I did actually finish and through informally teaching my friends how to weld. I thought, I might as well formalize this. My friend Isabella is an Established Welding Mentor, so I shadowed her for a few sessions before running my own.
It turned out that a TON of people wanted to learn how to weld. It got to the point where people would ask Isabella and I if there was any way we could squeeze them in, despite all of our scheduled trainings being at capacity. We eventually both swapped out our open hour shifts for MIG welding trainings to double the number of people we could train each week. Even then, demand remained overwhelming. I ran a few extra impromptu trainings if people asked nicely.
This is all to say, that after repeating the welding training spiel two or even three times a week for a semester, it’s been seared into my memory. I might as well dump my training spiels here on my little corner of the Internet.
While I am but a wee hobbyist who can weld well enough to keep my silly little projects together, it’s a skill that people master after years of training through trade school or apprenticeships. I’m sure there’s more precise technique if you’re welding something professionally or higher stakes, like a rollercoaster frame. But for now I hope I can share with you the joy of melty metal.
Let’s begin the training. I introduce myself — I’m Audrey, and I like to weld for funsies. I ask the people here for the training to also introduce themselves and share any particular motivation for learning how to weld. Especially towards the end of the semester, most of the attendees needed to learn welding as a prerequisite for the IAP class where you build a bike. Others wanted to be able to stick together metal for MechE classes, architecture/design classes, aeroastro research, and of course, for funsies.
We make our way to the rack of safety glasses and put them on. They’ll protect our eyes against the hot metal sparks that welding torch sprays everywhere. Even though we’ll wear a welding helmet that will cover our face, there’s still a chance of sparks flying under the helmet and into our eyes. There’s been reported cases where welders who don’t regularly wear safety glasses go in for an MRI and have metal fragments embedded in their eyeballs vibrate, heat up, or even move around… Even though that’s highly unlikely to happen for the average MIT student who likely isn’t welding throughout their 9-5, safety glasses make our chances as close to zero as possible.
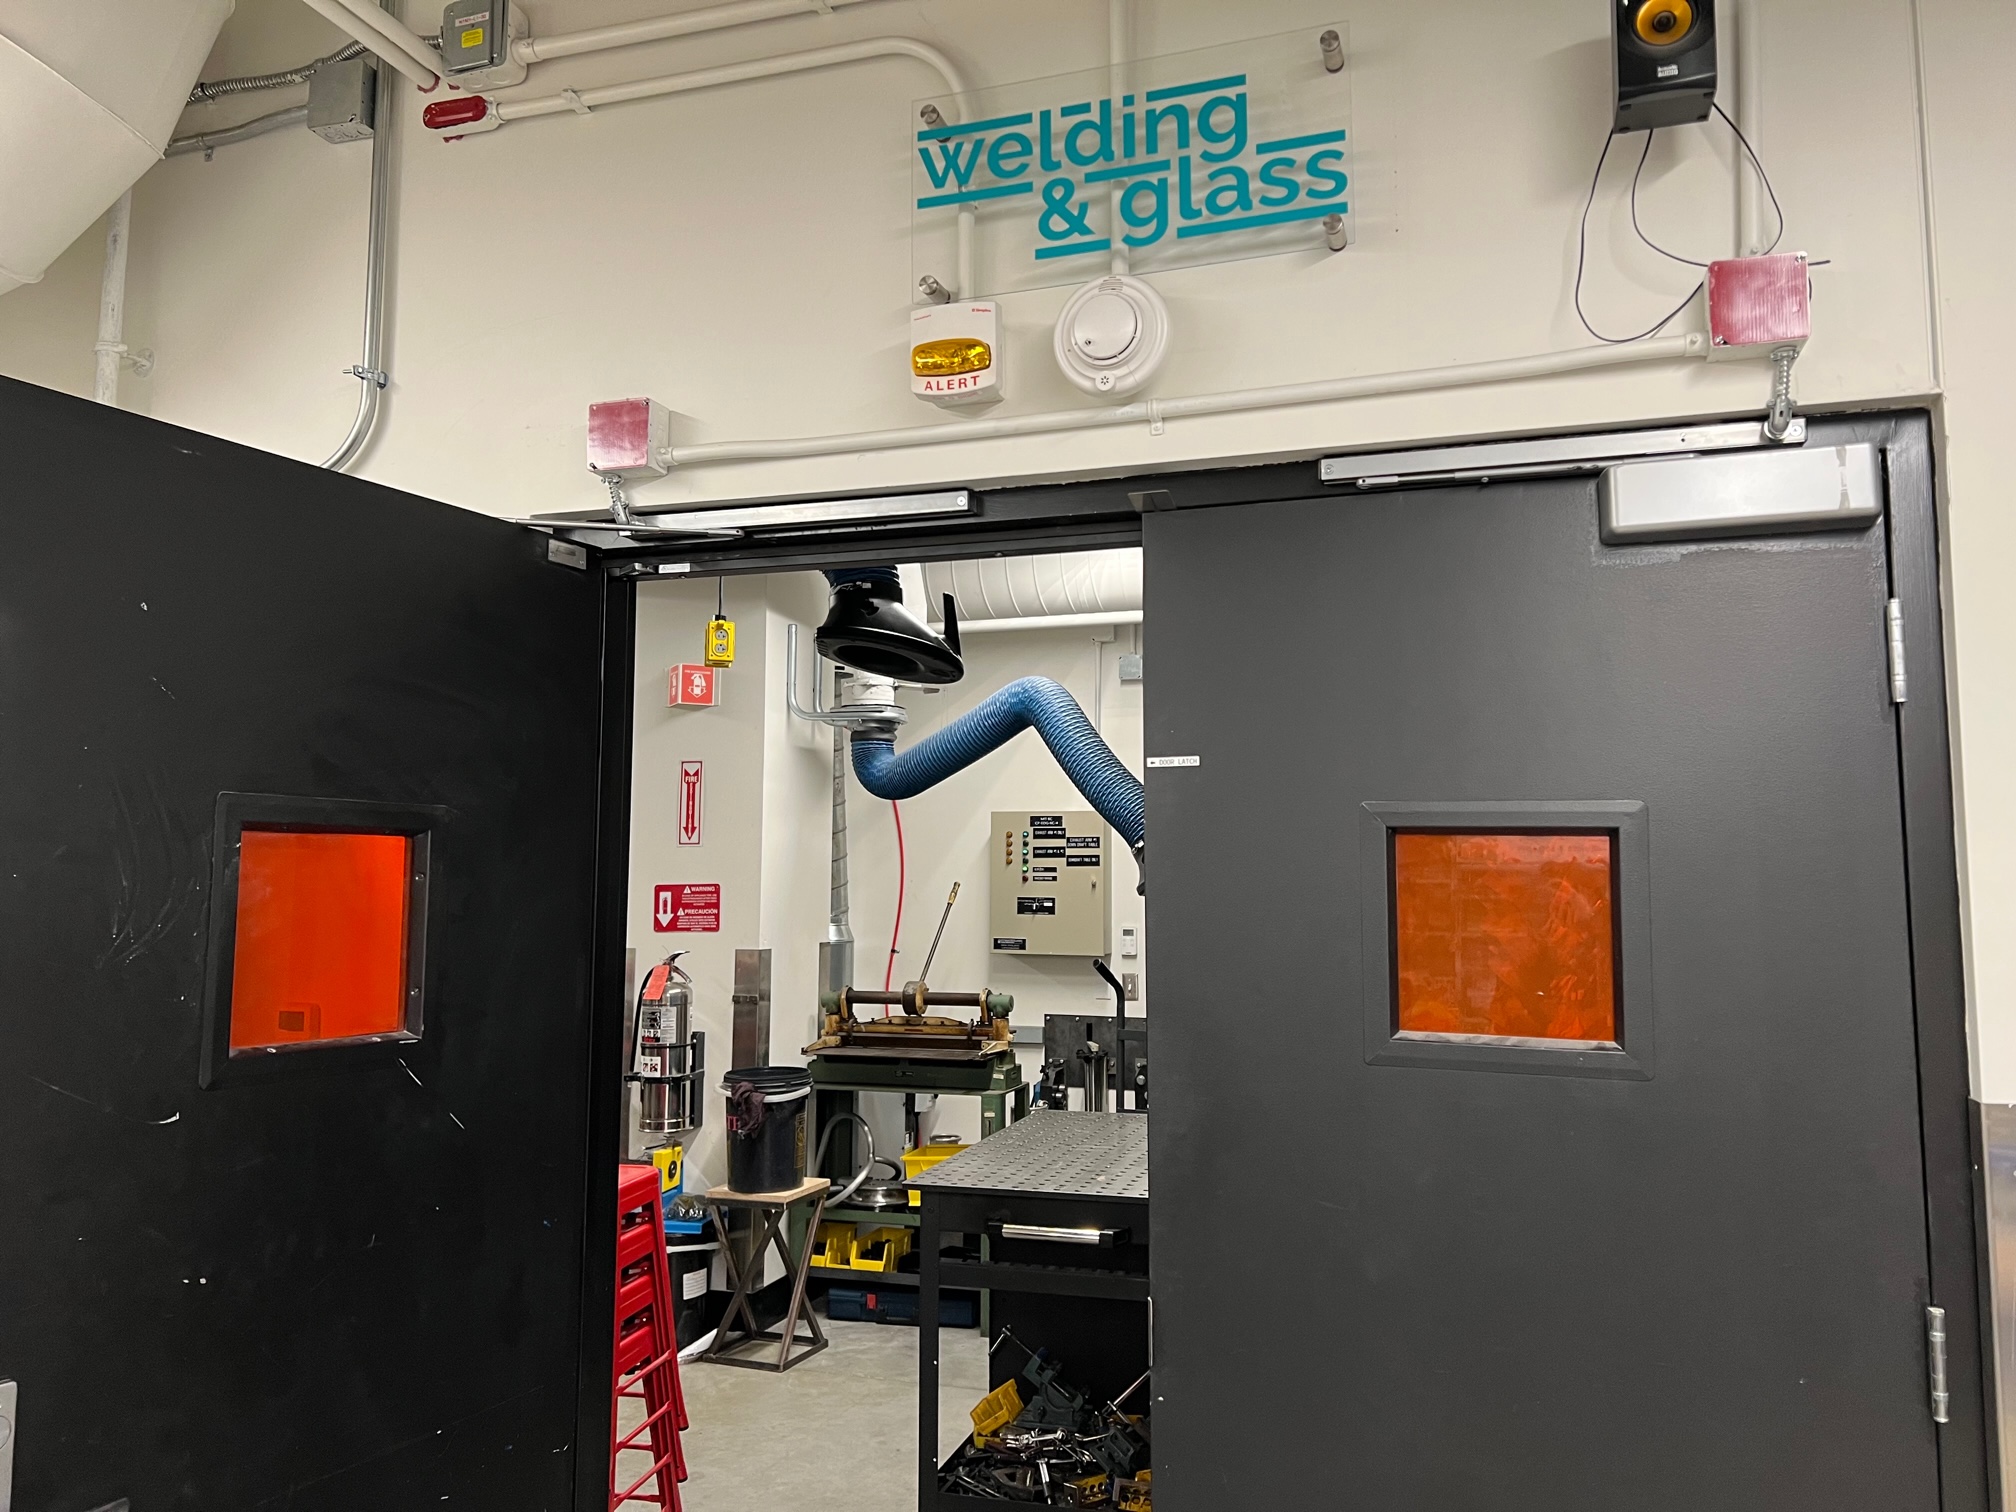
We peek inside the hotworks room through the orange UV protective windows on the door, just to make sure no one is already welding. If someone is working in there, you’d knock to get their attention before you walk in, since accidentally looking at the intense welding arc with naked eyes would not be fun. I point out the vinyl cut words on the back door as a summary for safety considerations:
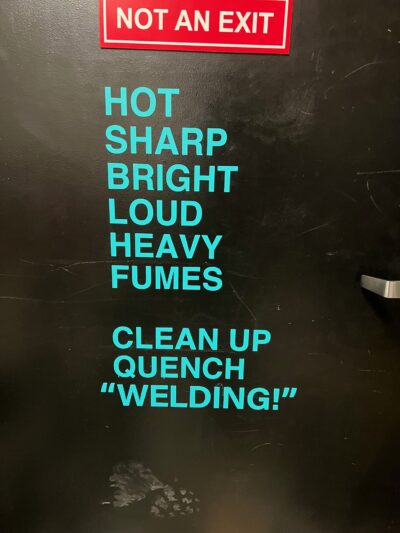
- HOT: freshly welded things are HOT. You’re literally melting metal to stick them together. Most burns don’t happen during the actual welding, as you’ll be wearing thick protective gloves. Instead, people tend to burn themselves when they take off their gloves to sand02 never wear gloves while sanding or using anything with a fast rotating component! down a freshly welded piece.
- SHARP: metal is SHARP right after you cut it. We can get rid of sharp edges by sanding it down or using a deburring tool.
- BRIGHT: welding arcs are BRIGHT. They’re super intense and emit a ton of UV radiation, which is why we wear helmets with self darkening visors to protect our eyes. According to reddit, it’s “fine”03 fine as in it won't cause permanent damage but it'll still hurt if you accidentally weld without your helmet once, but prolonged exposure could permanently scar your corneas.
- LOUD: all the equipment we use to cut/sand metal are very LOUD. People who work in machine shops tend to lose their hearing at an earlier age than the average population, but wearing hearing protection can spare you from that fate.
- HEAVY: metal, especially hunks of steel, is HEAVY. Always wear closed toed shoes in the hotworks room, as dropping a piece of metal on your shoe hurts less than on your naked toes. On a similar note, I see that everyone’s also wearing long pants as instructed, so we don’t have to bring out the Pants of Shame.
- FUMES: depending on who you ask, MIG in MIG welding stands for Metal Inert Gas or Mixed Inert Gas. The point is that there’s an inert gas involved, and it can get quite smelly and uncomfy. We’ll turn the fume extractor exhausts on to limit our exposure to the gas.
As the fume extractors gradually whirr to life, we can set up the welding machine. I point out the one that we’ll use today: the steel MIG welder. It does have an aluminum setting, but from experience, it sucks. The wonderful shop staff recently purchased a fancy MIG welder specifically for aluminum, which uses fairly similar technique as the steel MIG welder with a few additional quirks. Sandwiched between the MIG welders are the TIG (Tungsten Inert Gas) welding machines.
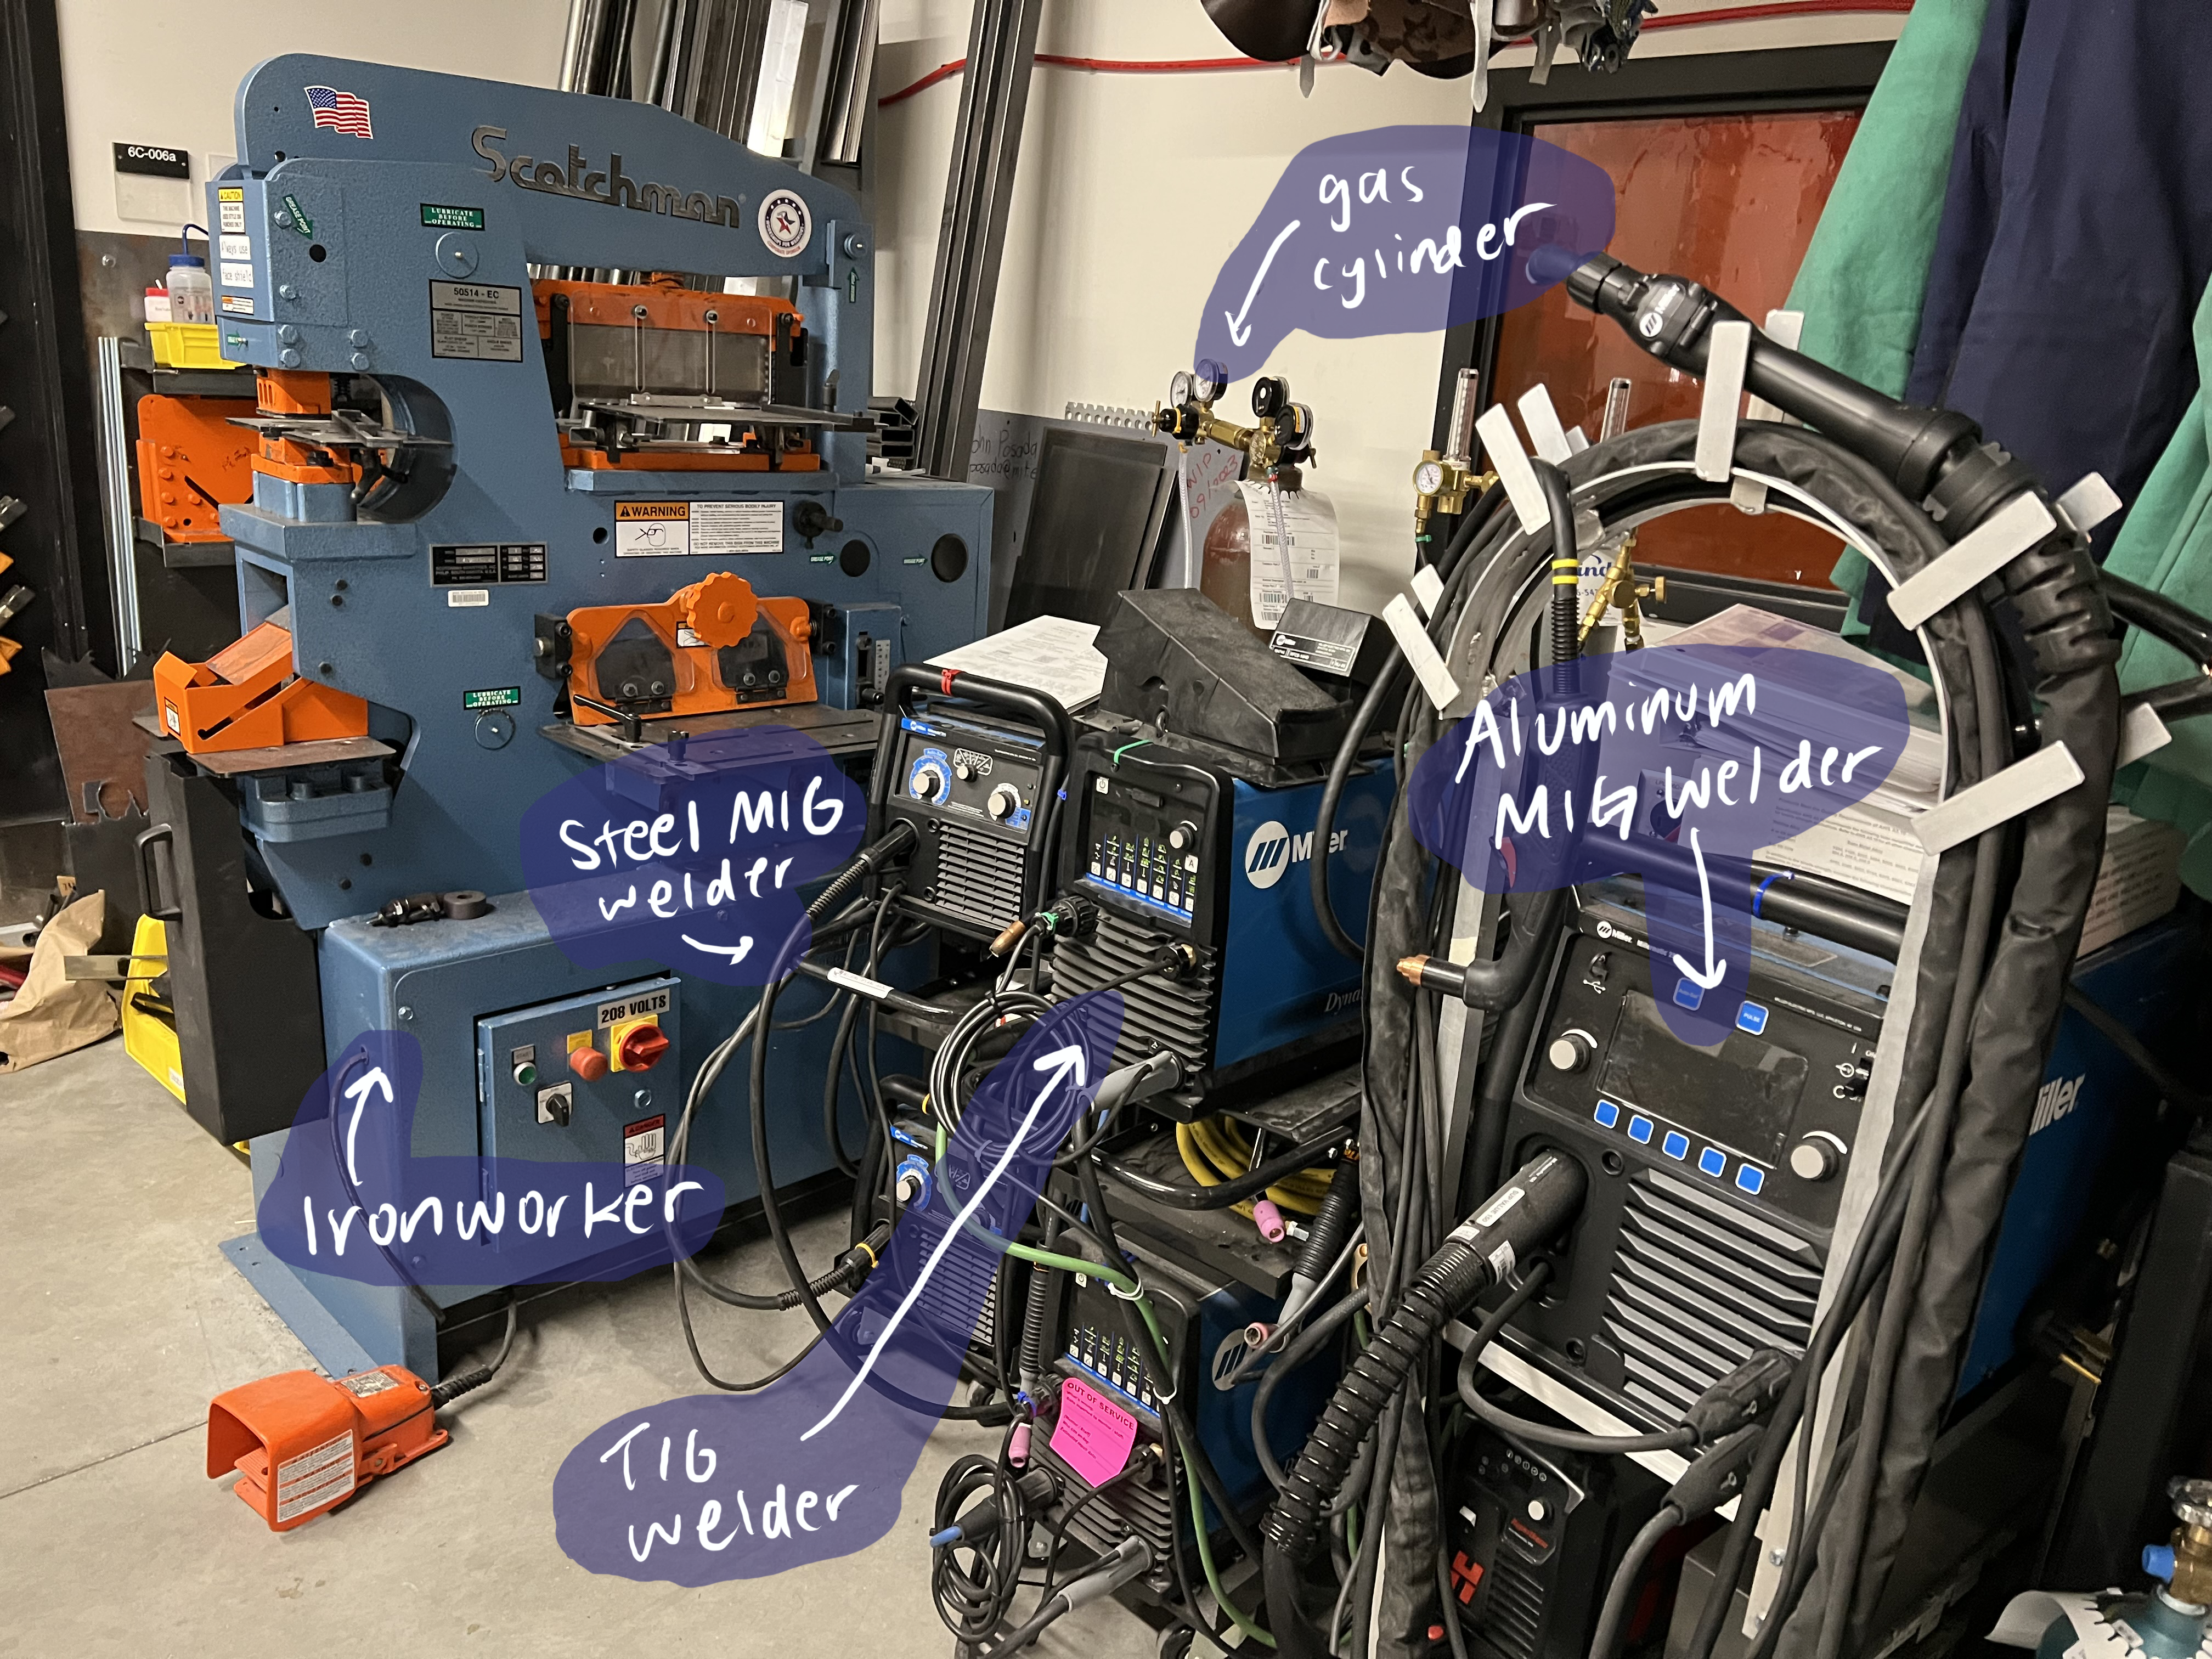
What’s the difference, you may ask? MIG is like using a fancy hot glue gun, where you press a trigger on the welding torch. The filler wire automatically extrudes from the torch and melts into a joint, just like hot glue. TIG is akin to soldering, where you hold the torch with one hand to melt a small puddle of metal. Your other hand manually feeds a separate filler wire into the puddle to create the joint. TIG makes stronger and more aesthetically pleasing welds and works on a larger variety of metals, but takes way longer to get the hang of and to execute. A lot of the popular welding Tiktoks feature someone making impossibly neat TIG welds that look like stacks of dimes. There’s a certain amount of street cred that comes with mastering TIG welding. But MIG welding works pretty well for how fast you can make them, and they can be beautiful too with the practiced technique.
We’ll plug in and turn on the welding machine. Then we’ll adjust the rate of flow for the inert gas, specifically an argon-CO₂ mixture, by twisting knobs on the gas cylinder. As you weld, the gas shields the molten metal from reacting with the oxygen in the air, which would create impurities and in turn weaken the weld. Hence the inert gas.
Let’s attach the ground clamp to the table. The machine pushes a very high current through the torch to create the arc that melts the piece of metal you’re trying to weld. To complete the circuit, the current must travel through the table, then the ground clamp, and finally back to the machine. It’s pretty unlikely that you’ll shock yourself, as the thick welding jacket and gloves that you’ll soon put on creates a layer of insulation. Furthermore, the welding circuit involves pretty low voltages. Ohm’s law states that voltage = current x resistance and dry skin has pretty high resistance, so the resulting current that travels through your body (i.e. what shocks you) would be very low.
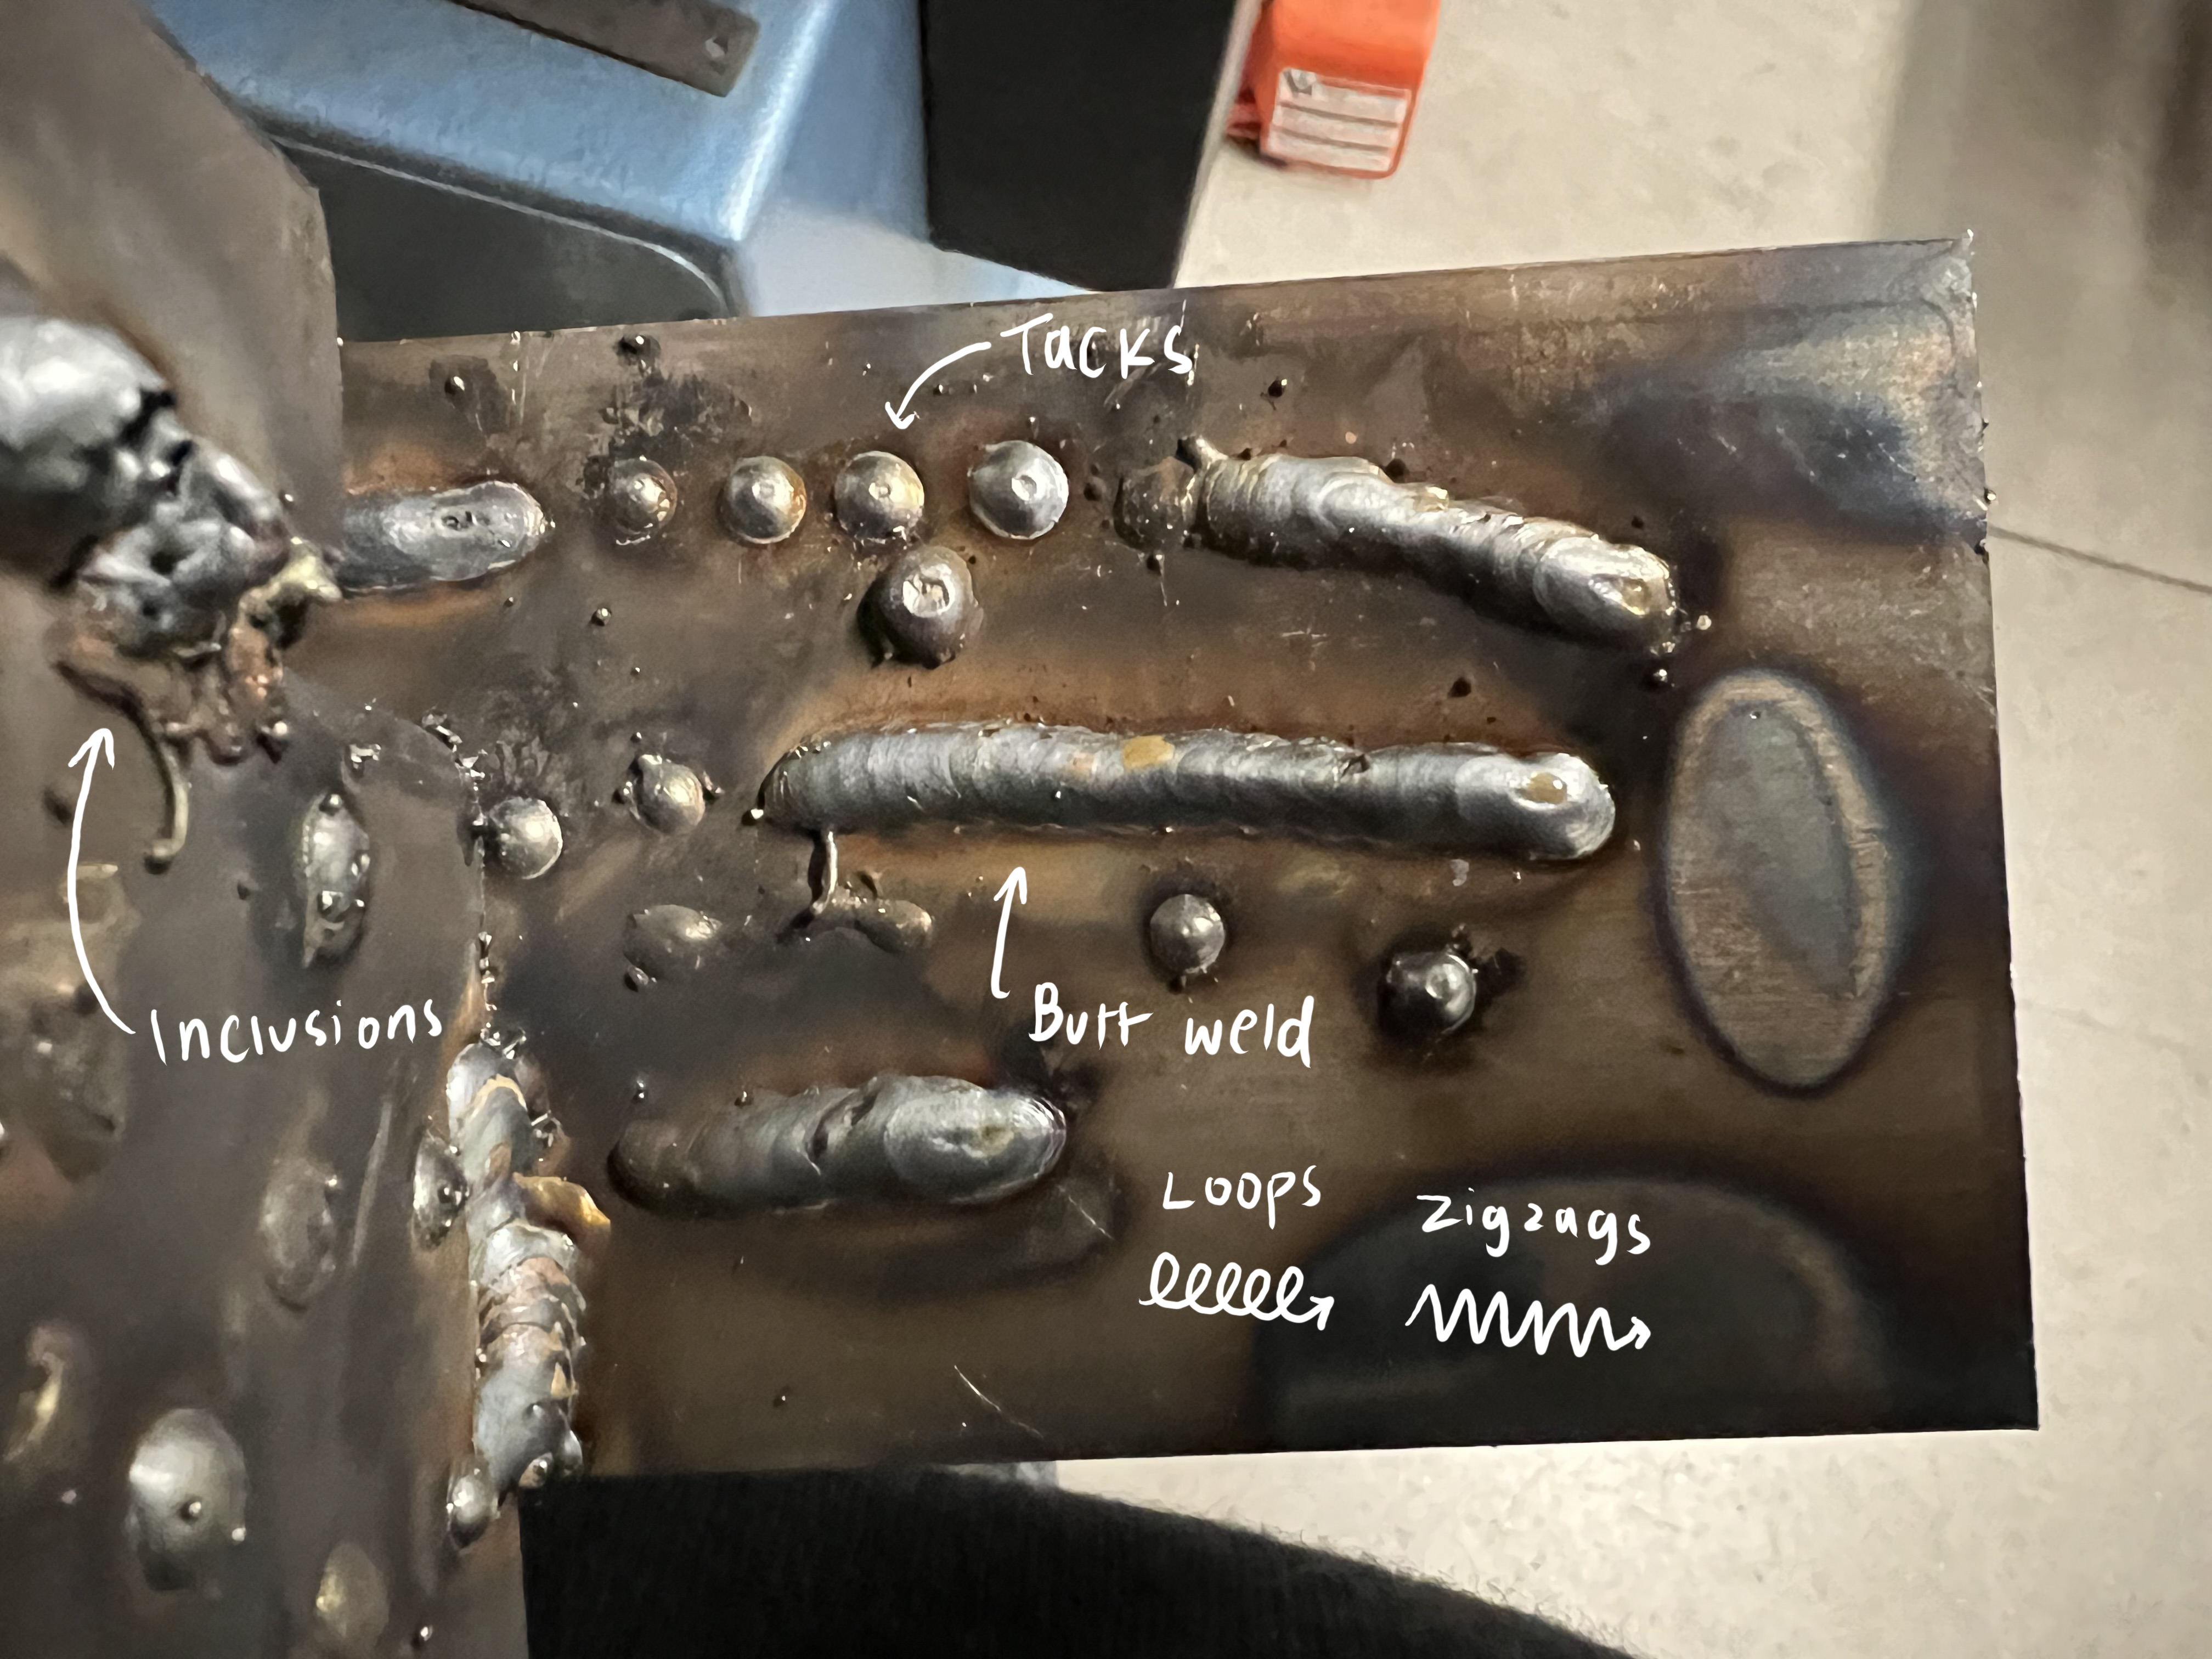
After we’re suited up in the jacket, gloves, and helmet, we can make our first welds! We’ll go over two kinds of welds: 1) tack welds and 2) butt welds. Typically, if you’re welding two big pieces of metal together, you’d first tack them in place so that they’re positioned correctly, and then add the thicker butt welds for strength. To make a tack, you hold the torch such that the filler wire is about 1mm away from the piece of metal at a perpendicular angle, press the trigger for about a second to initiate the arc, and release. Keep the torch there for an extra second to allow for postflow, which is the inert gas that keeps flowing onto the weld as it solidifies.
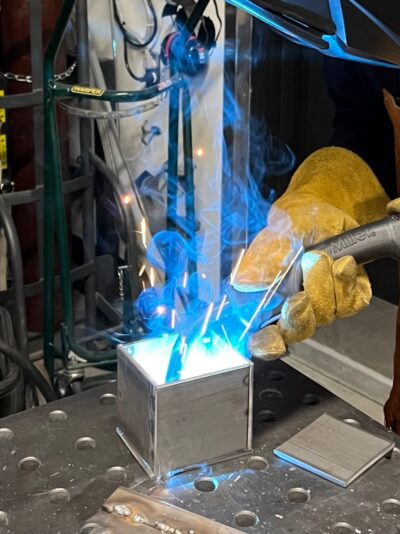
what the arc would look like if you theoretically welded without a helmet, minus the pain! featuring a metal box that someone made at a training :>
People tend to get the hang of tacks very quickly, so we can move on to butt welds. These involve the extra step of welding over a distance. To ensure that the joint has sufficient coverage, we don’t quite weld over a straight line, but rather as loops or as zigzags. I’m more of a loops girlie, but some people find zigzags easier.
There’s a bit of learning curve to making your loops/zigzags at the right speed. Too slow would make the weld too melty and potentially blow a hole through what you’re welding. Too fast would make the weld look like a series of individual tacks that won’t hold anything together. In terms of welding lingo, melty welds are dubbed “too hot” and weak welds “too cold.” You can fix this in your technique, but sometimes the answer lies in adjusting the voltage (higher –> hotter welds) or the speed at which the filler wire is extruded (faster–> larger welds).
The other point of difficulty is that people tend to lift their torches up as they make the butt weld. Welding with the torch too far away would cause the gas to bubble up in the weld, forming what’s called an inclusion. Inclusions significantly weaken the weld and are also unaesthetically pleasing. Clearly, aesthetics are paramount. You can’t really see how far your torch is from the metal surface because the darkened helmet visor takes away all depth perception, but you can hear it. Normally, the machine creates a high frequency popping sound when you’re making a good weld. Each pop is kind of blurred into one another, like duhduhduhduh. But if you start drifting, the popping lowers in frequency, more like duh duh duh duh. That’s a cue for you to reposition.
Once everyone’s comfy with butt welds, it’s usually about an hour into the training. The second hour is reserved for welding your own thing, as long as it can be done in an hour. Depending on what people are making, I demonstrate the other tools in the hotworks room. There’s a cold saw that cuts through metal like butter, with the help of coolant automatically pumped onto the saw blade. Fresh coolant is the color of blue raspberry, but it gets recycled through the pump system and eventually takes on an sad shade of beige. There’s also a beast of a machine called the Ironworker. It uses hydraulics to press a blade to shear through metal sheets. The cold saw was down for about a week, so we had to make do entirely with the Ironworker04 we could've also used a hacksaw, a kind of traditional hand saw, but that would've taken forever for a few trainings. Apparently if you cut a metal tube using the Ironworker, and the cut ends get flattened into a pillow shape.
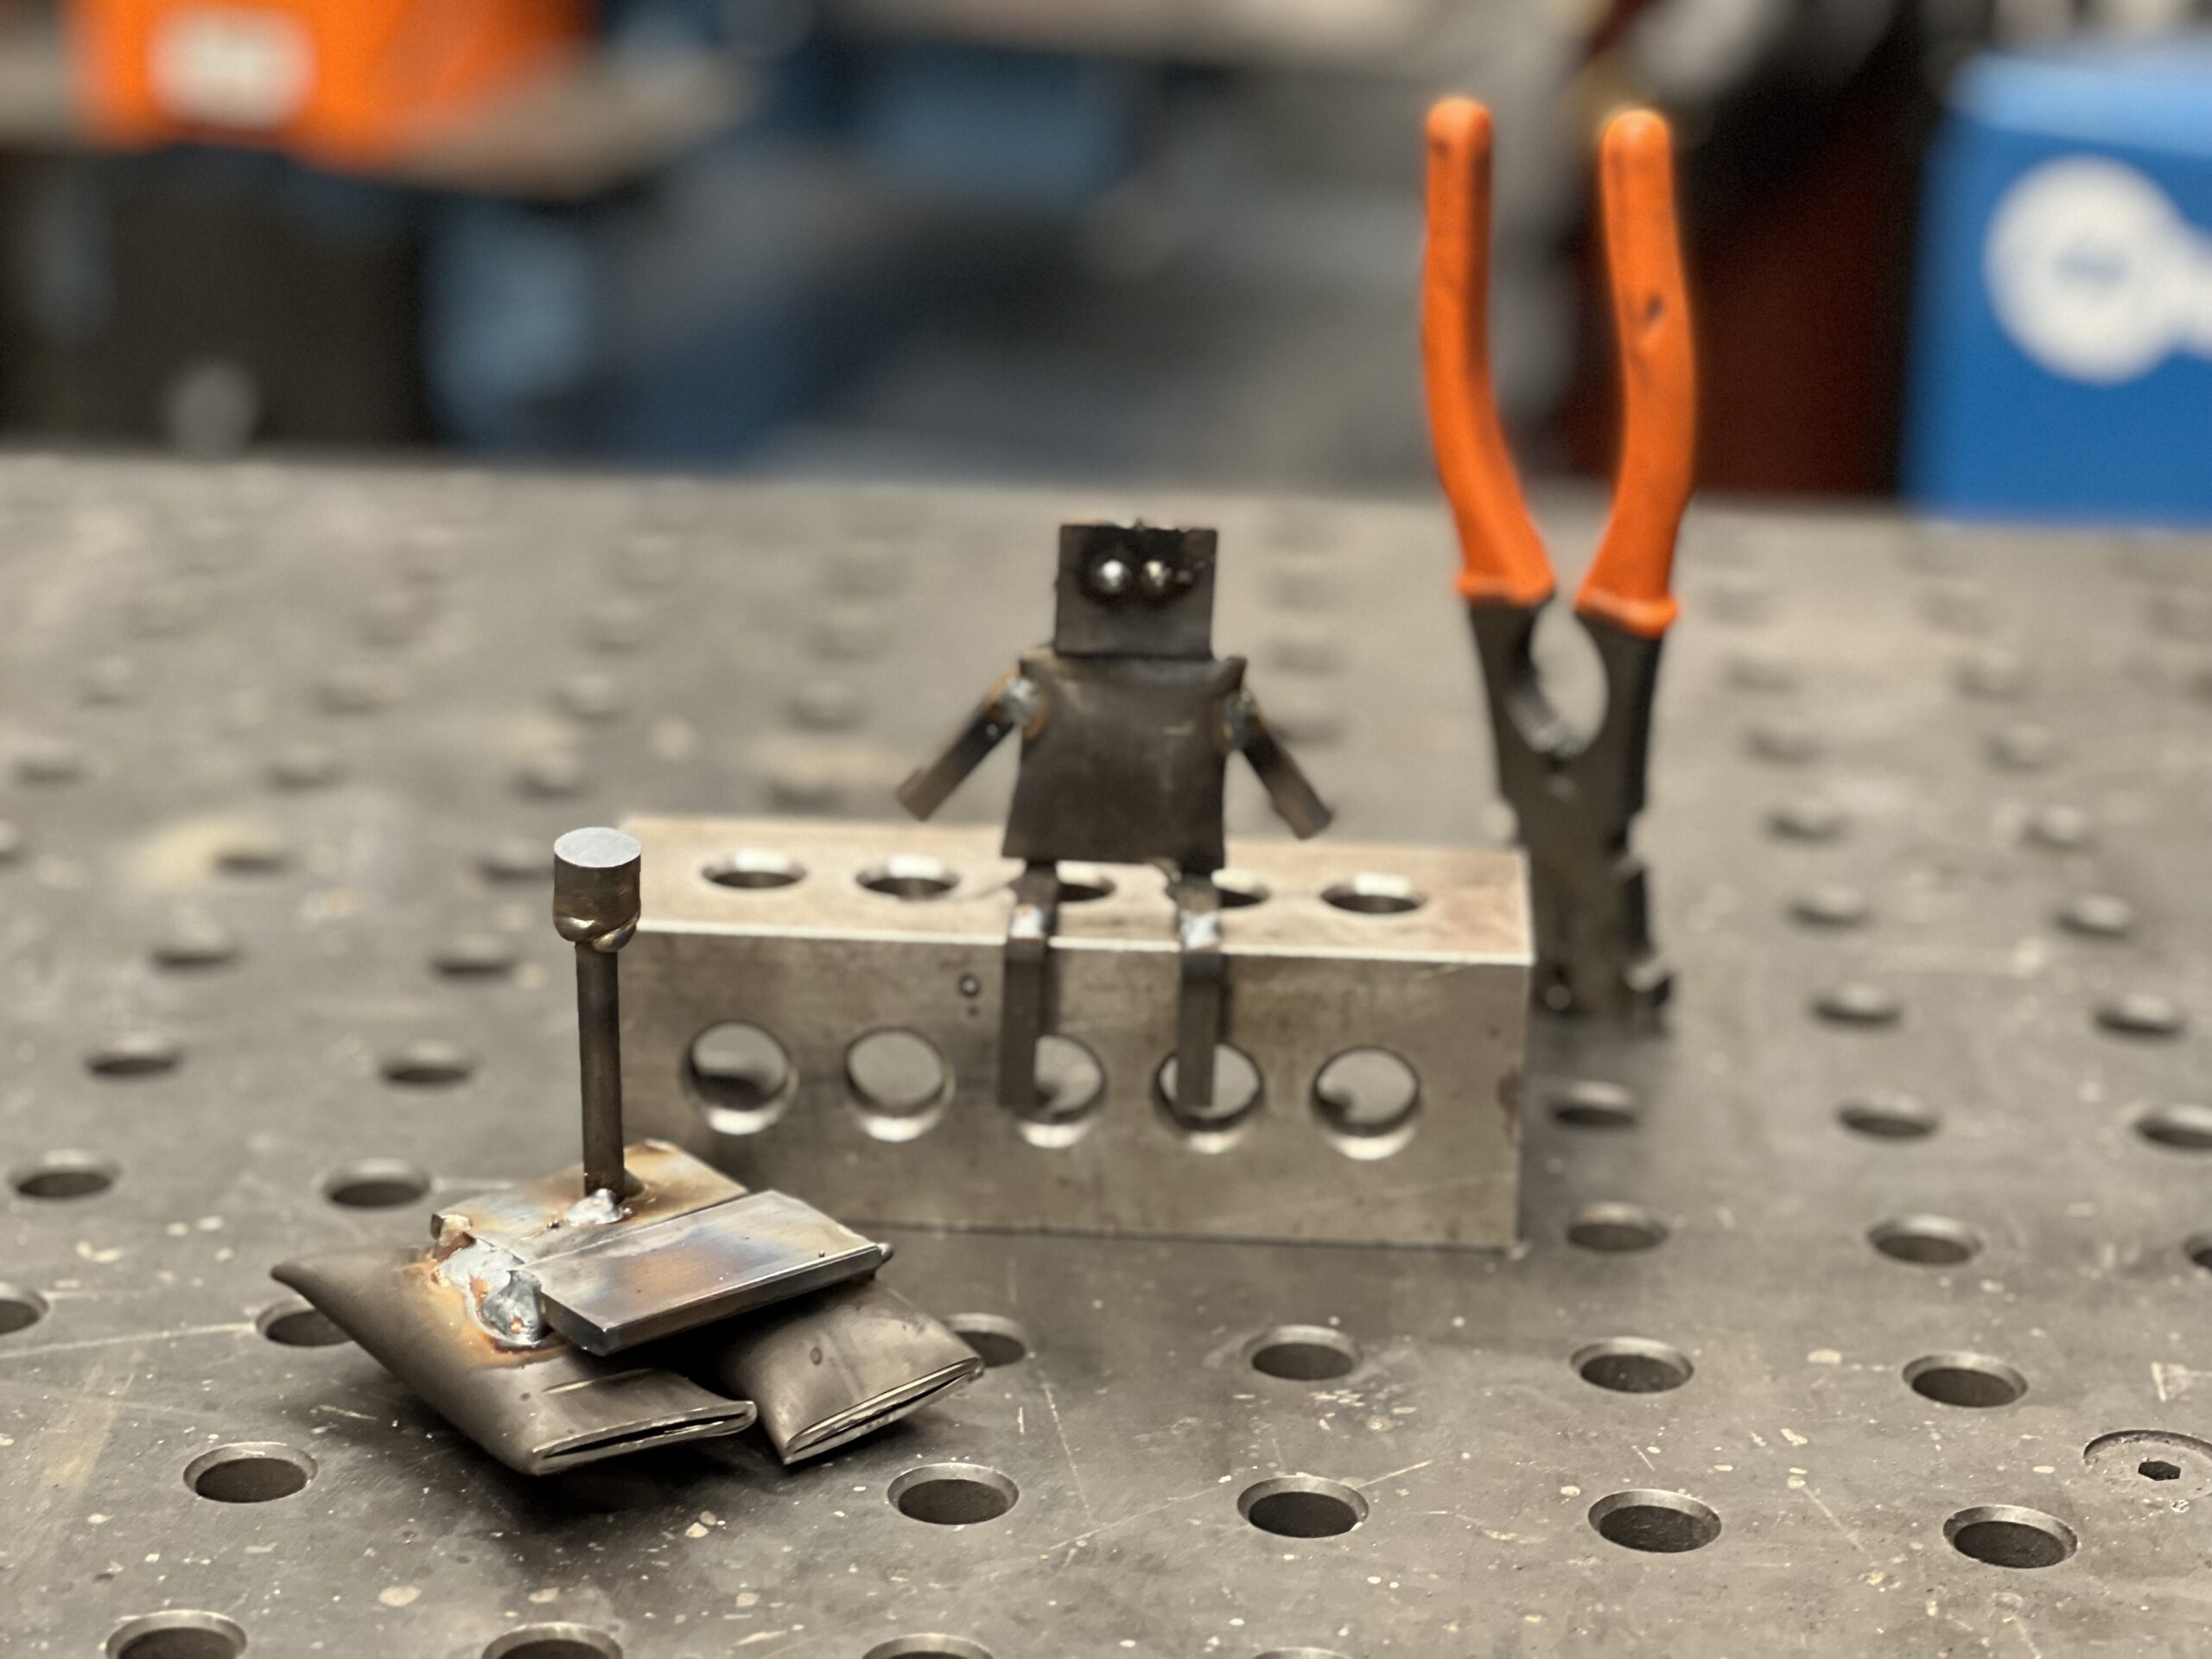
robot and catamaran made by Noah and Jai during a training! the pillow shaped tubes worked really well for their pieces :>
If there’s time, we’ll go through the various sanding tools to make the welded knickknacks shiny. We’re all just crows who love shiny things. I’ve been told that if you really cared about the aesthetics of your final product, welding projects end up being 90% sanding and 10% welding.
To wrap things up, we’ll put everything back and reset the welding machines — turn off the power, close the gas canister, wrap all the cords neatly in place, and turn off the exhaust. One final sweep of the room and you’re all set! Welding tends to make your hands very gross, so I shill orange pumice cleaner as an exfoliant to get the gunk off.
I definitely spent more time teaching people how to weld than welding/crafting myself last semester. I’m glad that I did, since I’ve developed a much deeper understanding of how the process works and how to troubleshoot suspicious welds. The machines are almost like friends whose quirks you really get to know as you spend more time around them. It’s also a ton of fun watching people get the hang of it and make something they’re proud of. I hope I can block more time during IAP/next spring to take advantage of all the cool resources Metropolis has to offer and to finally finish my fire fans, but I’m thankful for the opportunity to give back to the community that’s done so much for me!
- Metal Inert Gas -- I will explain more in a bit! back to text ↑
- never wear gloves while sanding or using anything with a fast rotating component! back to text ↑
- fine as in it won't cause permanent damage but it'll still hurt back to text ↑
- we could've also used a hacksaw, a kind of traditional hand saw, but that would've taken forever back to text ↑