How To Make (almost) Anything by Joel G. '18
I switch between saying I study “computer science” or “math” but neither one can hide that I usually live my life lost in abstract-land without anything to tether me down to things that actually exist. So to hedge my bets, I’ve set out on a crusade to learn more about regular old everyday physical objects, starting with “How To Make (almost) Anything” (aka 4.140 aka MAS.863 aka 6.943) with Zany Inventor Scientist Neil Gershenfeld.
The class “How To Make (almost) Anything” (also “How To Make” or just “Make”) is sort of legendary. Gershenfeld has taught the class every year since 2004 while directing the Media Lab’s Center for Bits and Atoms, and the class sparked an entire international “Fab lab” movement. Each week we cover a different fabrication technique on our quest to make (almost) anything: it’s a semester-long crash course on making for those who have never made before.
(Gershenfeld is also credited in Minority Report and Big Hero 6, and in the spring he teaches “How To Make Something That Makes (almost) Anything”, where you make the machines that you use in normal How To Make.)
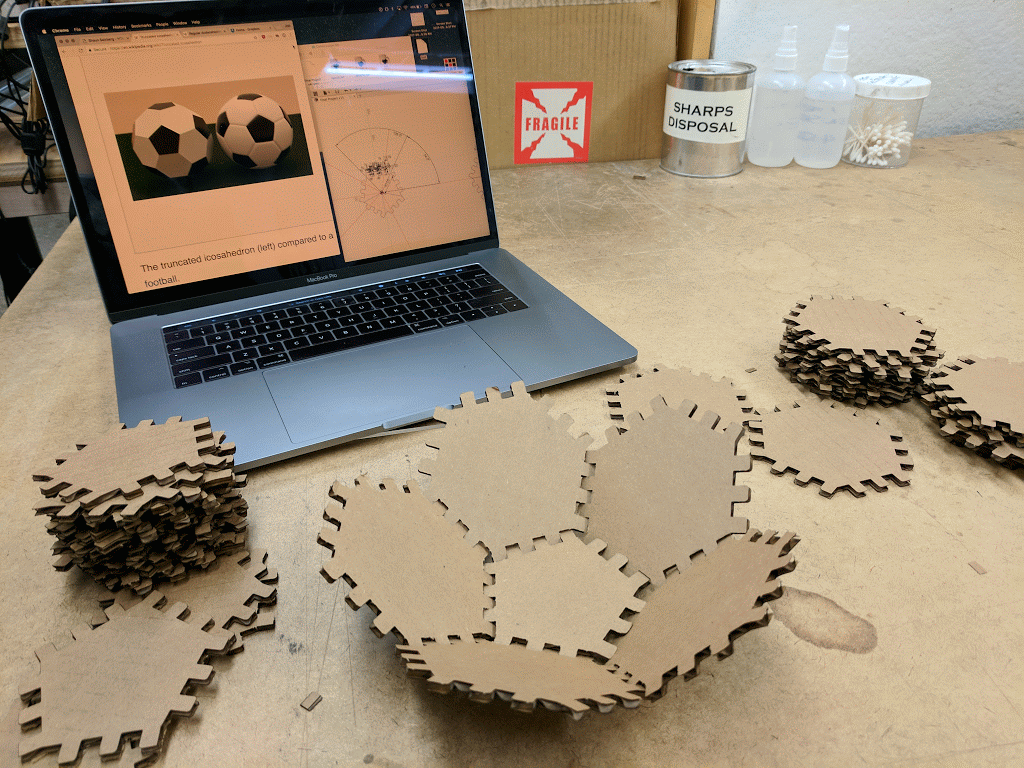
Anyway, last week’s assignment was to use the laser cutter to make a press-fit construction kit – like a LEGO model, except we had to design the bricks ourselves and laser cut them out of cardboard.
I decided to make a soccer ball.
Step 1: Parametric Polygons
Soccer balls have both hexagonal and pentagonal sides, so I wanted a parametric sketch that could be an arbitrary number of sides.
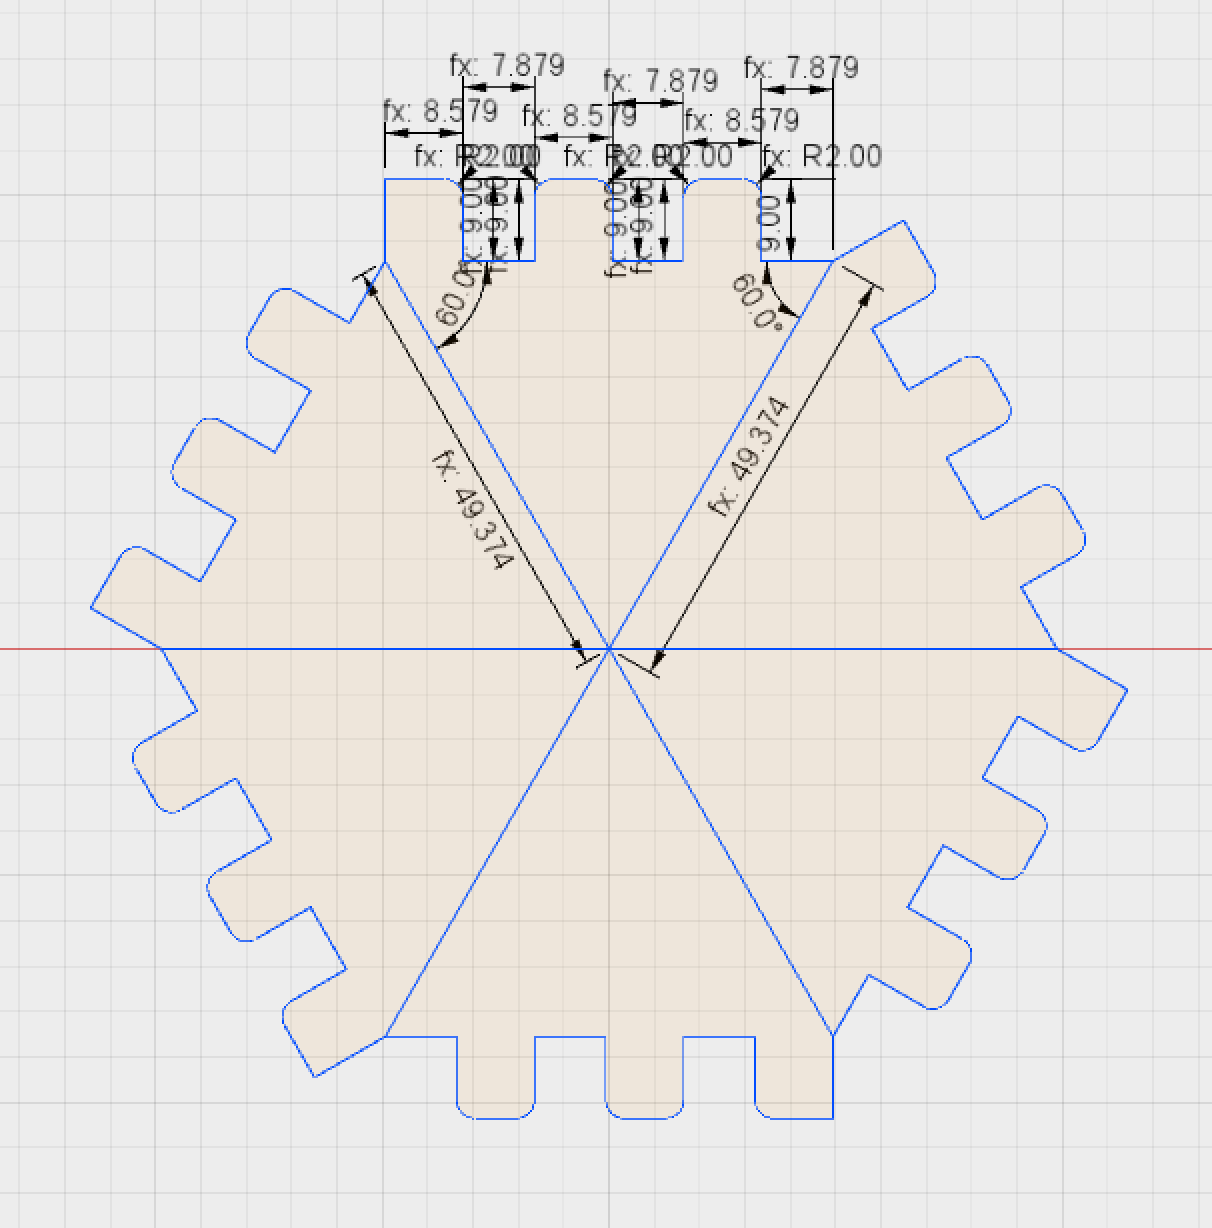
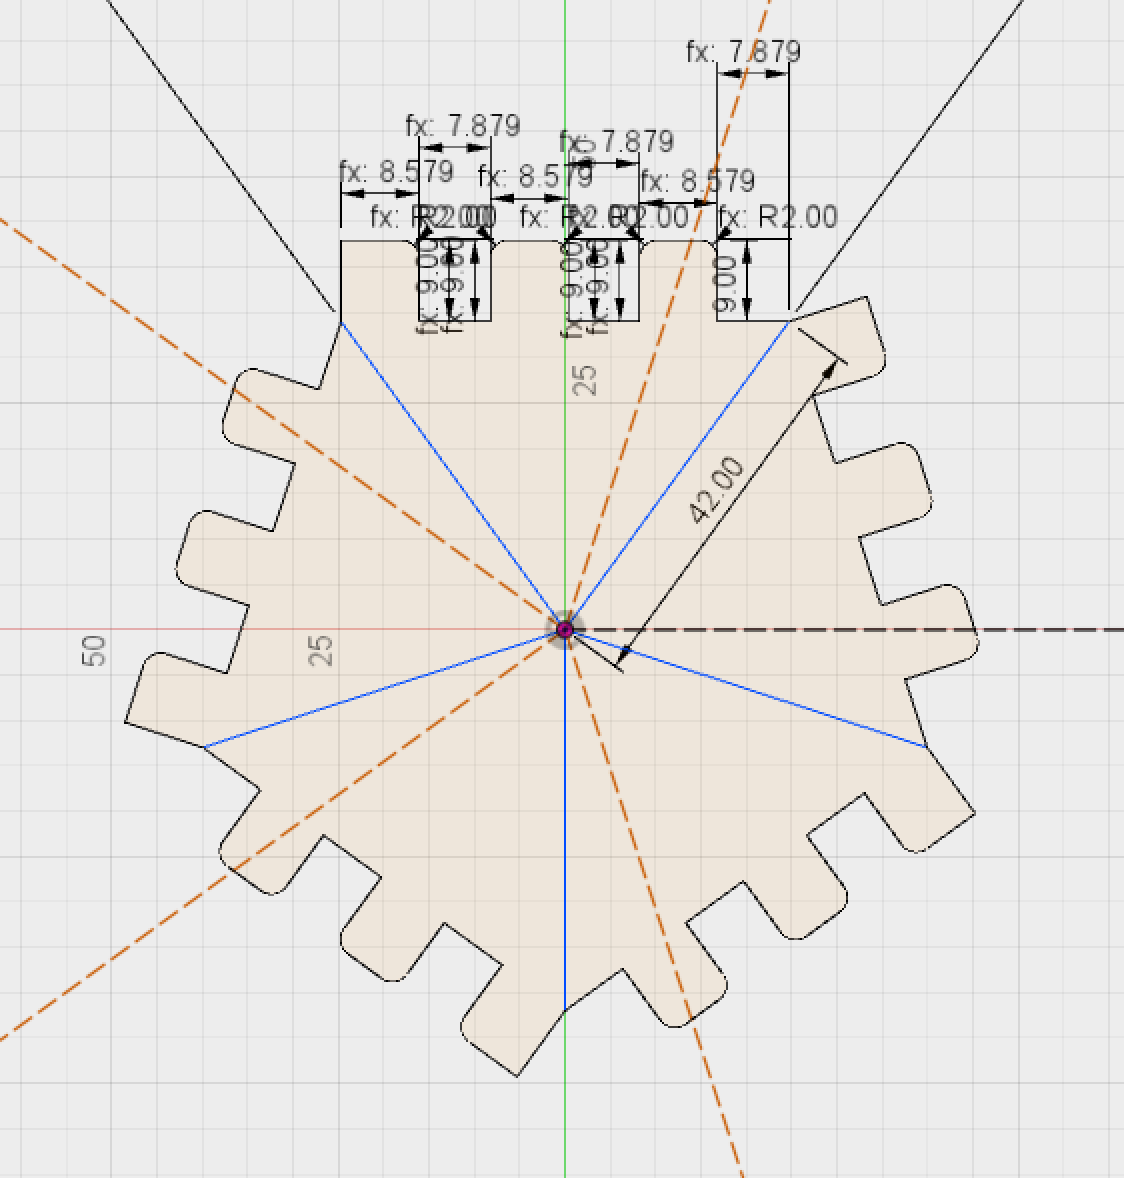
This seemed like a good idea for a while, but after an hour of congratulating myself on how great an idea this was without making any progress, I just gave up and made a parametric pentagon and a parametric hexagon separately and set their side lengths to the same number. ¯\_(ツ)_/¯
Step 2: Joint Testing
Even lasers have width (or “kerf” if you’re really fancy), which means the peaks of the edges have to be wider than the valleys, so that the joints will fit snugly after getting cut out. For a polygon with n sides and sides lengths l, each peak had to be (l / n) + d and each valley (l / n) - d for some d.
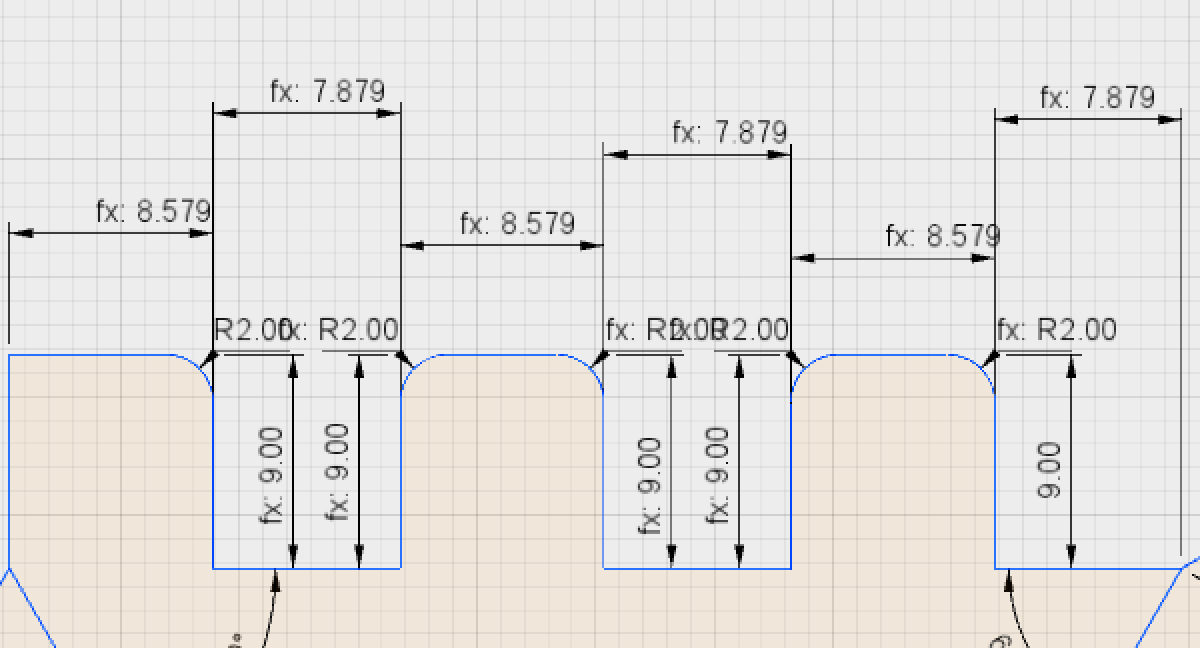
After a few trials, I settled on d = 0.4mm. Each seam overlaps on both sides so there’s 0.8mm of overlap for each joint, minus the width of the laser.
Step 3: Cut with Laser
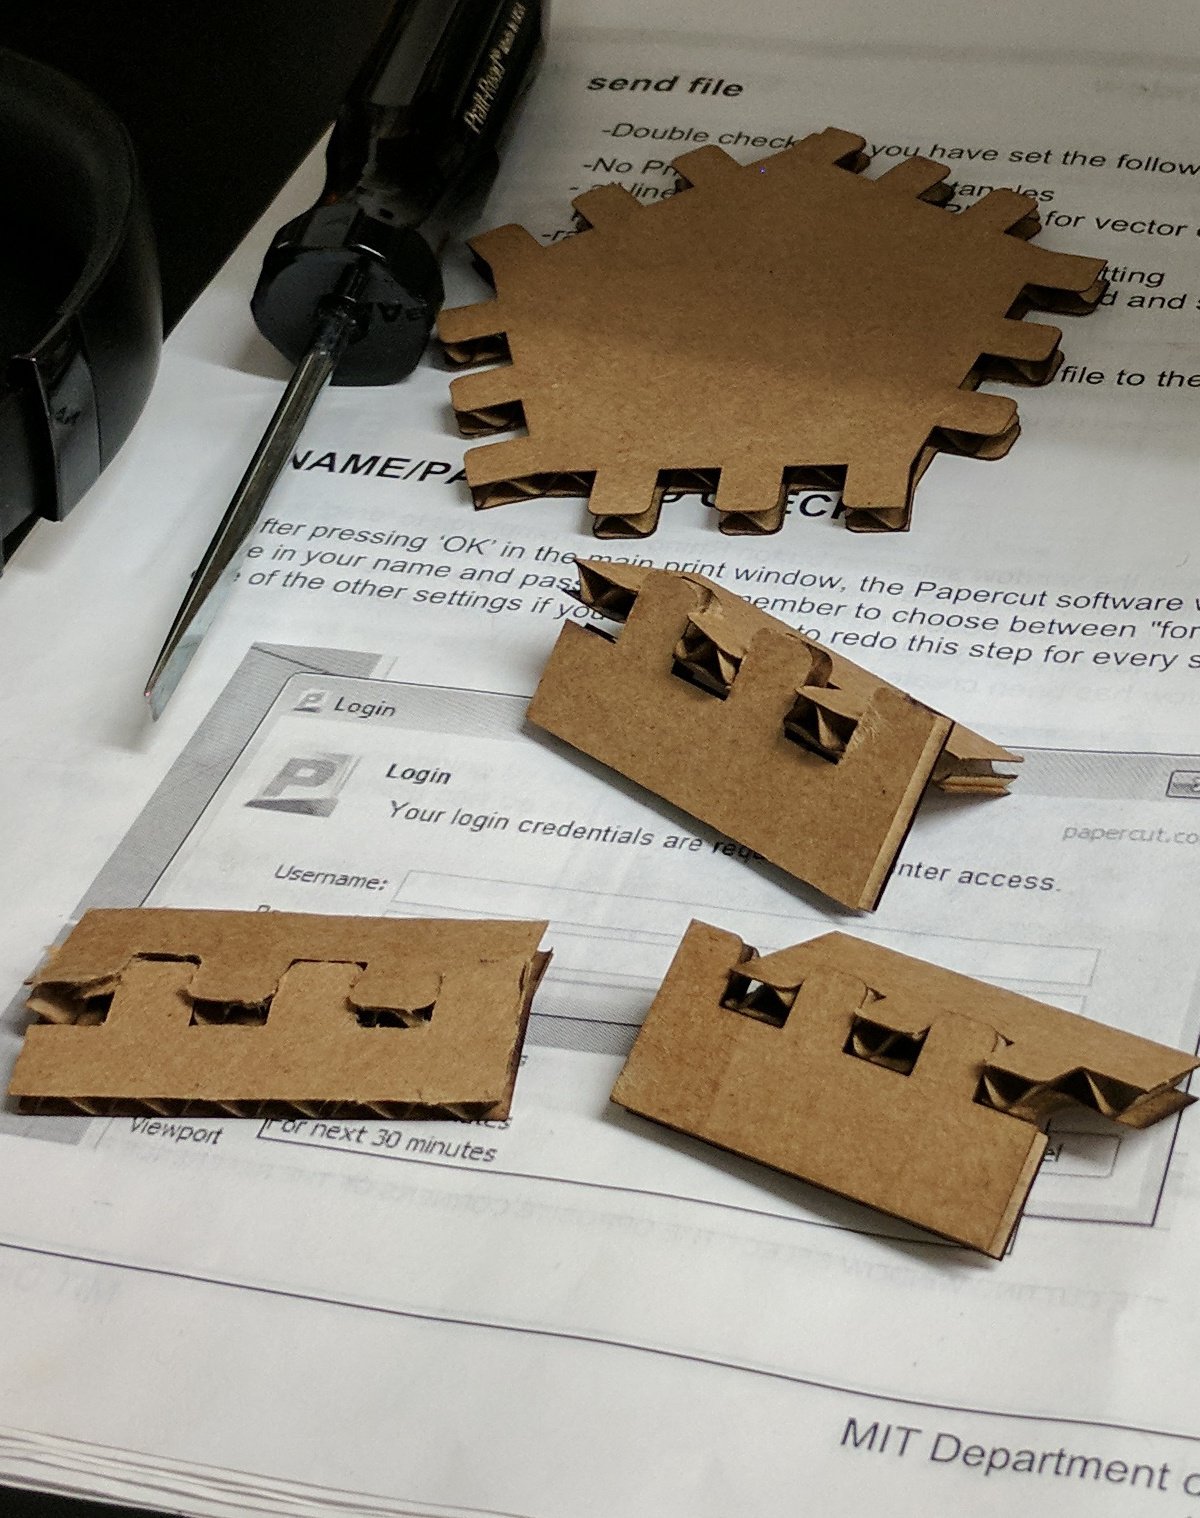
A soccer ball is a truncated icosahedron, which has 20 hexagons and 12 pentagons, which just about covered an entire 24x36in cardboard sheet. I filled the remaining space with extras, just in case some didn’t pop out cleanly.
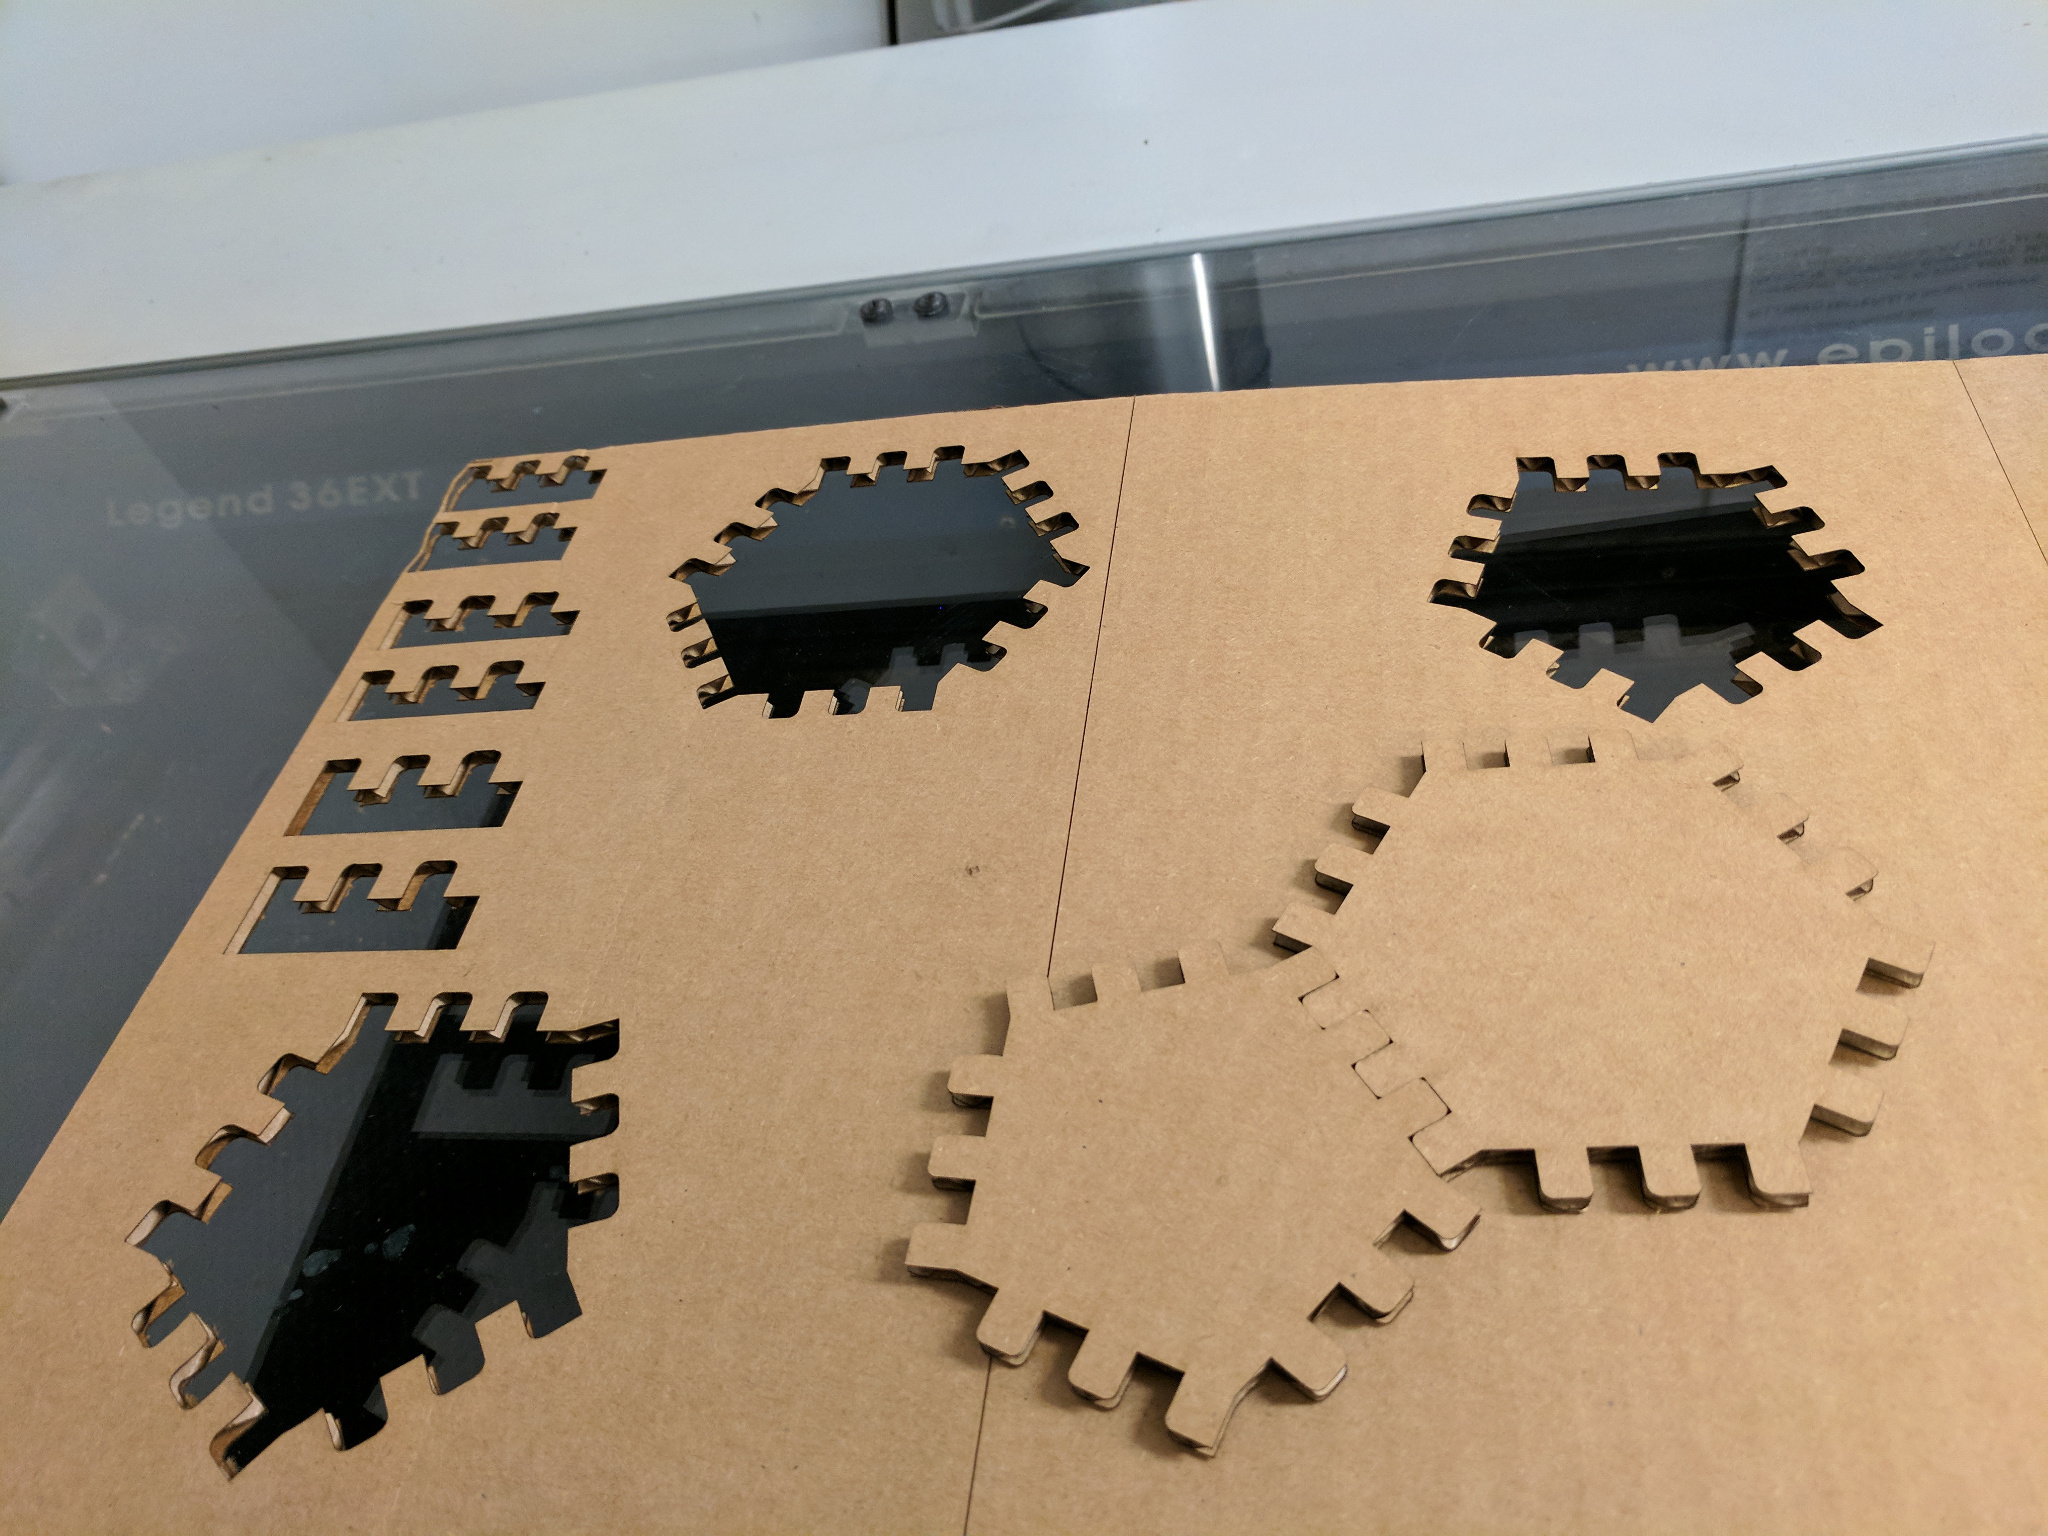
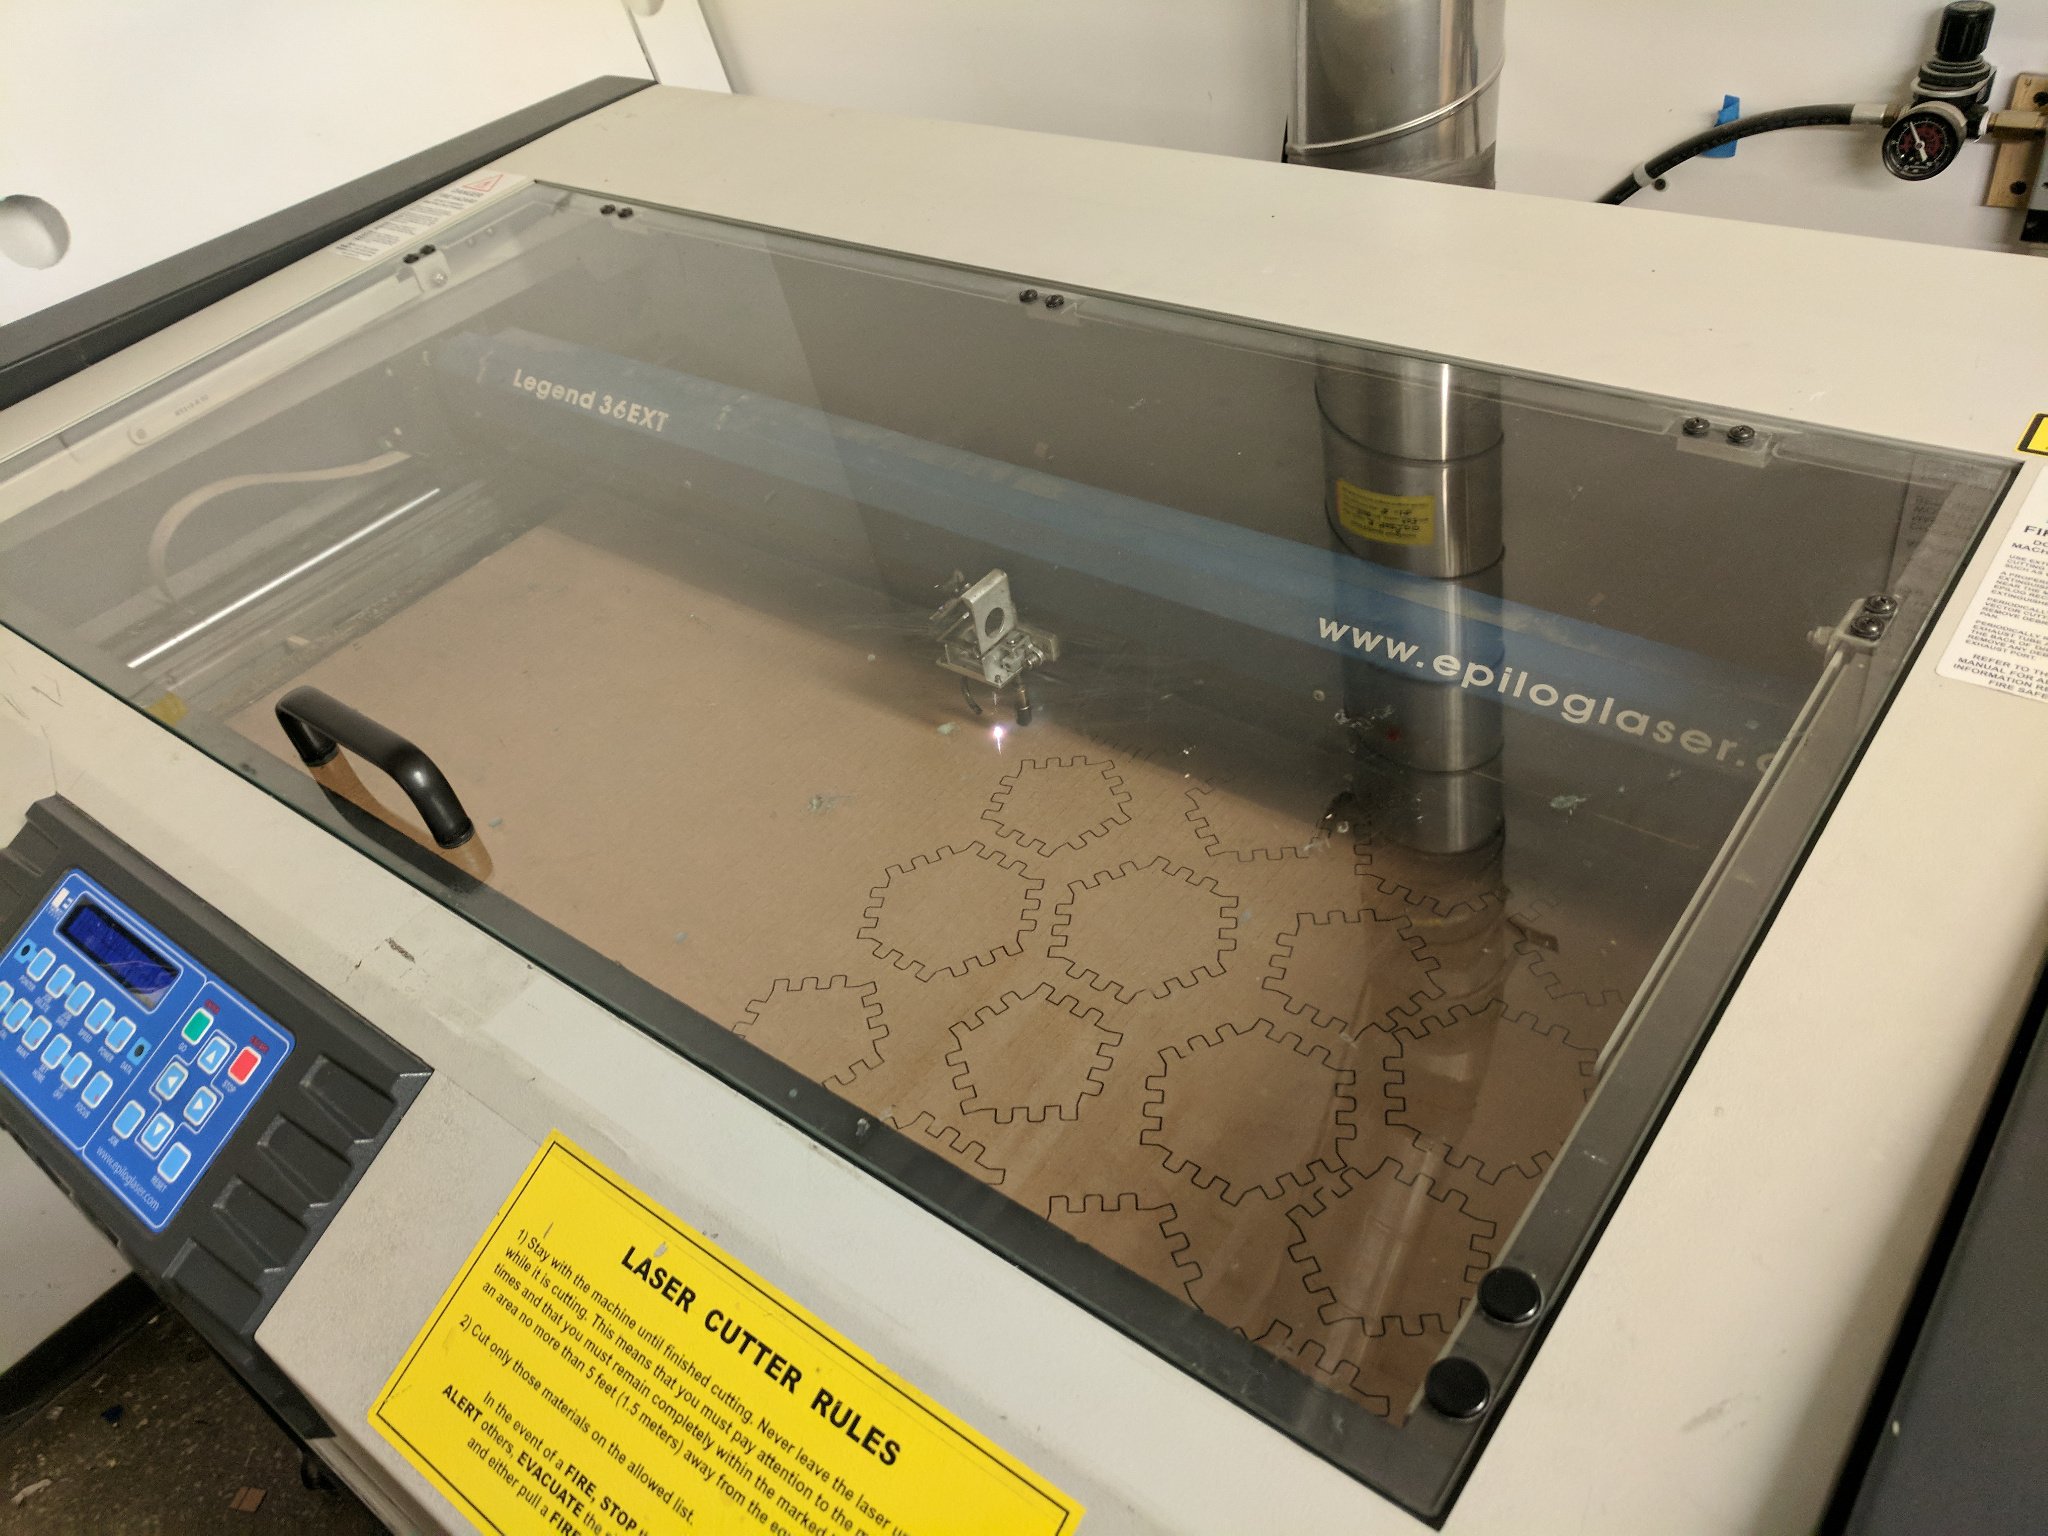
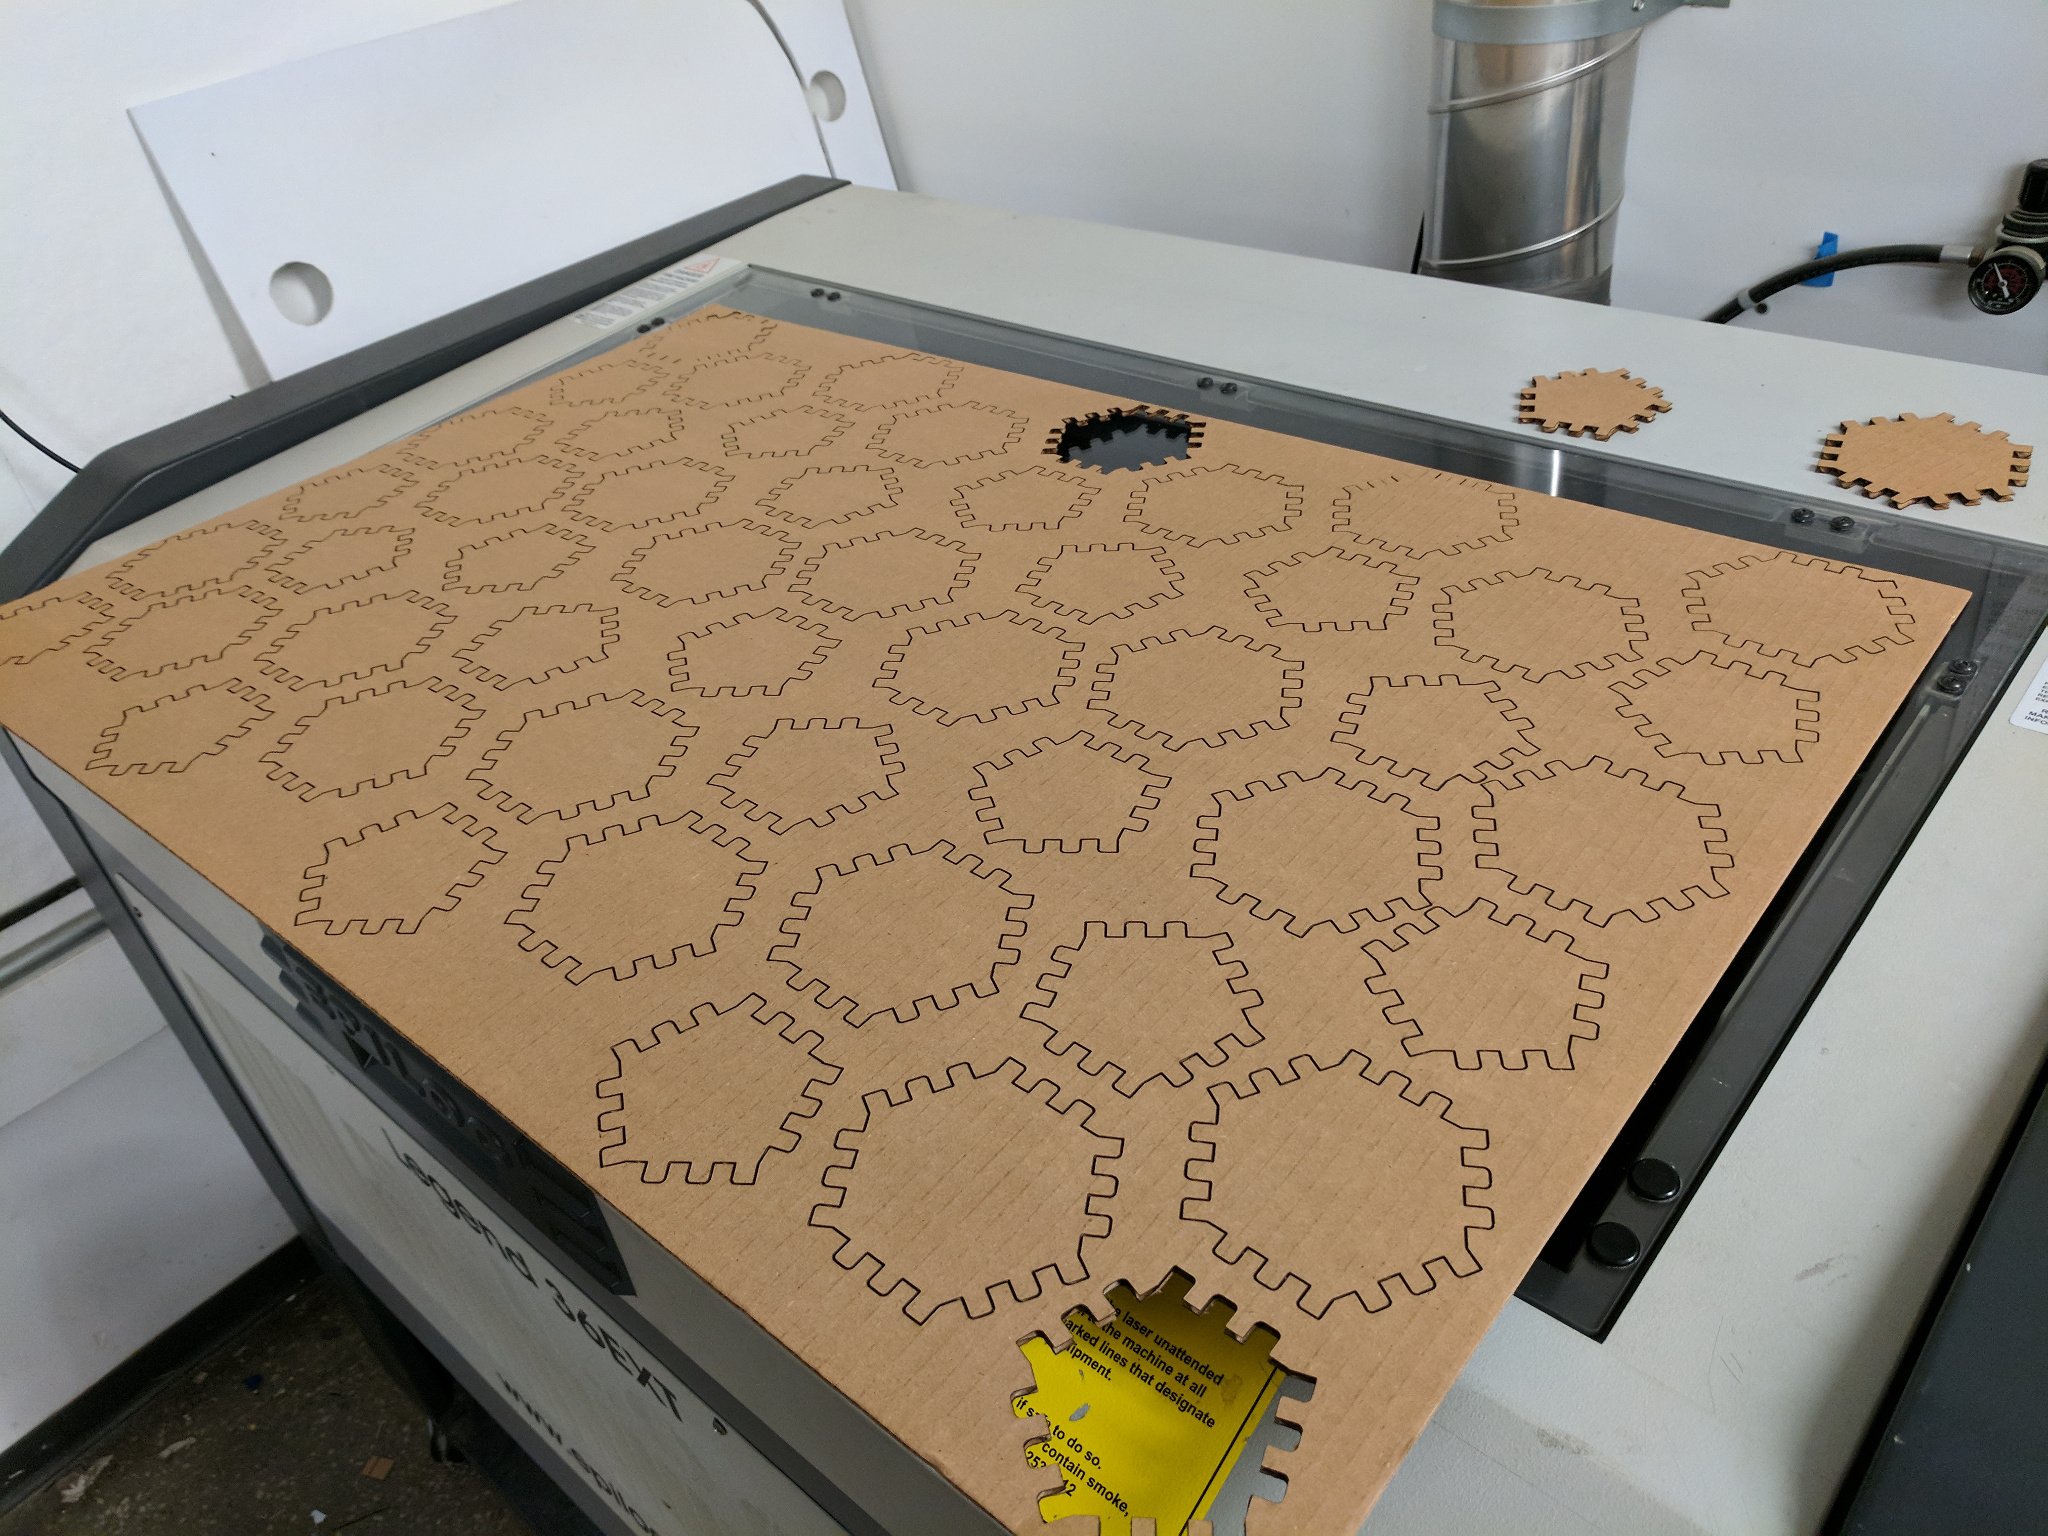
Two passes with the laser cutter took 20 minutes each. For some reason the bottom left quadrant of the sheet didn’t cut through the bottom layer of the cardboard at all – I ended up with just enough pieces without it.
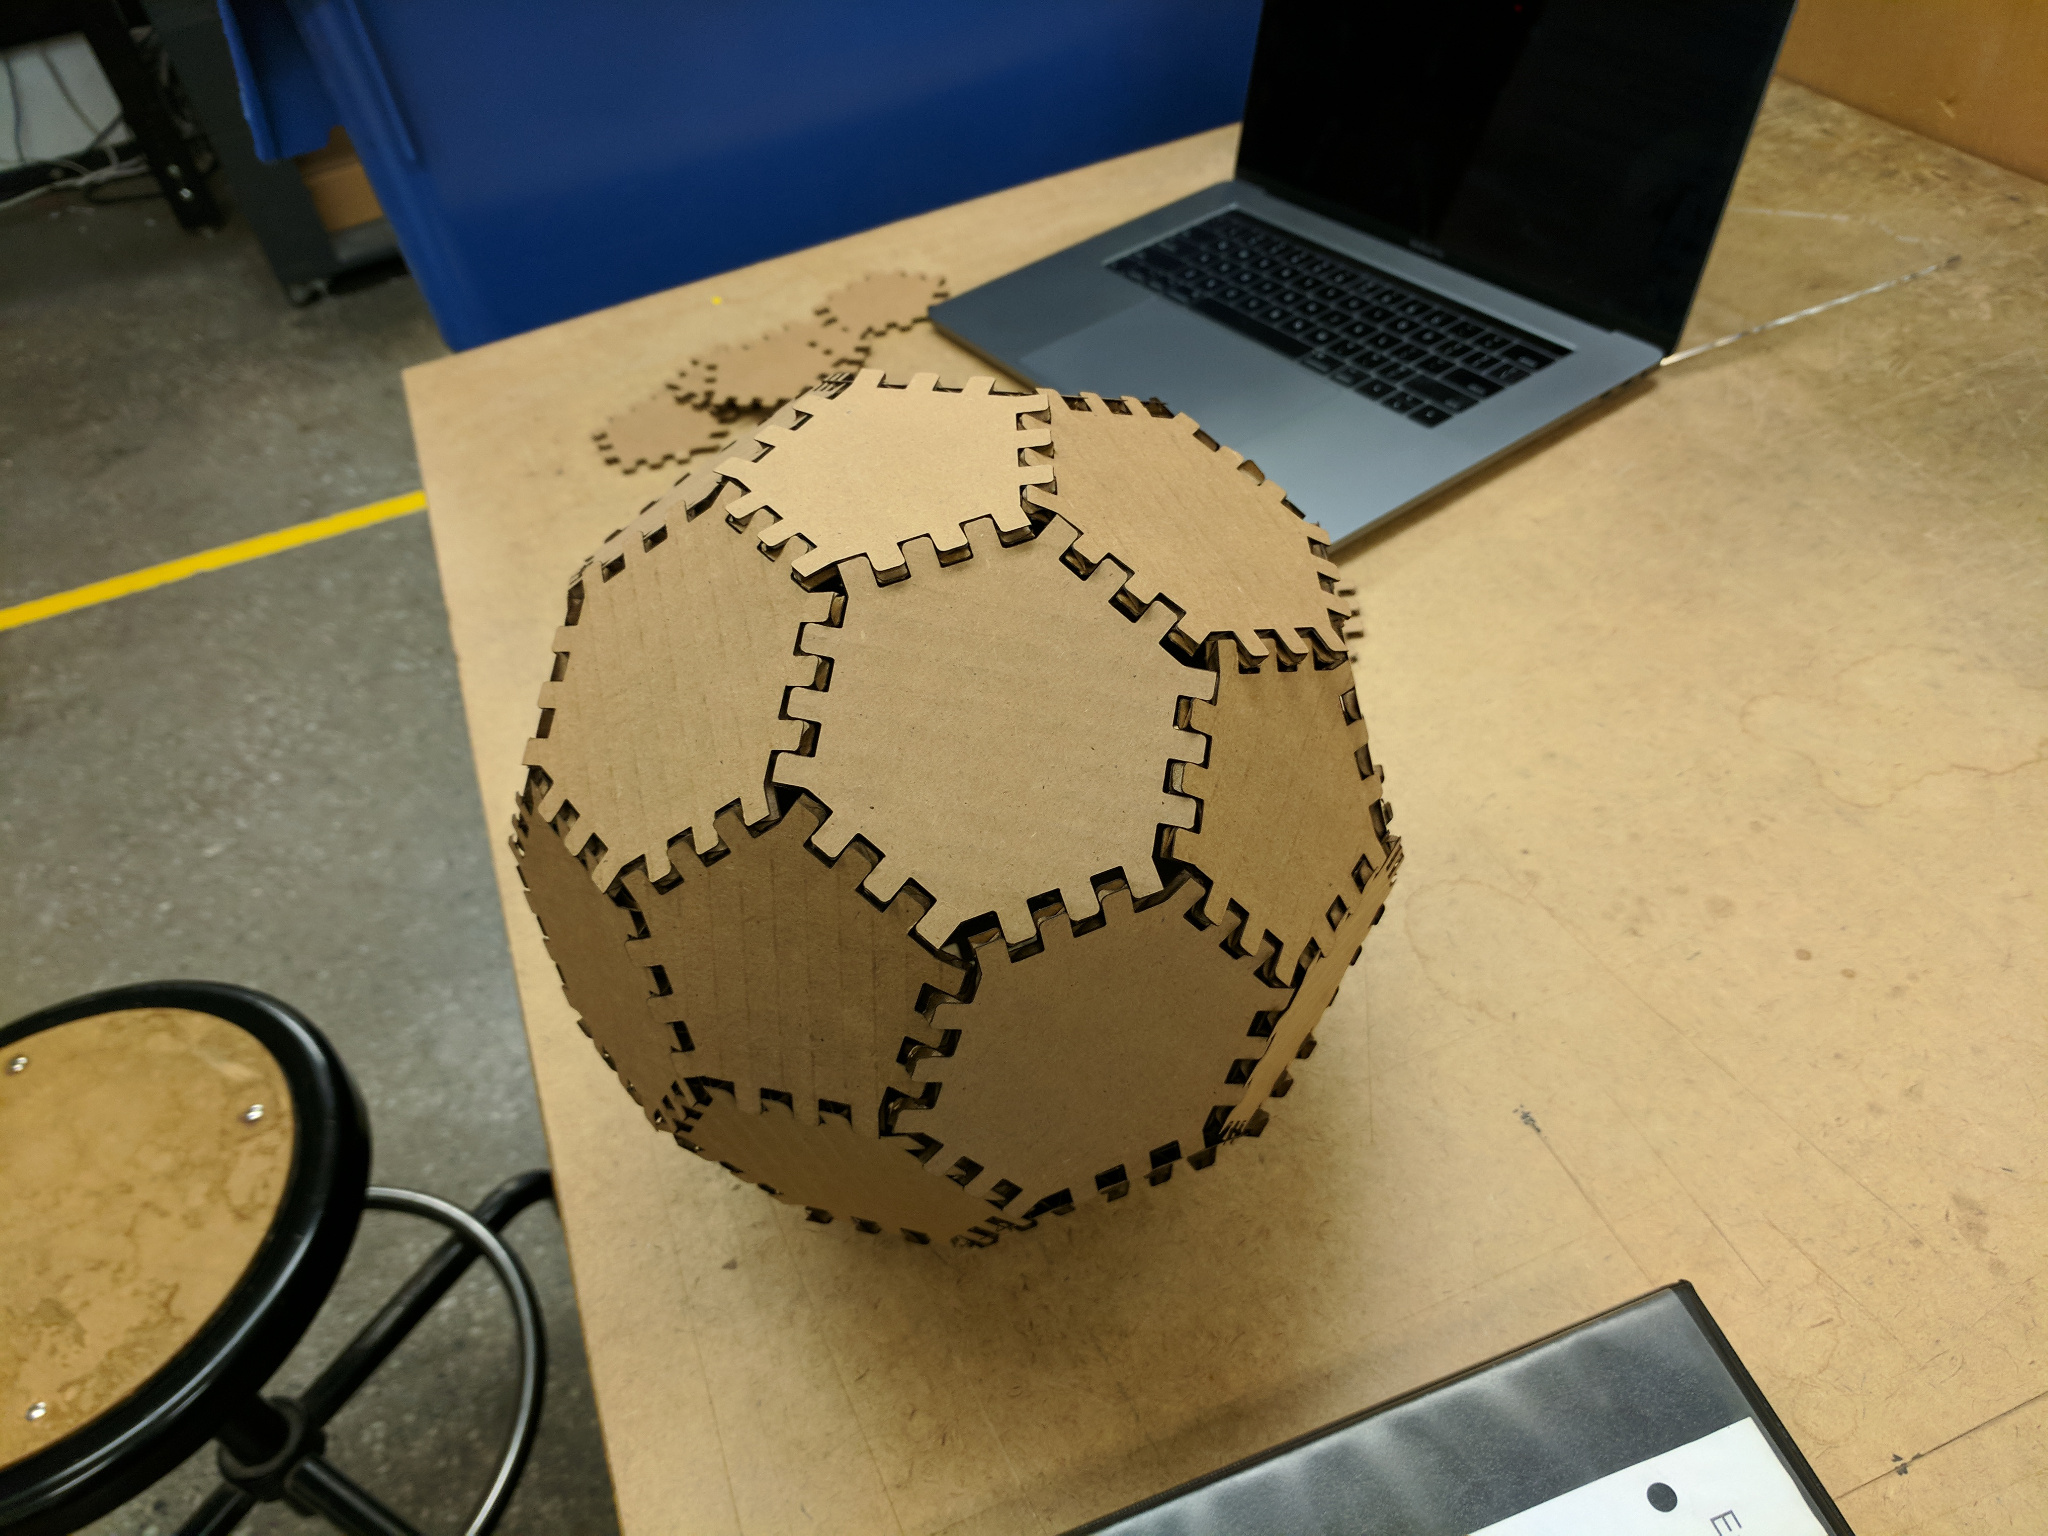
Step 4: Assemble with Hands
Assembling the ball was an adventure all on its own. The very beginning was easy – the joints felt secure and held together well. The middle ring of hexagons was terrifyingly unstable, but once I got past the middle ring and started enclosing the ball with the upper pieces it became dramatically more secure. The finished product is solid enough to drop or throw around!