42 Recipes for Surviving Freshman Year (Part 2) by Lydia K. '14, MEng '16
This is the more hardcore half or so of the 42 recipes. Most of these I don’t get to make much during the semester, except on slow weeks or when I really, really don’t feel like p-setting. At the end there are also places to buy food around MIT and some useful non-food things to have. If you haven’t, you should also read part 1.

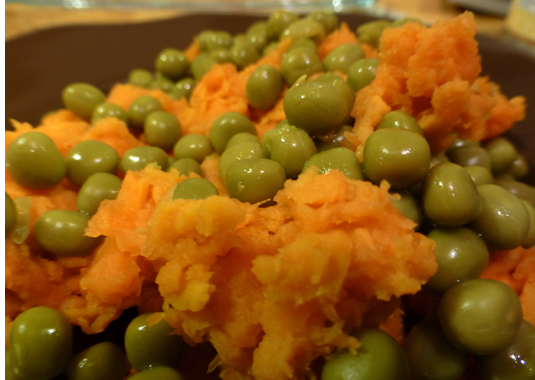
19. Sweet potatoes and sweet peas
 Effort: 3
Ingredients:
- Sweet potatoes
- Small can of sweet peas
- Salt
Steps:
- Peel one or two sweet potatoes and chop them so that they are not as large.
- Put the sweet potatoes in a casserole dish and add a small amount of salt. Cook on high in the microwave for five minutes per yam, covered.
- Mash the sweet potatoes with a potato masher. Drain the sweet peas and add them to the sweet potatoes.
18. Slow-cooked meat
Unfortunately I can’t eat this anymore because I am allergic to most fruit. Hopefully we’ll find an alternative. Here is the recipe I adapted it from.
Effort: 3
Ingredients:
|
|
Steps:
- In the morning, peel and chop the onion. I recommend wetting the knife before chopping with it so that you do not cry. Put the chopped onion in the slow cooker.
- Add the beef to the onion.
- Add about a cup of craberry juice (I used to use 100% cranberry juice but I’m pretty sure it doesn’t matter), about a cup of wine, two tablespoons of soy sauce, and a handful of frozen cranberries.
- Cook on high for five hours or on low for eight hours while you’re in class. Don’t cook the meat for too long or it will become tough.
- If you want, prepare waffles in the toaster and put the meat on top of the waffles to eat.
One wonderful thing about slow cookers is that meat winds up tender even if it was not high quality to begin with. Another is that there are zillions of crockpot meat and chicken recipes on the Internet for you to explore. My favorite source is A Year of Slow Cooking. A great recipe to start with is chicken with tomatoes.
17. Spaghetti squash
This recipe was invented by a close family friend, Ellen Tatcher. Her son and my brother are in the same after-school swim class. Sometimes when my mom doesn’t have a timepoint to run catch they get to hang out, my mom gets to learn new recipes, and my dad, my brother, and I get to eat amazing new things. Spaghetti squash has become one of our favorite dinners.
Effort: 3
Ingredients:
- A spaghetti squash
- One small onion or half a large onion
- A red or green bell pepper
- Polish sausage or beef franks
- Shredded cheese
- Olive oil
Steps:
- This is the hardest part. It’s actually a bit dangerous: we’re not preheating the oven yet because there’s a small chance you’ll be in the emergency room and if you left your oven on that would just be terrible. Go down to the wood shop (or find someone who is shop trained and take them down to the wood shop) and check out a wood saw. Saw the spaghetti squash in half (cut hot dog, not hamburger, so that each half has half of the stem). If you’re under 18 or not confident with a saw you should probably ask an adult (or someone who is course 2) to do this.
- Do you still have as many fingers as you started with? Good. Preheat the oven to 375 degrees Fahrenheit.
- Line a tray with aluminum foil and place both halves of the squash side by side on the tray. Remove the seeds and guts from the core of the squash, much like you would remove the seeds and guts from a pumpkin on Halloween. If you want you can fry and eat the seeds.
- Finely chop one small onion or half of a large onion and fry it in olive oil on high heat.
- Chop and add a red or green bell pepper.
- Chop and add Polish sausage. Beef franks are fine if you do not have Polish sausage.
- Distribute the contents of the pan among the two halves of the squash, filling the space that used to hold the seeds.
- Put some shredded cheese (of any variety, including mozzarella and taco blend) on top.
- Tightly cover the stuffed squash halves with aluminum foil. Cook the squash for about 50 minutes; the exact time depends on the squash. After about 50 minutes, open the foil and gently poke at the squash with a fork. If the insides of the squash separate easily into spaghetti-like strings, it is done.
- The cheese will be melted, but because it was cooked under the foil it will not necessarily be golden. If you would like your cheese to be golden, cook the squash for another 10 minutes without the foil.
16. Red beans and green beans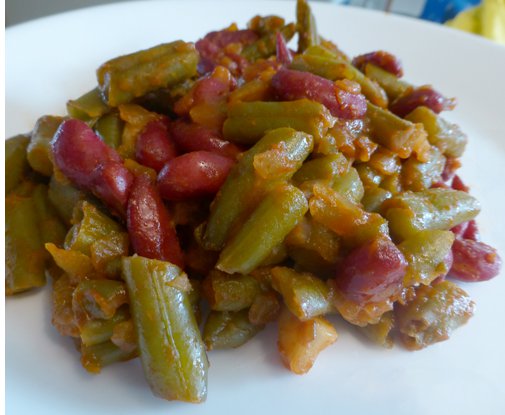
This is another recipe from Ellen. She did not invent this one but she did improve it.
Effort: 3
Ingredients:
- Frozen green beans
- A can of red kidney beans
- One medium-sized onion
- Ketchup
- One clove of garlic
- Olive oil
Steps:
- Chop one medium sized onion into small pieces. Fry it with olive oil on medium-high heat.
- Meanwhile, defrost frozen green beans by holding them under cold water. Pour off the excess liquid and mix the green beans in with the onions.
- Open and drain a can of red kidney beans. Add the beans to the pan.
- Add about a third a cup of ketchup. Add salt to taste.
- Simmer the mixture under a closed lid for about 20 minutes, stirring occasionally.
- Finely chop one clove of garlic and add it at the very last moment, right before you turn of the stove.
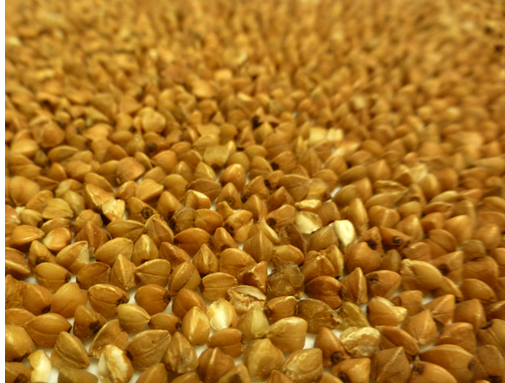 15. Гречка (buckwheat)
Buckwheat is a grain eaten a lot in Russia and a lot less in most other places. It does not take much effort to prepare and it can be eaten for pretty much any meal. This is my dad’s recipe. It can be extended to almost any other grain.
Effort: 3
Ingredients:
- Buckwheat
- Salt
Steps:
- Buy buckwheat, either at a local Russian store or at the first online store with English translations that pops up when you search “online Russian store [your town].”
- Boil water, either on the stove or in an electric tea kettle.
- Measure out a cup of buckwheat, or about a third as much buckwheat as you think you want to eat.
- Pour some the buckwheat onto a plate and gently shake the plate from side to side so that the buckwheat covers the plate in one layer. Remove rocks, pieces of wood, and other things that are not buckwheat, like these—
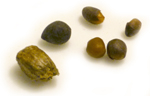
—and put the buckwheat that remains in a casserole dish. Repeat for all of the buckwheat. - Rinse the buckwheat in tap water and drain three or four times.
- Add 2.5 parts boiling water for every one part buckwheat. Add one tablespoon of salt. Microwave on high, covered, for five minutes.
- Microwave on 20% (hit power repeatedly until the microwave says 20% or hit power and type out 20) for 20 minutes.
Buckwheat goes well with meat and not as well with fish. A Russian friend of mine eats it with cheese melted on top. It is also very good if you heat it up in a bowl and add cold milk.
14. Манная каша (farina)
 My mom used to make me манная каша when I got sick. It’s really good but really hard to get right, which makes it extra special.
Effort: 3
Ingredients:
- Farina (actually sold in American stores, I promise; just ask)
- Milk
- Salt
- Sugar, honey, jam, cinnamon, apples, and/or bananas (optional)
Steps:
- Boil on the stove about as much milk as you want food.
- This part is difficult. With your left hand, pour farina into the milk in a slow, thin stream. With your right hand, stir the mixture to prevent it from clumping. If clumps do form, and they probably will, remove them. If you try to break them up they’ll just keep growing.
- Stop pouring when the mixture is no longer as thin as milk, but keep stirring. Eventually you should stop, probably when you get bored. The whole process should take less than five minutes.
- Add salt and sugar.
- If you want, also add cinnamon, apples, bananas, and/or honey or jam in the shape of a potentially creepy smiley face, because you’re awesome.
13. Бульон с клёцками (farina soup)
 This is from my grandmother on my dad’s side, and another wonderful food my mom makes for me when I get sick.
Effort: 4
Ingredients:
- Broth, or some thawed meat
- Farina
- Flour
- Eggs
- Salt
- Meat
- Carrots, an onion, and parsley root (optional)
Steps:
- First, prepare the broth. Put some sort of thawed meat in a pot of cold water. For every pound of meat add two to three liters of water. If you want, you can also add carrots, a whole onion, or parsley root. Cook the broth on the stove for about two hours on medium heat. This results in several servings of broth, most of which you can store in the fridge and use later.
- Boil as much broth as you can see yourself consuming in one sitting.
- Blend one egg with a fork. Add about one tenth a teaspoon of salt.
- Stir in farina until the mixture is dense like yogurt.
- Add flour until the mixture is about the consistency of cookie dough, so that it won’t fall apart in the broth. My mom says the proportion doesn’t matter, but the mixture shouldn’t be too thick.
- Dip a small spoon in the boiling broth for about ten seconds. Pick up some of the dough with the corner of the spoon and dip it in the broth again. The dough should fall off. Repeat until you are out of dough.
- When the clumps of dough float, they are cooked. Take the soup off the stove and eat immediately.
12. Lentils
 My maternal grandmother taught me how to properly cook lentils when she came to visit me a few weeks ago. This might be the best way possible to eat lentils.
Effort: 4
Ingredients:
- Lentils
- Onions
- Carrots
- Bell peppers
- Celery stems
- Dill, parsley, or other greens
- Garlic
- Salt and spices
Steps:
- Prepare the lentils. Pour them into a casserole dish, add water, and let them sit for about an hour. After an hour, pour off the water—carefully, so the lentils do not escape—and add enough boiling water to cover the lentils plus an extra centimeter above lentil level. Add a small amount of salt and microwave on high without a lid for 20 minutes. (If you added a lid the water would boil over, and that would be awful.)
- Chop an onion into approximately 1-cm cubes. (My grandmother says you do not need to measure with a ruler—8-mm cubes are okay, too.)
- Fry the onions in olive oil, on medium heat, until they are clear—not browned, not yellow, just clear.
- Put the onion in a food processor but do not turn the food processor on.
- Chop carrots into 5- to 8-mm-thick circles and add them to the same pan. Add olive oil and a small amount of water, cover with a lid, and cook on medium heat. Chop and add a bell pepper of any color, celery stems, and the stems (but only the stems) of dill or parsley or whatever greens you might have. Add a small amount of salt and whatever spices you want.
- While the carrots and other vegetables are cooking, chop the tops of the greens and add them to the food processor.
- Chop garlic into thin pieces and add it to the food processor, too. (If you don’t chop the garlic it will be in chunks even after going through the food processor.) Do not turn the food processor on.
- The carrots and other vegetables should steam for no less than 15 minutes. When they are done the carrots should be soft when poked with a knife; everything else can be in whatever state it wants. At that point, add everything in the pan—carrots, greens, whatever water is left—to the food processor. Don’t add too much water, though, or the sauce will be too thin.
- Finally, blend the vegetables in the food processor. Pour the resulting sauce over the lentils.
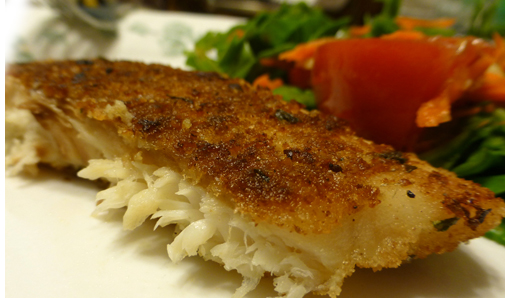 11. Fried, breaded tilapia
Effort: 4
Ingredients:
- Individually wrapped frozen tilapia, one or two per person
- Seasoned bread crumbs
- Eggs
- Olive oil
Steps:
- Leave the tilapia out on the table in its plastic wrapping in one layer for an hour to thaw. Alternatively, rinse the tilapia in warm water (still in its plastic wrapping) until it is bendy.
- Pour olive oil into a pan and leave it on the stove (on high) to heat up.
- On a large plate or bowl, beat one egg with a fork or knife until it is smooth.
- On another plate, pour out a small mound of breadcrumbs.
- Roll the tilapia around in the eggs until it is covered. Add a small amount of salt.
- One by one, roll each tilapia around in the breadcrumbs until it is covered and place it on the pan in one layer, the thicker part of the fish toward the center, leaving the center of the pan until last. Leave the heat on high and do not cover the fish.
- In about two minutes, the tilapia should be browned on one side. Turn the heat down to medium and flip them over.
- When the tilapia is browned on the other side, turn the heat down to low to keep them warm for up to five minutes until you are ready to eat them. If you want you can flip them over again.
10. Breaded chicken patties
 This is yet another recipe from Ellen. Cory also makes something similar.
Effort: 4
Ingredients:
- Two chicken breasts
- One egg
- Seasoned bread crumbs
- Onion powder
- Olive oil
Steps:
- Cut two chicken breasts into three pieces each.
- Start warming up a pan with olive oil on medium-high heat.
- Place the chicken breasts in the food processor. Turn the food processor on but only briefly, so that the pieces won’t be too small.
- Beat one egg slightly. Add some onion powder and beat the egg more. Mix in the chopped chicken.
- Pour a small mound of seasoned breadcrumbs onto a plate.
- Roll about two tablespoons of the chicken and egg mixture in the breadcrumbs until the chicken is covered. Place it on the pan and flatten it. Fry both sides on medium-high heat without a lid. Repeat, cooking multiple chicken patties at a time, until you are out of chicken.
9. Beets and carrots
One of my best friends Josh from seventh grade came to Boston a few days before finals last semester and taught me how to cook some things. Josh is majoring in computer science at the University of Illinois at Urbana-Champaign. He is also an amazing 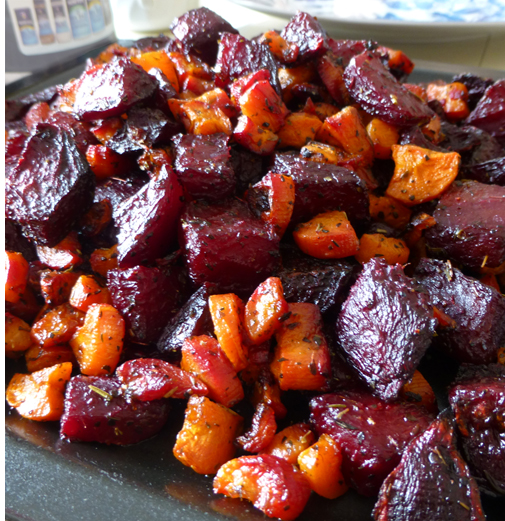 (amazing) cook. He probably thinks it’s silly that I’m posting baked beets when he can cook so many other things, but I like beets.
Effort: 4
Ingredients:
- Beets
- Carrots
- Salt
- Pepper, or a spice mix with pepper
- Thyme, a spice mix with thyme, rosemary, or something else you like
- Olive oil
Steps:
- Peel and chop some beets and carrots and put them in a large mixing bowl. I like there to be about as much carrot as there are beets. I also like the carrots to end up softer than the beets, so I chop the carrots thinner than I chop the beets.
- Preheat the oven to 425 degrees Fahrenheit. 450 degrees is also okay.
- Add a generous amount of salt and pepper and an even more generous amount of thyme and olive oil. Mix with your hands or, if you don’t want your hands to be red from the beets for the rest of the day, mix with a spoon.
- When the oven is done preheating, or when it isn’t, put the beets and carrots in.
- After 40 minutes or an hour, the beets and carrots should be easy to poke with a fork and soft and yummy when you eat them. At that point you should take them out. It might also be a good idea to take them out partway through to stir them and add more olive oil, or at least it is for me because I never add enough olive oil.
8. Котлеты (beef patties)
These go well with buckwheat or with mashed potatoes.
Effort: 4
Ingredients:
|
|
|
Steps:
- Blend two eggs in a food processor.
- Add half of a small onion and one third a teaspoon of salt and run the food processor again.
- Add half a cup of milk and two pieces of bread and run the food processor again.
- Add a pound of at least 90% lean ground beef and run the food processor again.
- Warm up a pan on the stove with olive oil on high heat.
- With two tablespoons, lift some amount of the meat mixture onto the pan to form more or less circular patties. The volume of meat you use for each one is not important. After you put the meat on the pan it should sizzle. Turn the heat down to medium-high.
- When the bottom of the patties starts to brown, flip them over. When the other side starts to brown, transfer them to a plate and microwave them on high for two minutes. Cover the plate so you don’t ruin the microwave. If you have time, they will turn out better if you instead cover the meat with a lid and cook it on the stove until it is fully cooked. Don’t try to make rare or medium rare meat—ground beef cannot be trusted.
7. Манник (farina cake)
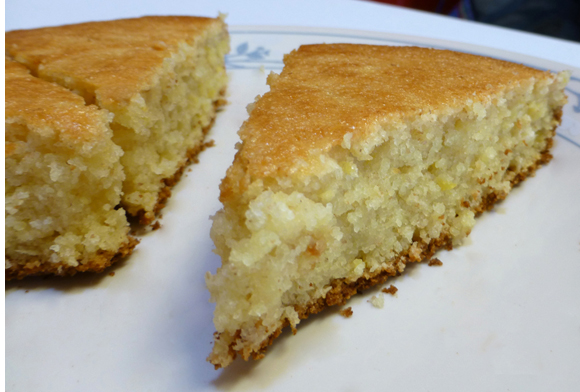 Effort: 4
Ingredients:
- Eggs
- Whole lemon
- Milk
- Flour
- Baking soda
- Sugar or stevia
- Olive oil
- Raisins (optional)
Steps:
- Preheat the oven to 375 degrees Fahrenheit.
- Blend two eggs in a food processor.
- Chop the lemon in half and put the whole thing in the food processor. Blend on high until the lemon is obliterated.
- Add one teaspoon of baking soda and blend again.
- Add a cup of sugar or a teaspoon of stevia and blend again. It’s much, much better with sugar than with stevia, so you shouldn’t use stevia unless you absolutely cannot have sugar.
- Add one cup of farina, one cup of milk, and one cup of flour. If you are not using sugar, add more flour until the mixture is the density of sour cream. If you want, mix in raisins.
- Using a napkin, spread about half a tablespoon of olive oil over a cake pan. Sprinkle farina over the surface. It should stick to the olive oil.
- Pour the dough into the pan and put it in the oven.
- Check the cake periodically by patting the dough. If it gives in and feels liquidy, put it back in the oven. Once the surface doesn’t give in, and is more like a balloon, take it out. This should be after about 45 minutes.
The above is the traditional Russian recipe. Cory and I both think it is too sweet and too lemony. Since it was easy to get rid of by emailing the dorm I guess not everyone thinks that’s a bad thing. If you do not like sweet things, cut the sugar and the lemon in half.
6. Пирожное крошка (crumb cake)
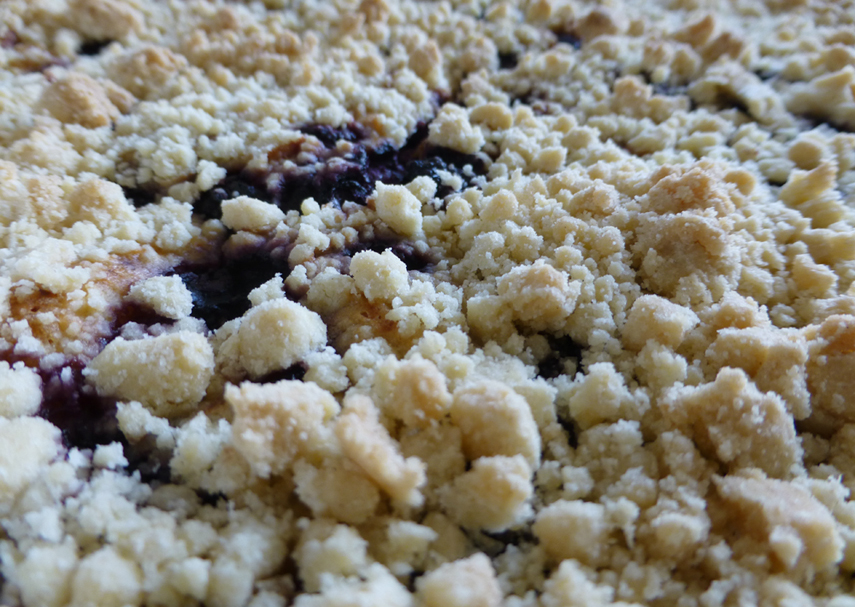
This is quite possibly the most delicious dessert in the history of desserts.
Effort: 4
Ingredients:
|
|
|
Steps:
- Preheat the oven to 375 degrees Fahrenheit.
- Pour about a cup of olive oil into a large bowl. Add a teaspoon of sugar.
- Pour flour into the bowl and mix it with the olive oil by hand. Keep mixing in flour until the mixture forms thousands of small balls.
- In a blender or a food processor, combine three eggs, about three fourths of a large container of cottage cheese, and either a cup of sugar or one teaspoon of stevia until the mixture is smooth. Stevia is fine here, unlike in farina cake.
- Cover a baking tray with aluminum foil.
- Spread most of the crumbs over the baking tray, leaving about two handfuls for later.
- Pour the cottage cheese mixture over the crumbs, spreading it with a knife.
- Add blueberries, cranberries, or chopped apples on top of the cottage cheese mixture.
- Sprinkle the remaining crumbs over the fruit.
- Put the cake in the oven. Remove it when the crumbs are golden brown.
5. Ёжики (hedgehogs, or beef patties with rice)
This recipe is from my great-grandmother Женя (Zhenya, or Eugene), whom my grandmother on my dad’s side is named after. Apparently I spent a lot of time learning how to walk at her house, carrying a stuffed plushie monkey by the tail for what I apparently thought was stability.
Effort: 5
Ingredients:
|
|
|
Steps:
- Prepare between one half and one cup (dry) rice, using the recipe for buckwheat above (15).
- Blend one or two eggs in the food processor. Add about a quarter of a small onion and a small amount of salt and blend again. Add about a pound of ground beef and blend again.
- Mix in the cooked rice with a spoon. (Don’t blend.)
- Shape the meat into circles and fry them on a pan in olive oil on medium to high heat. Flip them over when they are browned.
- Chop one large onion or two small onions and fry them with the patties.
- When the patties are browned on both sides, add half a cup of pasta sauce and enough water to cover the patties about three-fourths of the way.
- Rinse, chop, and add some parsley and about a teaspoon of salt.
- Cook the patties on low heat with closed lid for another 20 minutes. The water should be simmering. Remove the patties from the water and eat.
4. Tacos
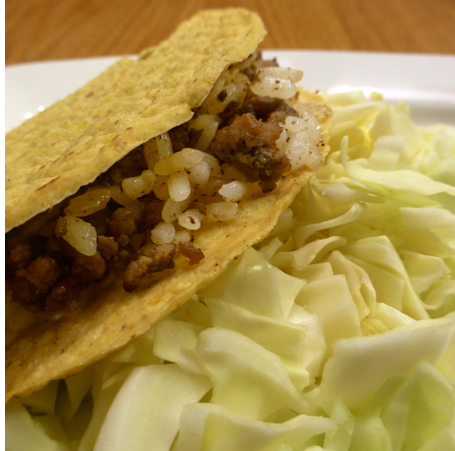 This is from Cory R. ‘14. It’s probably my favorite of the many things he cooks.
Effort: 5
Ingredients:
- Ground beef
- Rice
- Hard corn taco shells
- Garlic powder, onion powder, cumin, or other spices
- Lettuce and cheese (optional)
Steps:
- Cook ground beef in a skillet on medium heat until it is browned. Do not add olive oil.
- Add rice and about twice as much water to the skillet. The ratio depends on the amount of beef you’re using and doesn’t really matter.
- Add spices. We use garlic powder, onion powder and cumin. In theory you can replace the onion powder and garlic powder with actual onions and garlic, but we’ve never tried that.
- Simmer on low heat, mixing often, until the water is gone.
- Try the rice. If it is not cooked, add more water and cook until it is.
- Once the rice seems thoroughly cooked, you’re done! Distribute the meat and rice into hard taco shells. If you want, rinse and chop some lettuce and add it. You can also add cheese.
3. Potato salad
My mom usually only makes this salad on special occasions. It is one of my favorite foods.
Effort: 5
Ingredients:
|
|
|
Steps:
- Cook three potatoes in a casserole dish in the microwave for about 15 minutes, covered. Peel the potatoes after they are done microwaving and chop them into cubes with 1.5-cm sides.
- Hard boil two eggs and chop them into cubes with five- to seven-mm sides.
- Peel one large cucumber and chop it first into fourths the long way, and then into three-mm-thick cross-sections.
- Chop two pickles, again into fourths the long way and then into thin cross-sections.
- Rinse two handfuls of salad and chop it into small pieces.
- Drain and add half to one can of sweet peas.
- Rinse three stalks (three white roots with green straws coming out of them, not three green straws) of green onions. Chop off the white roots and throw them away. Chop the green straws into three-mm-thick cross-sections.
- Add two tablespoons of mayonnaise.
- Add a small amount of salt and mix the salad, lifting it up rather than pushing down on it. Add more salt and mix again if it tastes like there should be more salt.
2. Блины с мясом (crepes with meat)

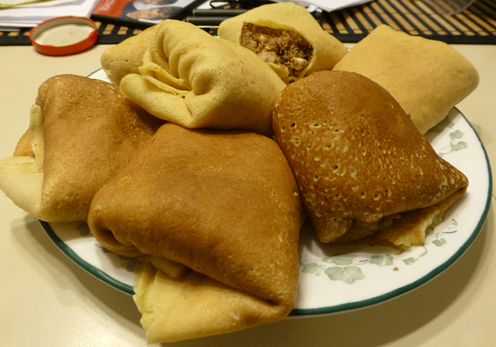
My mom made me these on my last day home this summer. :)
Effort: 5
Ingredients:
|
|
|
Steps:
- Put about a pound of beef in a glass pot or a casserole dish. Add enough water to cover the meat and one teaspoon of salt. Microwave the meat for about 20 minutes on high and then leave it to cool down.
- While the meat is cooking, hardboil, cool, and shell three eggs (see 41 in part 1 of this blog post).
- While the meat and the eggs are cooking, peel one medium sized onion and chop it into very small pieces. Put the onion in a large pan with a few tablespoons of olive oil and fry it on high heat until it is golden.
- Chop the meat into smaller pieces and run them through the food processor. Dump all of the meat into the pan with the frying onion. Add some olive oil and continue frying, stirring often with a spatula.
- Add some of the broth that resulted from the preparation of the meat, so that the mixture is only slightly moist.
- While the meat is cooking, make crepes in another pan (see 29, also in part 1).
- Add salt, pepper, and any other spices you like adding to meat.
- When the meat is done, chop the eggs into small pieces and add them to the mixture.
- Add a few tablespoons of the meat filling to the center of each crepe. Fold the crepes into square bundles around the meat.
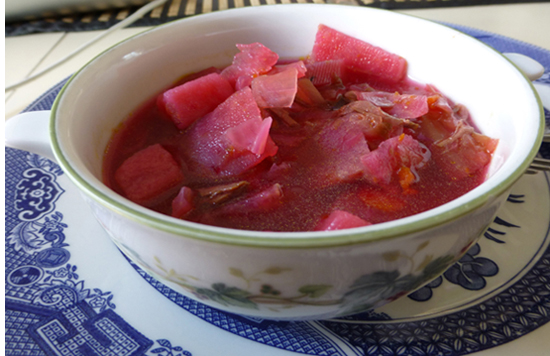
1.a. Борщ (borscht)
You’re never going to do this. You’re never, ever going to do this. But maybe it’s a four-day weekend and you do—you could have soup for a week! This is my mom’s recipe and it is amazing. I’m sorry for all the measurements. This is how recipes work in my family.
 Effort: 5
Ingredients:
- Beets
- Potatoes
- Carrots
- A small onion
- Green bell pepper
- Cabbage
- Pasta sauce
- Olive oil
- Salt
- Fresh parsley or dill
- Sour cream, green onions, whole garlic cloves, and rye bread (optional)
Steps:
- Peel three small beets or two large beets and chop them into three-mm-thick circles or half circles with an area of approximately two cm3.
- Peel three small carrots or one and a half big carrots. Chop two thirds of them into circles or half-circles of three-mm thickness. Set the other third aside.
- Put all but the unchopped carrot in a pan on the stove with olive oil. Add a small amount of salt. Simmer for about ten minutes on medium heat under a lid.
- Fill a large pot two-thirds of the way full with water. Add about one fourth a pound of meat. Put the pot on the stove to boil.
- Put a small onion, the remaining carrot, one fourth of a green bell pepper, and half a cup of water in a bowl or a casserole dish. Cover it with a lid or a small plate and microwave it on high for five minutes.
- Peel and chop two potatoes into one-cm3 cubes.
- Cut out a chunk of a whole cabbage such that the cross-section at its largest end is 15 cm in diameter. Chop this part of the cabbage into five-mm-by-four-cm strips.
- Put the cabbage and the potatoes in the boiling broth with the meat.
- Add about half a cup of any non-spicy pasta sauce to the soup.
- Add about one and a half tablespoons of salt to the soup. You will be adding more later to taste.
- Wash about a handful of parsley or dill. Blend it in a blender or food processor with the carrots, onion, and bell pepper you microwaved earlier and one half to one cup of water. If you want, you can also blend in a few garlic cloves. Add all of it to the soup.
- Leave the soup to simmer on the stove on medium heat for about twenty minutes. It will be done when the potatoes are cooked.
- Add salt to taste. The soup will be best after standing for several hours.
- If you want, you can add a spoonful of sour cream and some chopped fresh dill, parsley, or green onions on top of the soup (to your bowl, not to anything you’re putting back in the fridge). I also like toasted rye bread and a clove of garlic alongside, but you shouldn’t eat garlic if you don’t want to smell like garlic.
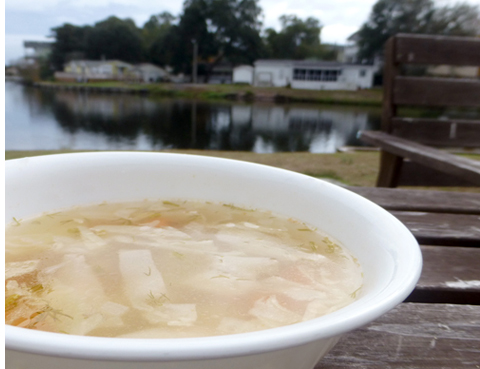 1.b. Щи суп (white borscht,
or cabbage soup)
This is a cross-national soup my mom makes alternately with борщ.
Effort: 5
Ingredients:
- All the ingredients of борщ (borscht) except for the beets.
Steps:
- Follow the protocol for борщ, above, excepting beets.
0. Sweet, tasty defeat
![]()
 Effort: 0
Ingredients:
- Internet
- Money
Steps:
- Admit defeat.
- Go to Foodler or GrubHub and order food from a restaurant. I tend to do this before exams or when I’m stuck in a place that doesn’t have food, like late-night study sessions on campus or Random Hall desk. Some of my favorite places to order out from are Los Paisanos (Mexican), Beantown (Tex-Mex and Mexican, and really good pancakes and sausages in the morning), Middle East (Middle Eastern, which is surprisingly similar to Russian), Pepper Sky (Thai), and Desi Dhaba (Indian).
There is an unlimited supply of other foods you can try cooking that exist on the Internet. Again, I recommend searching for stir-fry and slow cooker recipes.

In addition, here is a list of kitchen items that I have found useful to have:
|
|
|
If you live in a non-dining dorm almost all of these things will probably exist as community items in your kitchen. You should wait until you move in before you buy them. In retrospect, my floor had most things I needed and the only things I should have bought were:
|
All of these things should be nice enough for you to enjoy but cheap enough for you not to miss too terribly when someone other than you inevitably gets them out of the dishwasher first and leaves them in the community drawers or the various dark corners of the dorm. They should also have sufficiently unique designs that you can track them down and reclaim them when they do eventually disappear.

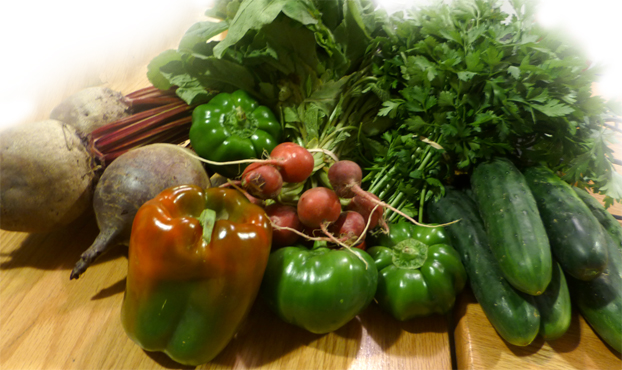
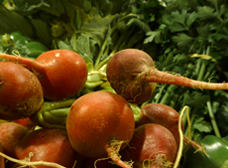
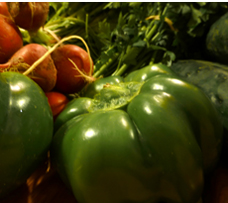
And where to buy food? I get most of my food at Shaw’s (Star Market; B, below), because it’s a three-minute walk from Random Hall. Unfortunately Shaw’s does not have the best produce and can be needlessly expensive. When my grandmother came to visit me she found a farmers market in a parking lot near Central Square. (Isn’t my grandmother amazing?) It appears every Monday from noon to 6 pm, at Bishop Allen Drive and Norforlk Street (C, below), unfortunately up to the Monday before Thanksgiving. You should check them out in the spring. You can get there by following the beautiful graffiti alleyway across from where Pearl Street dead-ends into Mass. Ave.
  |
||
 |
  |
|
All of these vegetables for $7.60. |
||
There is another farmers market in Kendall Square on Thursdays and a produce stand on Tuesdays in the Stata Center, both of which are closer for almost all of campus. I think the latter might even still be happening. If you’re very adventurous you should also try some of the other options around MIT, organized into this convenient map by Mollie B. ‘06:
View Boston-area stores in a larger map

Bonus recipe: Lemon iced tea
My little brother Max made up a recipe for lemon iced tea that reportedly tastes just like Snapple. He is awesome and this is his recipe.
Effort: 2
Ingredients:
- Black tea
- Lemon juice
- Sugar
Steps:
- Heat water in an electric tea kettle.
- Put three teaspoons of sugar in a glass.
- Add one cup of boiling water to the sugar.
- Add three teaspoons of lemon juice to the sugary hot water.
- Put a black tea teabag in the hot lemonade. Steep until the tea is “nearly as brown as a penny.” You can replace the black tea with any of your favorite teas.
- Cool the tea by putting it in the refrigerator or adding ice. “Do not add too much ice, or else it will dilute the flavor.” If the tea does not taste right, you used too much water. You can fix that by adding more sugar and lemon juice.
“You’re adorable,” I said. “No comment,” he responded.

If you want more, here are other blogs posts about dining or recipes on the admissions blogs:
- The Starving Student’s Guide to Cooking For Yourself by Michael C. ‘16
- Healthy Eating Craze by Rachel D. ‘16
- World’s Best Rib Recipe by Chris Peterson
- Most delicious deliverables ever by Maggie L. ‘12
- How to get around MIT hunger pangs by Sadie Scheffer ‘10
- Talking About Dining by Elijah T. ‘11
- Q&A: Food on campus, UROPs, decisions by Anna H. ‘14
- Come together (and eat) by Jessie L. ‘07
- More on food by Mollie B. ‘06
(This is just what I found by Googling. If you find even more, post a link in the comments and I will add it here.)
And that is all, for now. One turkey, seven yoga classes, and four and a half wonderful days with family later I am sitting on a warm windowsill, waiting for my late evening flight back to Boston, writing. And they’re already playing Christmas music.
I hope you had a wonderful Thanksgiving, surrounded by people you love, and that there is wonderful food in your present and future.